Thank you, I’ve heard of a scanner on the phone, is it just IPhones?
What a fascinating hobby it really is.
If you don’t mind, I’d really enjoy if you keep showing us what you make xxxx
Thank you, I’ve heard of a scanner on the phone, is it just IPhones?
What a fascinating hobby it really is.
If you don’t mind, I’d really enjoy if you keep showing us what you make xxxx
Nope android has it in its camera app but I suspect you would need a modern phone. I don’t know if apps would add anything as I havve never needed to use the scanner.
Apparently not but I think you do need a reasonably good Android phone.
The app is called Polycam not Copycam, it is in early development so I guess if you get in now you will get a free copy when they release the final version. There are also paid apps too.
@Bruce , l totally agree with you Brucy !
3D printing is a load of blox !!
Any of the things ?!you have made can be manufactured by your average
craftsman in not much longer time scale!
What are you trying to do?
Put artists and renovators out of work ??
Donkeyman! 

BTW My toyota bakkie needs a new crankshaft !
When can l expect delivery ??
Saw something on TV a while ago and a model railway enthusiast had got himself a 3D printer to make some things for his track layout. Marvellous stuff and I love the idea that you can design and make a small number of or even unique item(s)
As for the antiplastic argument, one can imagine that designing and making the machinery would only really happen if there was going to be a sizeable number of items to be made which then has to be shipped. A 3D printer could reduce this enormously and I wouldn’t be surprised if these will become readily available in shops etc so you can get your single item made while you wait.
Well unlike @PixieKnuckles, I’m not apologising to you after your unnecessarily rude comment.
I think most people would agree that’s exactly what I was doing.
I agree - domestic 3D-printers should be banned - they’re a waste of space, using valuable resources to generate a load of rubbish … ![]()
@Melgal70 , Yeah, you are right there l think?
3D printing probably has potential in making prototypes Melgal,
But when it comes to making things in metal it becomes a whole new
ball game??
It is possible but requires either micro welding using wire feed welders
or the use of metallic powders and laser technology and probably the
process has to take place in a vacuum chamber too !!
Donkeyman! 
this has just appeard on the thread I linked to @Bruce The completely pointless 3D printed items thread | Page 14 | AVForums
I have my first small project. Alas for the plastiphobes among us it does involve plastic.
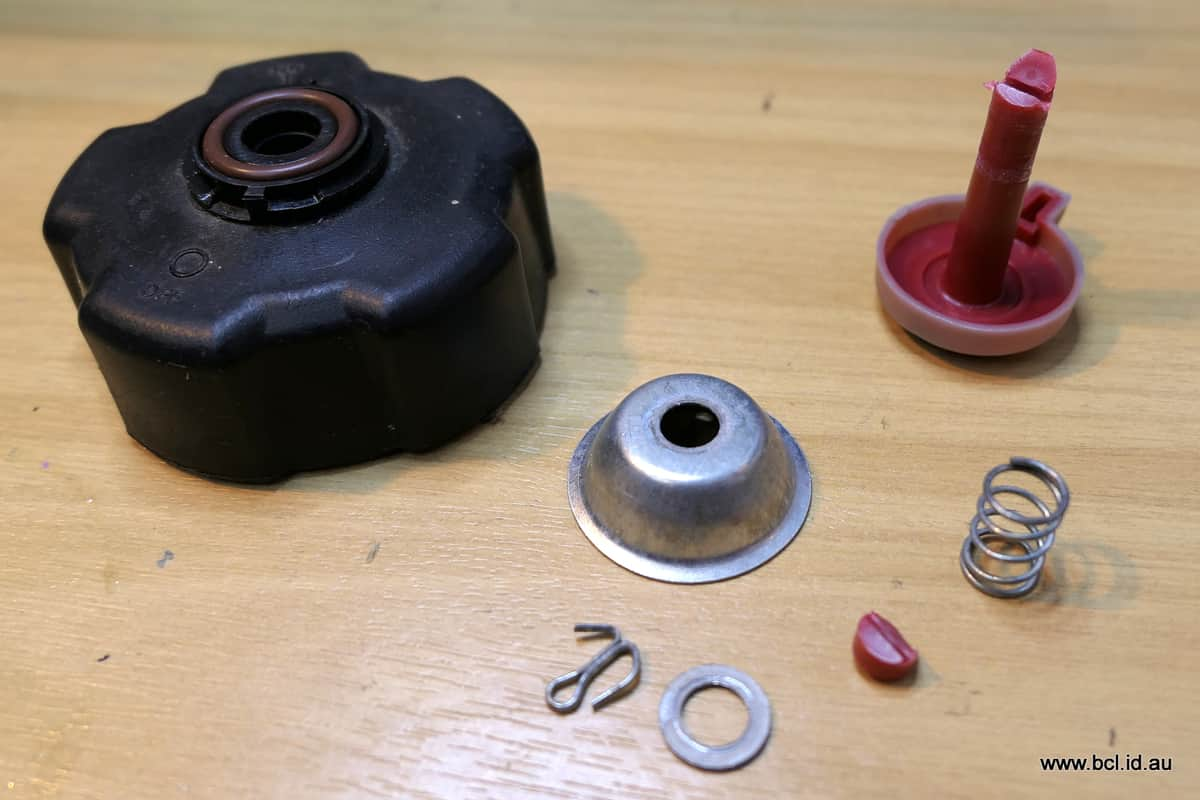
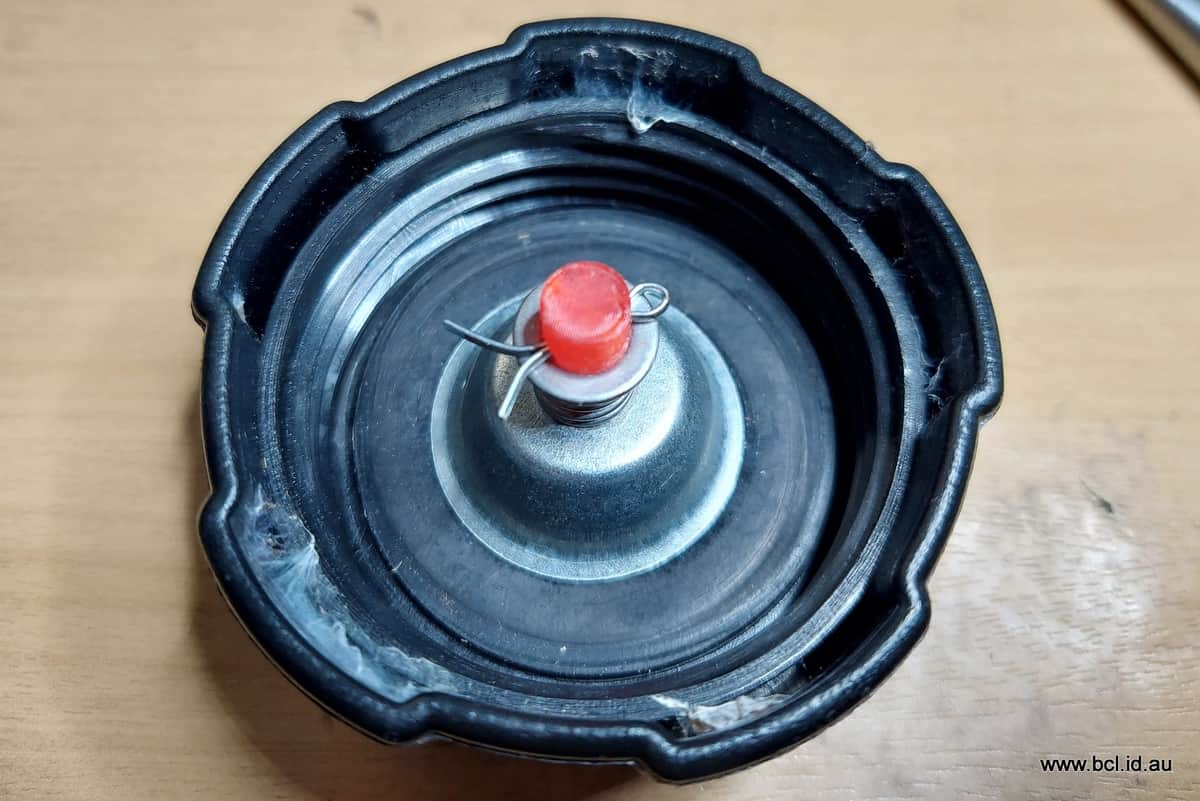
The fuel cap on my generator has a small vent which allows air into the fuel tank when the generator is in use but which is closed when not in use
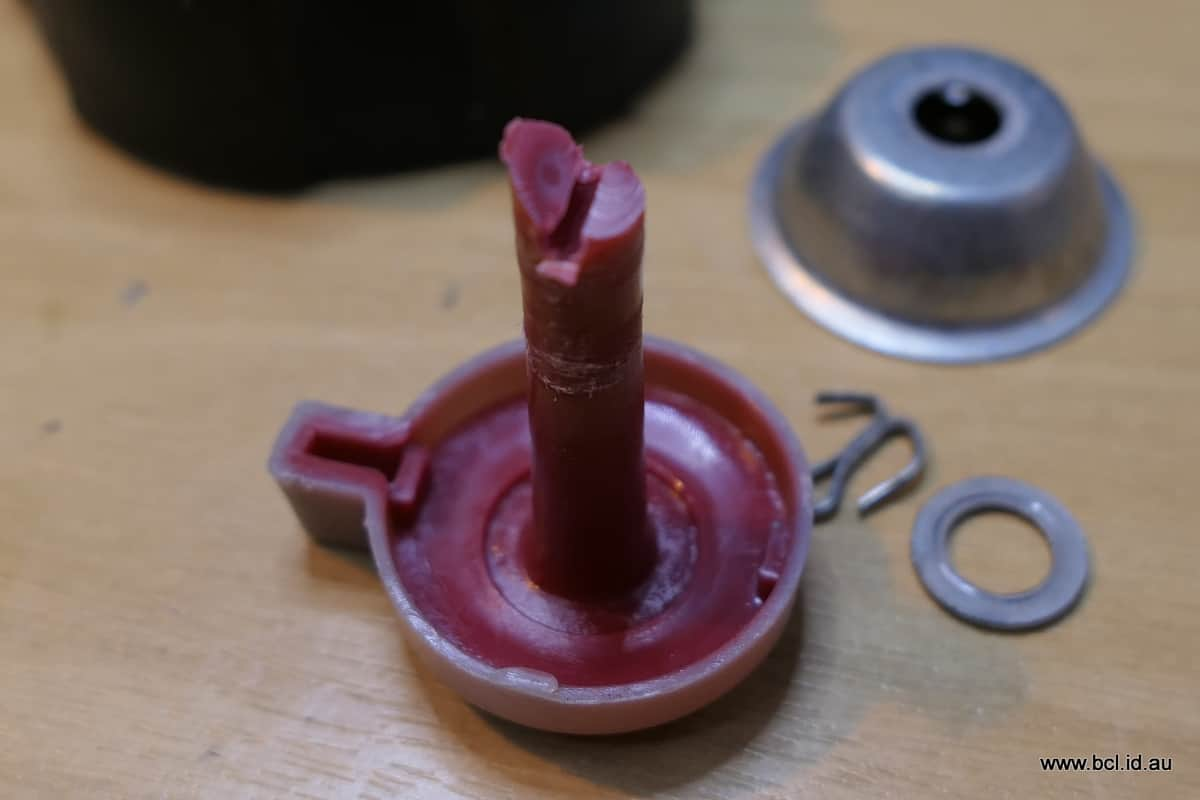
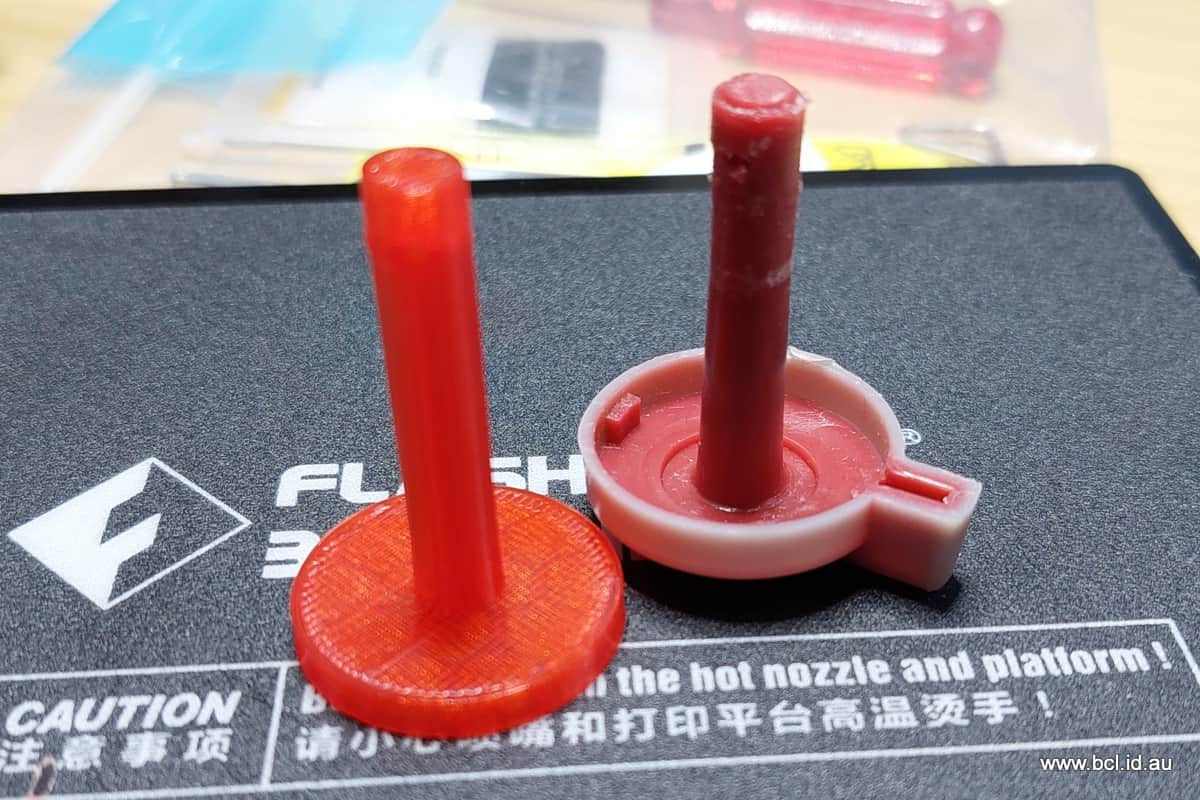
As you can see the end of the small rotating cap - the red piece top right has snapped so it is no longer under spring tension holding it firmly against the rubber seal.
I am going to attempt to design and make a replacement piece.
BTW if I am honest, while I can see how air can get to the rubber seal from outside and I can see how it gets down the shaft to the fuel tank I am buggered if I can work out how it gets past the seal in the “On” position. There is a subtlety there that I am missing but it might be something simple like it lifts the cap off the seal as it rotates.
Don’t hold your breath waiting for me to build this because It is a big challenge just to design it never mind making it fit accurately.
@Bruce ,. I assume you are going to re-use the metal components
then Brucy ??
Surely you could design a single material component with your
magic machine could’nt you ?
Donkeyman! 

Finally got round to starting on this project.
First a rough piece to check the dimensions. This will basically seal the cap, held in place by the spring but as I say it is to test the accuracy of my printer.
BTW I am using a cheap eBay digital calipers which in fact seem remarkably accurate.
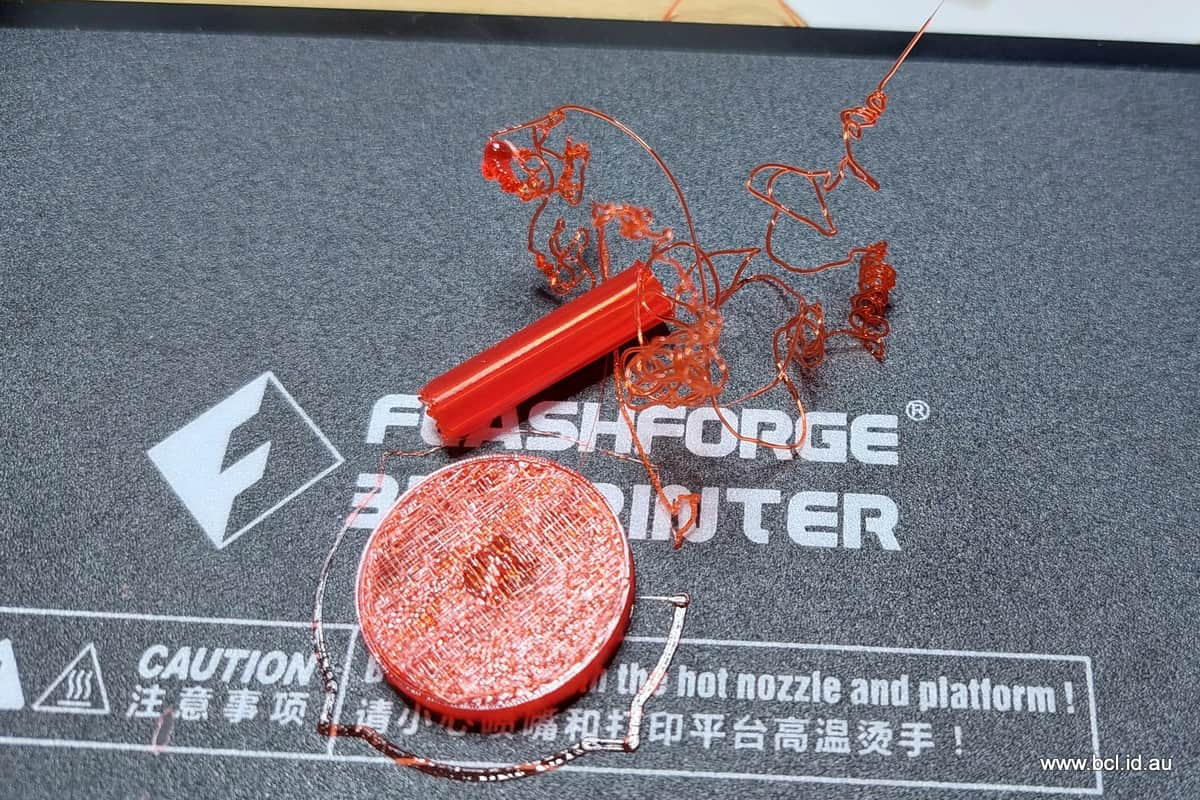
Unfortunately things can go wrong, I had a blockage so had to stop the print half way so there must have been a weakness at that point - the end fell off
Take two…
…a little while later.
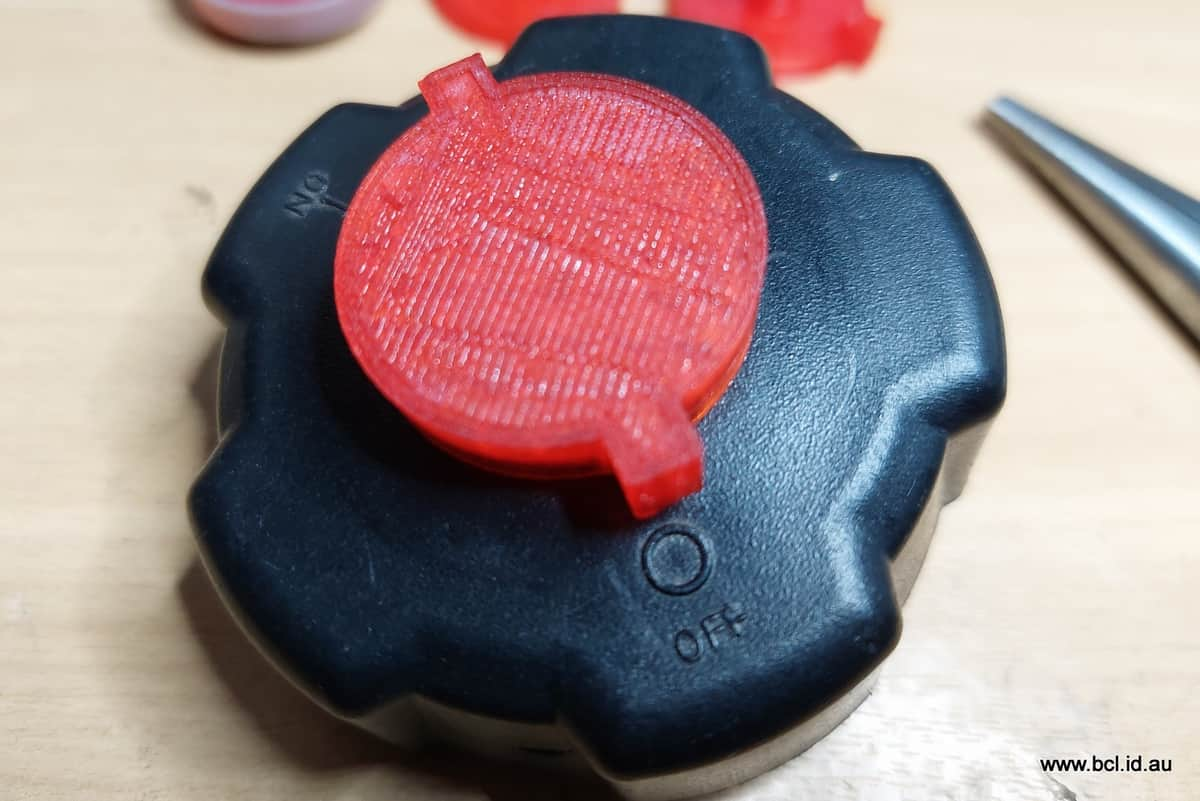
I successfully printed out the piece in the previous message and it fitted in the cap just fine (where it is now)
I am not happy with the surface of the piece as I want it smooth to provide the best seal but I don’t know how to get it smooth other than fine sandpaper so have asked in a FB group for this printer.
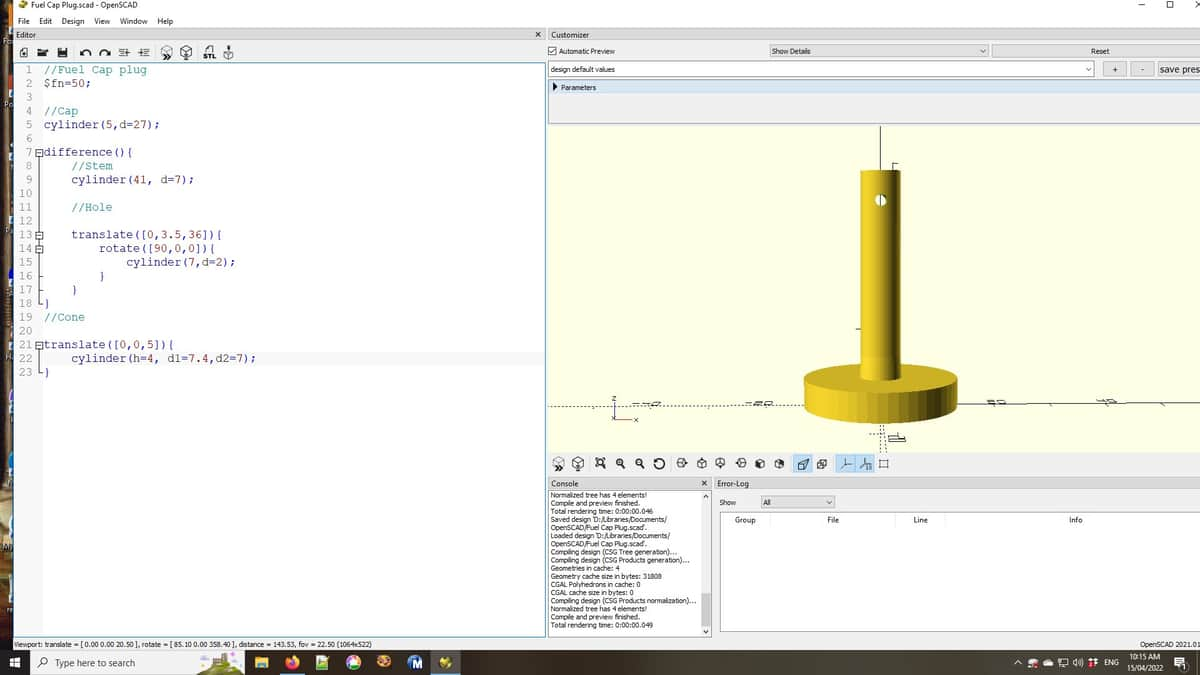
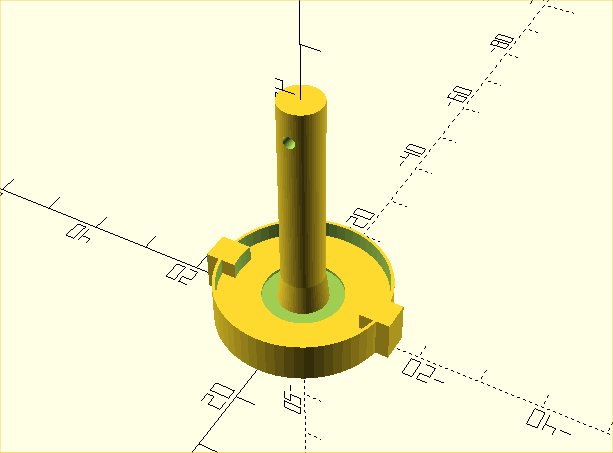
In the meantime I have been improving the design and learning as I go. Currently it looks like this
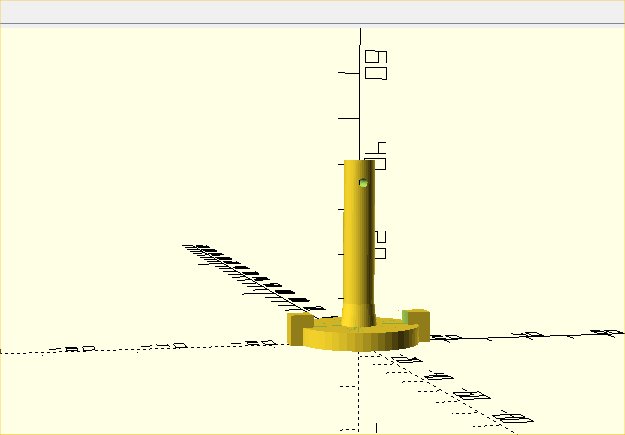
As you can see I have added the lugs that lift it off the seal as well as grips to allow you to turn it. I could add a cover but am not sure if this is needed. This is the code so far:
//Fuel Cap plug
$fn=50;

Slht=4;
Sldia=27;

//Cap
cylinder(Slht,d=Sldia);

difference(){
    //Stem
    cylinder(41, d=7);

    //Hole

    translate([0,3.5,36]){
        rotate([90,0,0]){
            cylinder(7,d=2);
        }
    }
}
//Cone

translate([0,0,Slht]){
    cylinder(h=5, d1=8.1,d2=7);
}

//lifting pegs

difference(){
    translate([0,0,Slht+2.8/2]){
        cube([Sldia+5,4.7,2.8],center=true);
    }
    translate([0,0,Slht]){
        cylinder(h=2.8,d=22.35);
    }
}
//grip to match pegs
translate([0,0,Slht/2]){
    cube([Sldia+5,4.7,Slht],center=true);
}
So far so good, I am enjoying working in OpenScad. There are still a heap of commands about which I haven’t a clue but I am getting the general idea. My mistakes are usually a parsing error where I leave out a necessary punctuation mark - [ { ; - in particular.
Some more progress in the design.
Slight delay in printing it out because the primer bulb on the fuel pump is split so I have had to order a new one from Ebay. It’s unrelated to this part but will wait until it arrives before progressing.
More code to get your rocks off.
//Fuel Cap plug
$fn=60;

Slht=4;
Sldia=27;

//Cap
difference(){
cylinder(Slht,d=Sldia);

translate([0,0,Slht-.5]){
cylinder(.5,d=13);
}
}
difference(){
    //Stem
    cylinder(41, d=7);

    //Hole

    translate([0,3.5,36]){
        rotate([90,0,0]){
            cylinder(7,d=2);
        }
    }
}
//Cone

translate([0,0,Slht-.5]){
    cylinder(h=5, d1=8.1,d2=7);
}

//lifting pegs

difference(){
    translate([0,0,Slht+2.8/2]){
        cube([Sldia+5,4.7,2.8],center=true);
    }
    translate([0,0,Slht-.5]){
        cylinder(h=2.8+.5,d=22.35);
    }
}
//grip to match pegs
difference(){
    translate([0,0,Slht/2]){
        cube([Sldia+5,4.7,Slht],center=true);
    }
    translate([0,0,Slht-.5]){
        cylinder(h=2.8+.5,d=22.35);

    }
}

//Outer Case
difference(){
cylinder(Slht+2.8,d=Sldia+1);

cylinder(h=Slht+3,d=Sldia);
}
Just a very short (and jerky) video showing how the piece is built up by the printer. This is just a screen shot of the slicing program that creates the instructions for the printer to follow.
I increased the infill to 25% and added extra surface layers to make it a bit stronger following advice from the printer manufacturer Facebook page
The piece used about 1.5m of 1.75mm filament

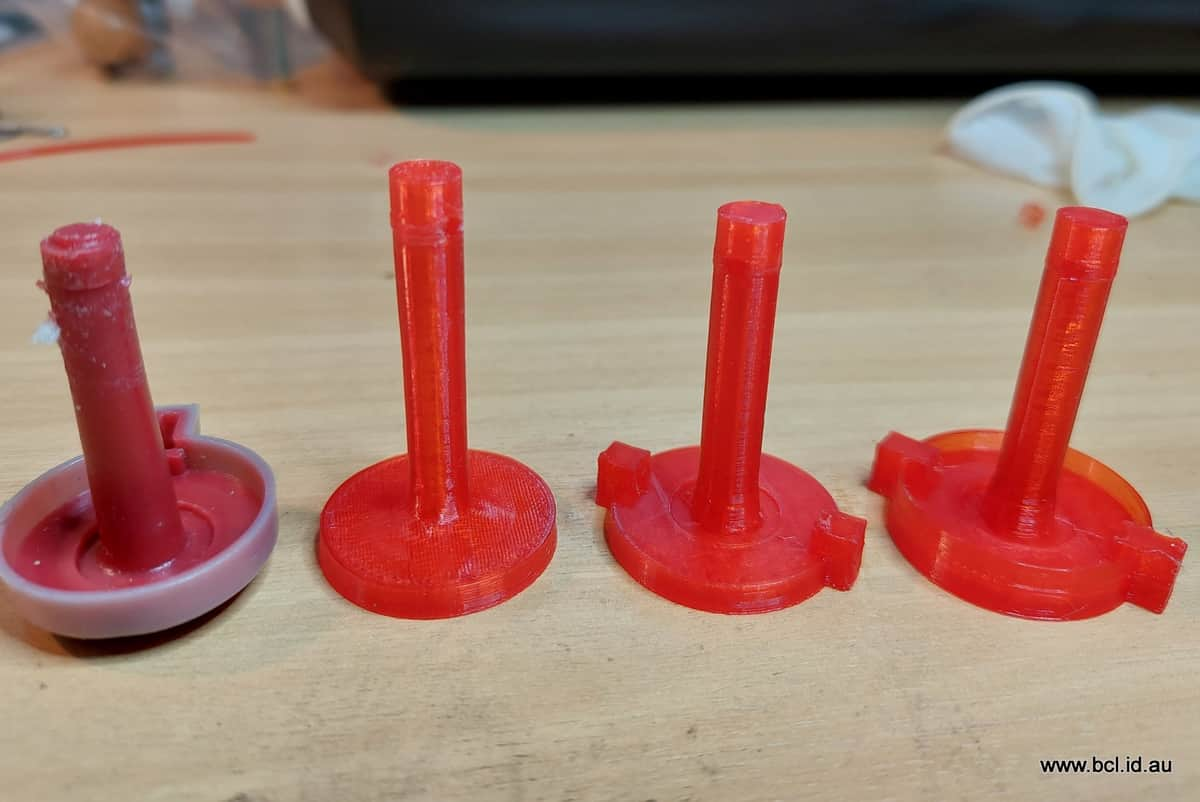
Some photos of the development of this project.
From the left the original broken piece, next the first trial for fit, then a piece with the lifting lugs that allow air to enter the fuel tank when the generator is in use.
That piece demonstrated that the lugs were an interference fit so I added an extra .25 mm to the internal spacing then added some side walls to prevent water splashing in during rain. which is the far right piece.
Finally the final fitted piece in the fuel cap.
BTW each piece took between 27 and 34 minutes to print.
I could have added a mark to the pointer but in the end satisfied myself with some white correcting fluid (not shown) and probably could have tidied up the design but it is baby steps at the moment.
I am quite pleased with the way it went, I learned a lot about the printer, you might notice how smooth the final internal surface is compared to the first attempt it is also stronger than the first piece too.
The design software, OpenScad, is brilliant, love working with it, though I still have a lot to learn, it is great fun and so easy to use (as long as you come to grips with the syntax).
Now I am waiting for the primer bulb to arrive so I can test that the generator still works
That’s all folks.
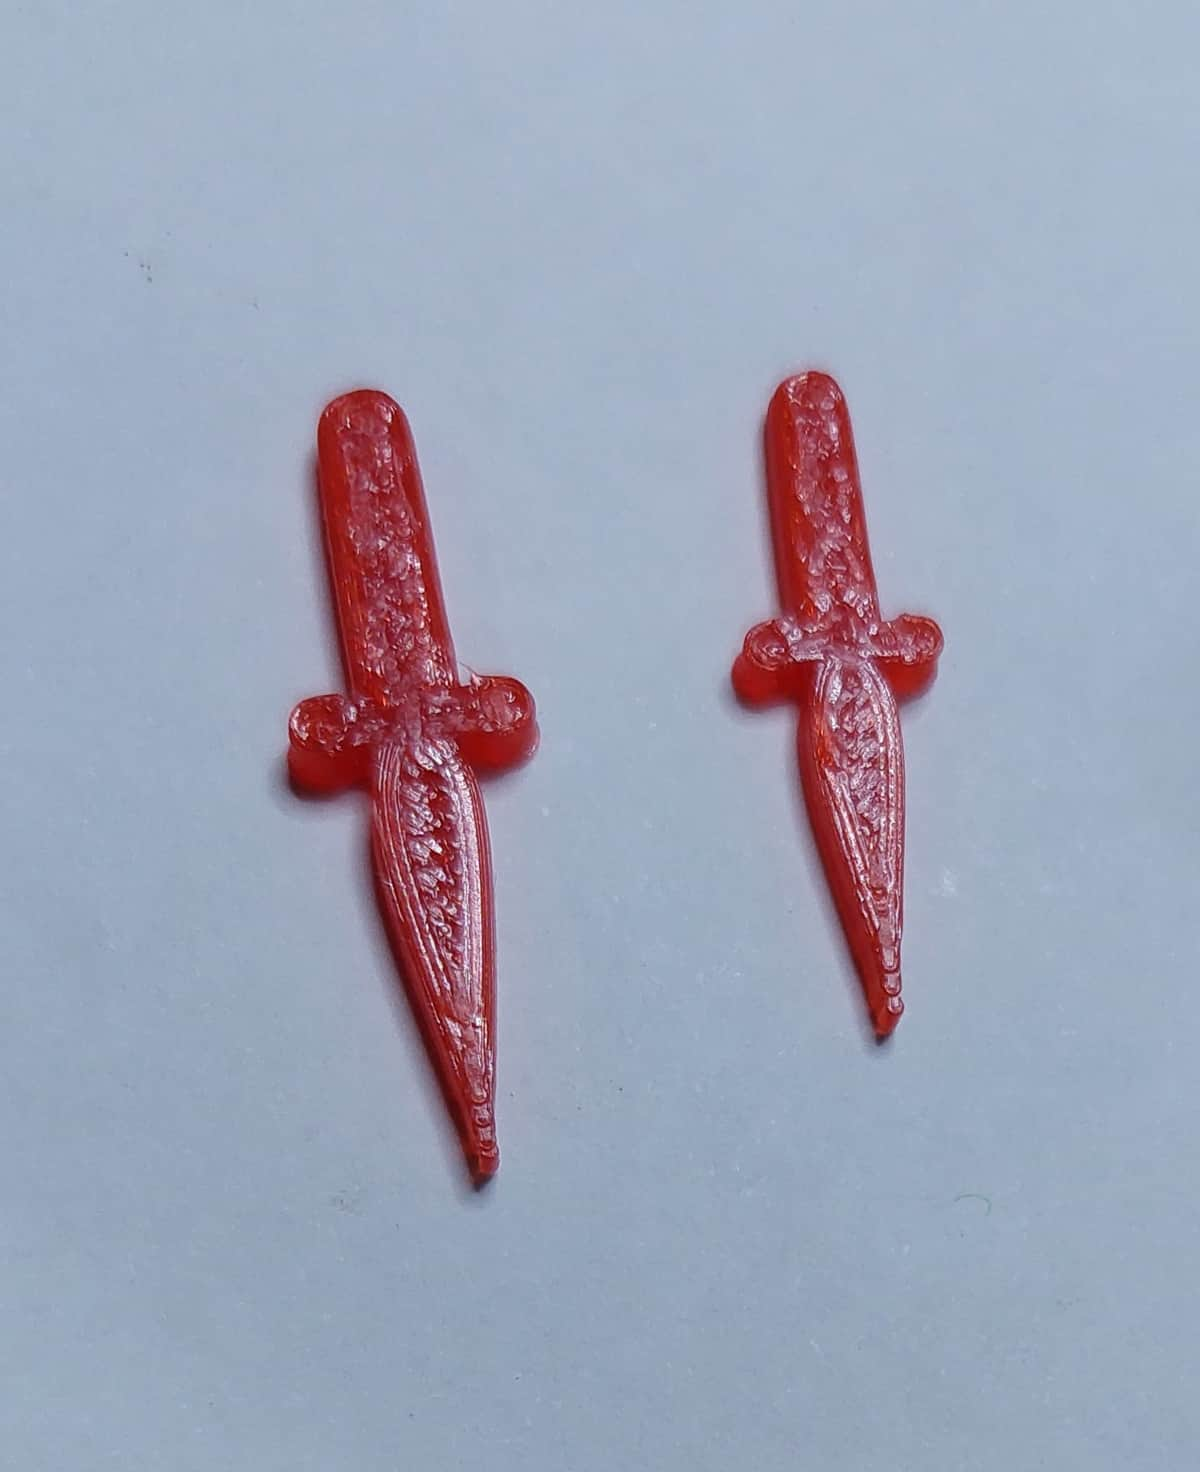
I never thought I would do this but yesterday I downloaded a file from Thingiverse.
My Grandkids lost a dagger from their Cluedo game and looking in Thingiverse I discovered a set of files to make all the objects. I just downloaded the appropriate file and printed out a couple of daggers of different sizes because I was not sure which was right - if I had just printed the file as is it would have been 6cm long but the great thing about these files is that you can scale them.
They were printed using the filament in the machine which is a sort of red but if they are keen they could spray paint them.
I also came across the device for releasing Aldi trolleys which my son was asking about so I might print that as well (this is for the Australian $2 coin)
In the Flashforge FB group there are a few people who make things commercially using the same machine as mine some print out stuff to create latex moulds. According to one person they make approximately $700 from one $30 roll of filament (the power used by these machines is very small). it is not a full time job but they make a couple of thousand dollars a month. Once the design is done it requires no effort as the machines don’t need to be attended.
Personally have no interest in selling stuff but I thought it was fascinating to read about their efforts.
You are doing really well. I’m more interested in the arty side but I’m going to ask my friend to print out a couple of these for me
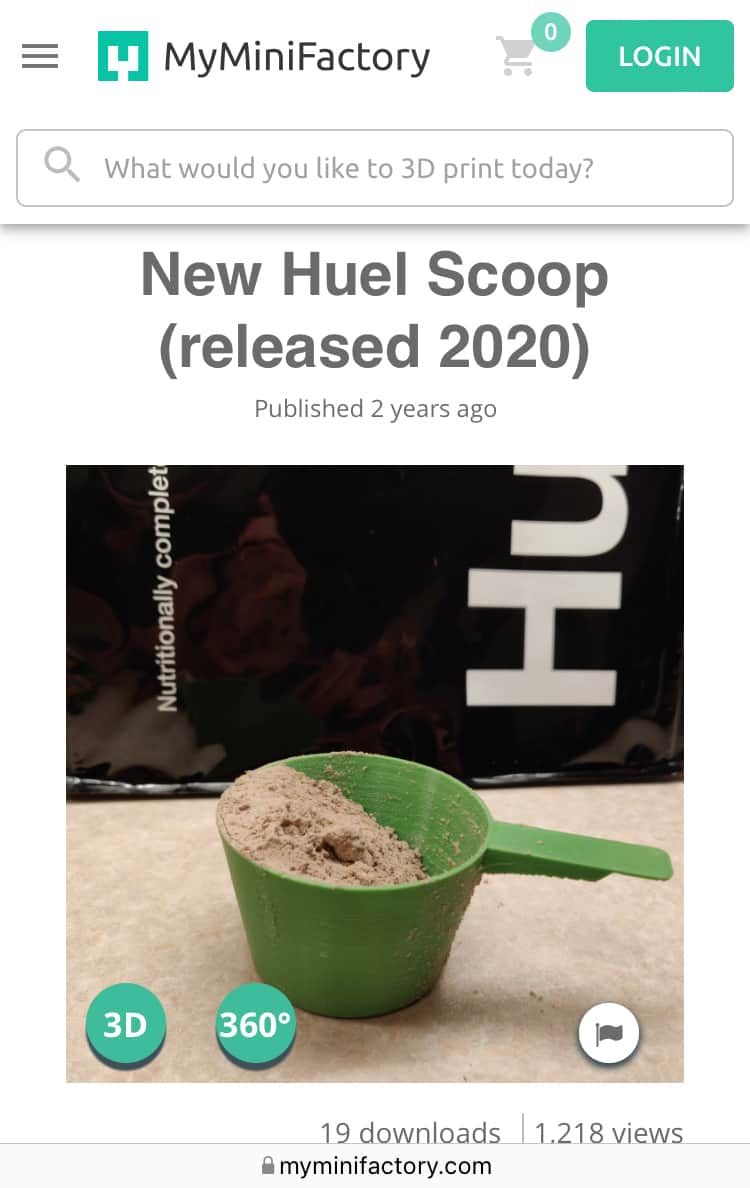
My son is trying to lose weight on the Huuel diet and they only give you one measuring scoop with your first order. It holds exactly 50g of Huel and it would be really to have a couple spare, one for each flavour
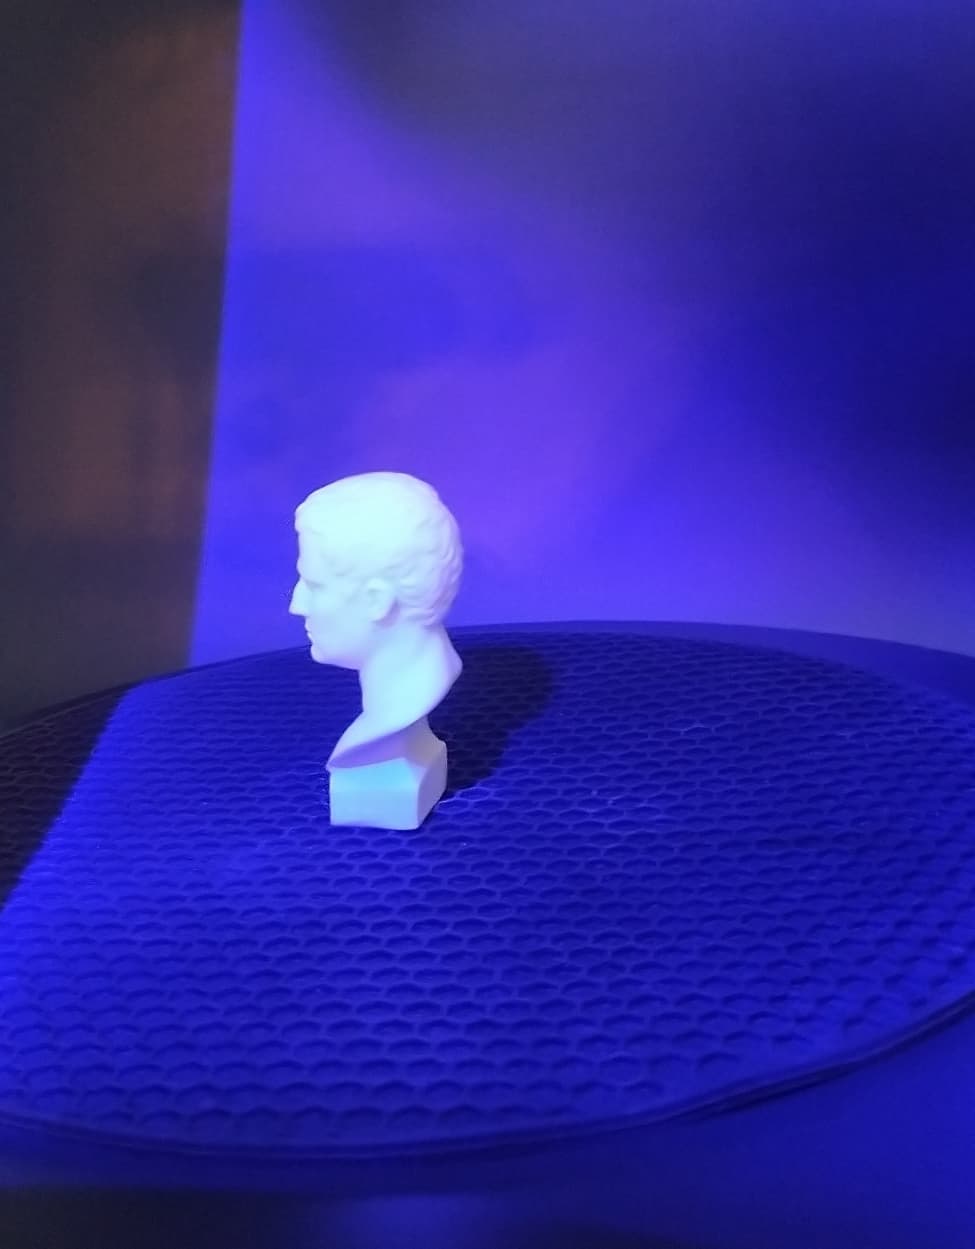
It’s my progress, I made it on my Creality , I have already made several figures for my friends and family for Christmas.
I missed this post for some reason. Do you scan the figures yourself?