My 3D Printer Progress

I have made a little progress with my 3D printer and learning OpenScad, the latter being the program that allows you to design objects ie a 3D CAD program.

First off I printed some battery holders using code I copied off the internet, since then I have attempted to write my own code - so far so good.

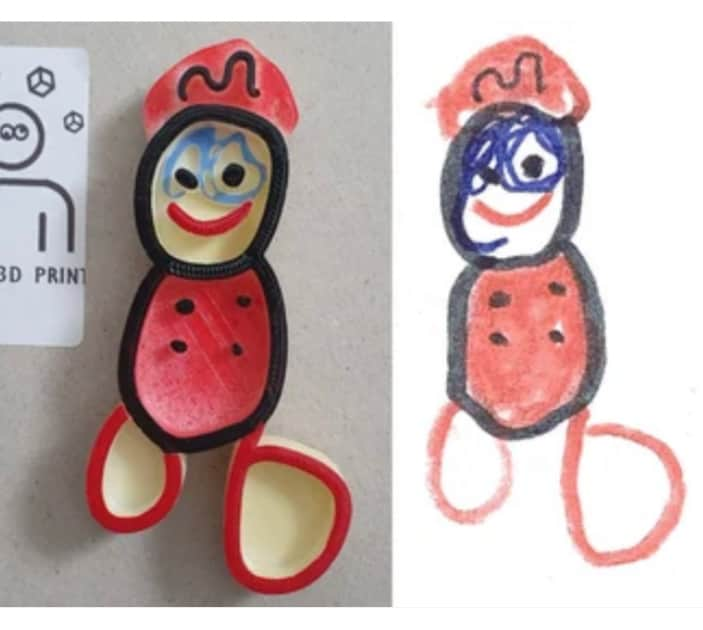
Some things I have printed (quick photo taken with my phone):

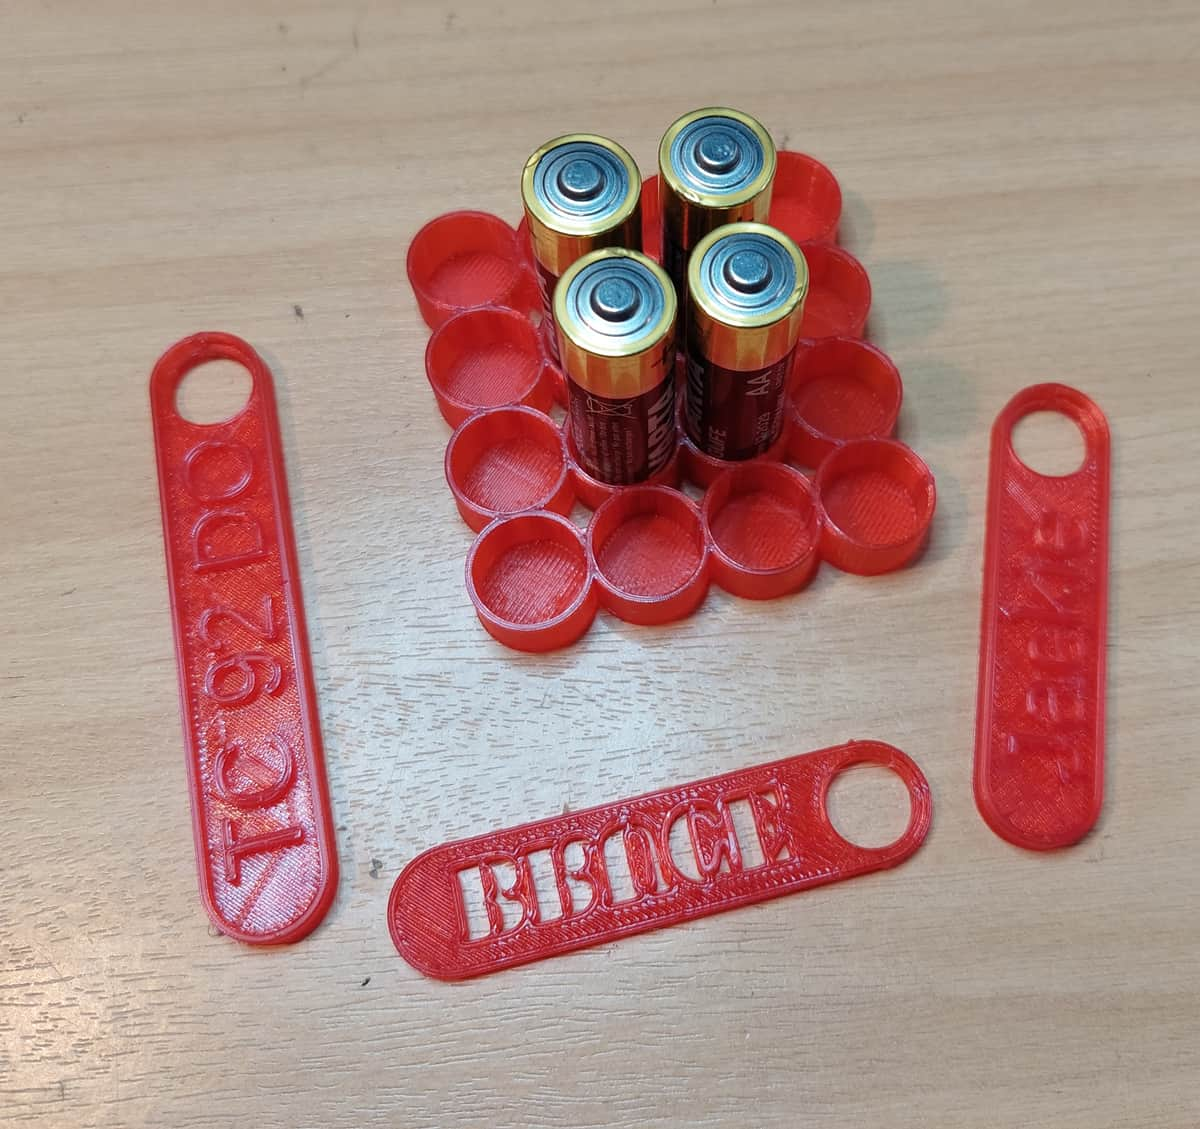
The battery holder is obvious but I thought I would try something simple like a key tag. It took me a while to get the code right (you have no idea the angst caused by a missing “;”) but eventually I was able to print different styles as shown in the pic. (I got the idea from the Internet)

OpenScad is free open source software which uses basic shapes to create quite complex objects but naturally I am still at the simple stage. If you look on YouTube you can see very complex designs create using it.

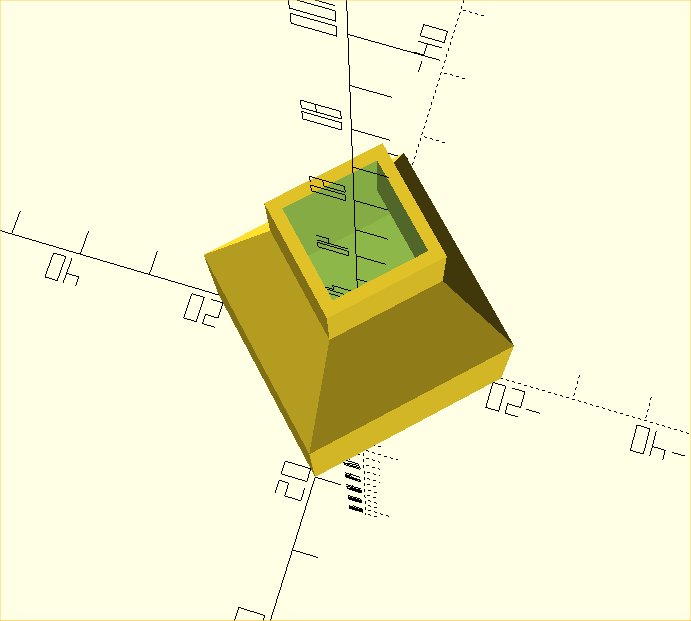
This during the design of the key ring:
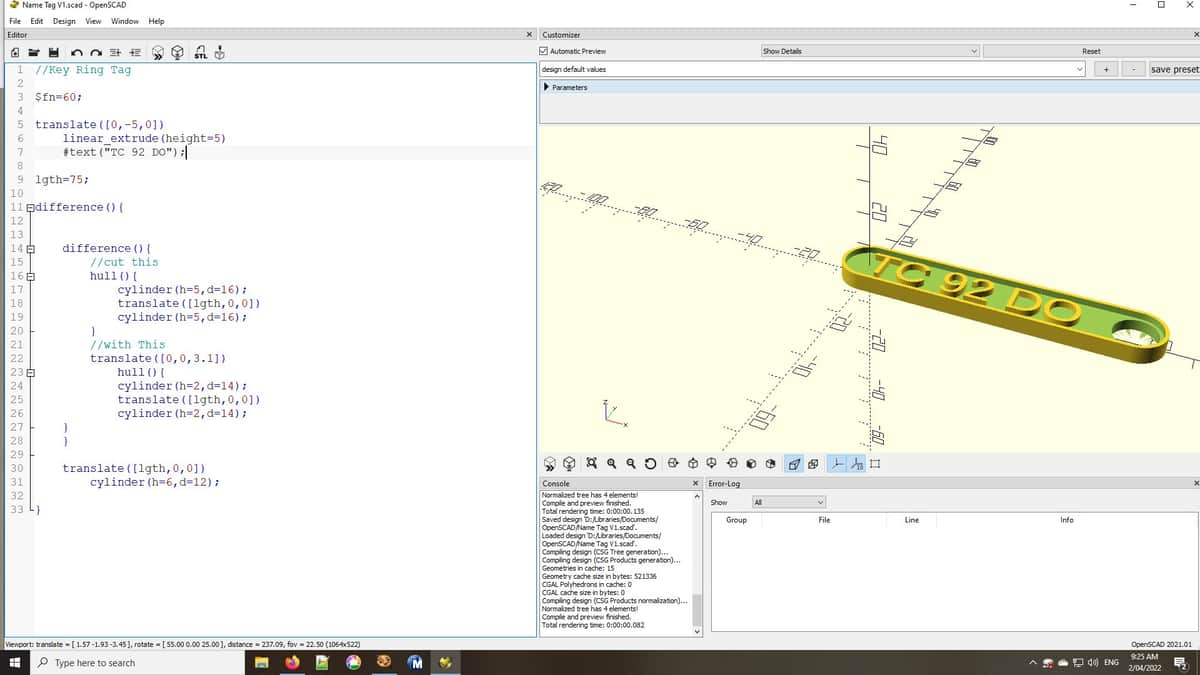
…and the code

//Key Ring Tag

//number of sides or resolution
$fn=60;

translate([0,-5,0])
    //Text is flat so has to be given height
    linear_extrude(height=5)
    #text("TC 92 DO");

lgth=75;

difference(){


    difference(){
        //cut this
        hull(){
            cylinder(h=5,d=16);
            translate([lgth,0,0])
            cylinder(h=5,d=16);
        }
        //with This
        translate([0,0,3.1])
            hull(){
            cylinder(h=2,d=14);
            translate([lgth,0,0])
            cylinder(h=2,d=14);
    }
    }

    translate([lgth,0,0])
        cylinder(h=6,d=12);

}

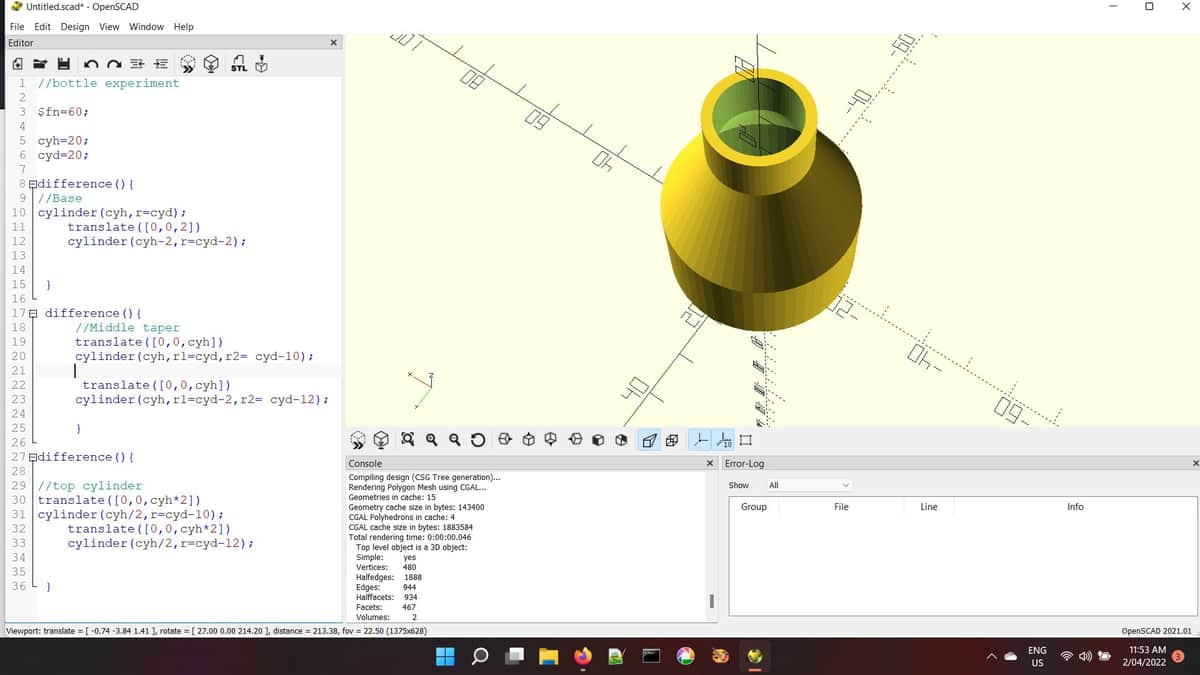
I think it is amazing that so few lines can create such a 3D object. Fortunately there is a Cheat Sheet built into the program which I refer to a lot (and I mean a lot)

It is surprising how the filament lasts - I am still using the 300gram roll supplied with the printer

1 Like

I got a bit carried away with my progress today and sat down to create a bottle similar to a Yacult (sp?) bottle.

In about 10 minutes I had created it successfully without getting stuck or making an error, or at least an error I couldn’t understand or correct - I have to say that I was pretty pleased with myself.

This is not something I would want to print but it does include some shapes and matching shapes to locations so was a good exercise for a beginner like me.

Here is the code:

//bottle experiment

$fn=60;

cyh=20;
cyd=20;

difference(){
//Base
cylinder(cyh,r=cyd);
    translate([0,0,2])
    cylinder(cyh-2,r=cyd-2);
    
    
 }
 
 difference(){
     //Middle taper
     translate([0,0,cyh])
     cylinder(cyh,r1=cyd,r2= cyd-10);
     
      translate([0,0,cyh])
     cylinder(cyh,r1=cyd-2,r2= cyd-12);
     
     }
     
difference(){

//top cylinder
translate([0,0,cyh*2])
cylinder(cyh/2,r=cyd-10);
    translate([0,0,cyh*2])
    cylinder(cyh/2,r=cyd-12);
    
    
 }     

Yes, I know I am talking to myself while you lot are sleeping but what else is a bloke to do?

I suppose the next step is to create modules for repetitious jobs like that so all you have to do is call one module with different parameters to create all three parts.

BTW just by changing the $fn=60; to $fn=4;

You end up with a rectangular bottle

1 Like

Good stuff @Bruce if I was a bit younger I would definitely be getting into 3D printing.
I thought I would share a thread from my main forum, might find something of interest.

I had to laugh, you’re younger than me :wink:

The little boat in the thread you showed is a very common test piece I have come across before, it has lots of curves and overhanging pieces. It was an interesting thread to browse. I think the 3D printer shown is far more sophisticated than mine - mine only prints to a maximum of 150 by 150 by 150 (mm) very much a beginner’s model.

I have downloaded a Buddha from Thingiverse which is identical to a ceramic one I have and I might print it when I change the filament for a full roll. However I don’t have much interest in printing figurines or the like but I do want to be able to repair stuff when a plastic moulding breaks for example. However at the moment I am printing junk to get used to the machine and learn Openscad, just created a right angle bracket in the latter (another very small step)

I find this all really interesting, and if I had the resources I would definitely have a go! They key tags are a good (useful) idea, especially if you can personalise them. :+1:

Honestly, these things concern me. My grandson has one and has made several bits and pieces, most of which were just for fun, not for real application. And I just find myself asking, does the world really need all this extra plastic? I thought we were being urged to reduce our plastic usage, and these printers go utterly against that ethos.

2 Likes

That is a good point, Sheba, and its something that should be investigated. Apparently there are ways to recycle the plastic, but its a huge faff and would put a lot of people off. Plus you need extra tools (like a filament extruder) which adds to the cost, I imagine. So, yes, more effort should be put into trying to find ways of recycling this stuff - as useful as it is.

Good job I am not making a car then. I am sure that the car in your garage has more plastic than my printer will ever use.

What a load of bollox!

How about you stick to the topic about 3D Printers rather than inane chatter about recycling?

You are doing really great at it, and you’ve picked it up so quickly! You’ve definitely made me think I’d like to have a go when I retire

My model railway friend has made me some useful bits. ( and it will be handy having a bit of an expert for advice!)

The knob on my cooker split and he made me one that matched exactly in black and also a drawer handle on our bedroom drawers that had been discontinued. He made it in white and I painted it to match, it looks OK, much better than an odd one

Well thats you told @PixieKnuckles @Bathsheba :rofl: :rofl:

2 Likes

Its all part of having a conversation…these things lead onto other things. We meant no harm :woman_shrugging: Apologies @Bruce

1 Like

I think having someone to guide you through the very initial stages would be a great asset. Unfortunately I didn’t know anybody who had one but I found a group on FB who helped a lot but being shown would have been great.

It is turning out to be quite fun. I must admit learning the coding interests me anyway.

1 Like

Temper, temper. :018:

:slightly_smiling_face:

2 Likes

I know it’s very advanced and it probably needs a 3D body scanner! Although this Artist on. Etsy does it from photos

But those figurines they print out and paint to be an exact copy of the person fascinated me, I think they’d make magic momentos

Also making 3D versions of children’s drawings

Not for me a figurine in my likeness, oh so spooky.

1 Like

Aw, get one made and I’ll have it on my mantelpiece :rofl::smiling_face_with_three_hearts:

1 Like

I was surprised to discover only today that there are free 3D scanner apps for a phone. I think one was called Copycam (that might not be exactly right) but I saw a video of some one using it on a full size bronze statue using a selfie stick to create a very accurate model. It was very impressive.

Likewise the child’s drawing, again, within the last week, I have seen a video on how to import a 2D computer scan/drawing into Openscad - I forget the file type but it is one used for graphic design in free programs like Inkspace.

The possibilities seem amazing once you start looking into them, using equipment you already have and free open source software.

YouTube is your friend.

2 Likes

In that case would something like this be OK, a little aggressive perhaps but tasteful. :rofl:
main-qimg-faa9d469693530dc2f821e99f4c9f6d7

We will get told off for derailing Bruce’s thread. :rofl: :rofl:

2 Likes

Thank you, I’ve heard of a scanner on the phone, is it just IPhones?

What a fascinating hobby it really is.

If you don’t mind, I’d really enjoy if you keep showing us what you make xxxx

Nope android has it in its camera app but I suspect you would need a modern phone. I don’t know if apps would add anything as I havve never needed to use the scanner.

1 Like