I'll be the son of a gun

Every now and then I get the urge to just go and make something I have never done before. Fully carved rocking horses for my kids, a tractor seat for the garden, a TV cabinet with faux stained glass pictures of dogs, a hexagonal Amish style gazebo are all things I have made on a whim.
Despite having an O Level in metalwork, I really like making things from wood. I look at a pile of scrap timber and think, I wonder what is in there, and off I go.

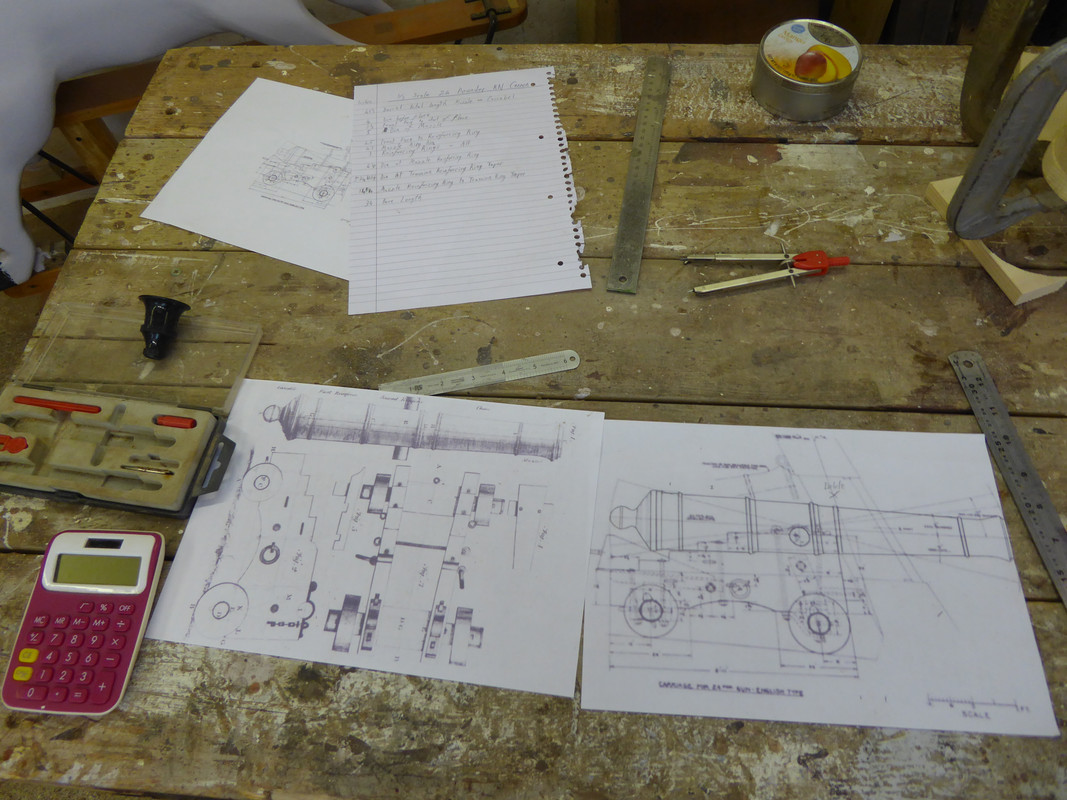
Here is another of my projects I have dragged across from the old site, a 1/3rd scale replica of a Royal Navy 24 pounder cannon, without the aid of a lathe.

I found some plans online, printed them out, and here is the result.

The plans and some other reference drawings, along with an old drawing set including dividers and a pair of compasses.

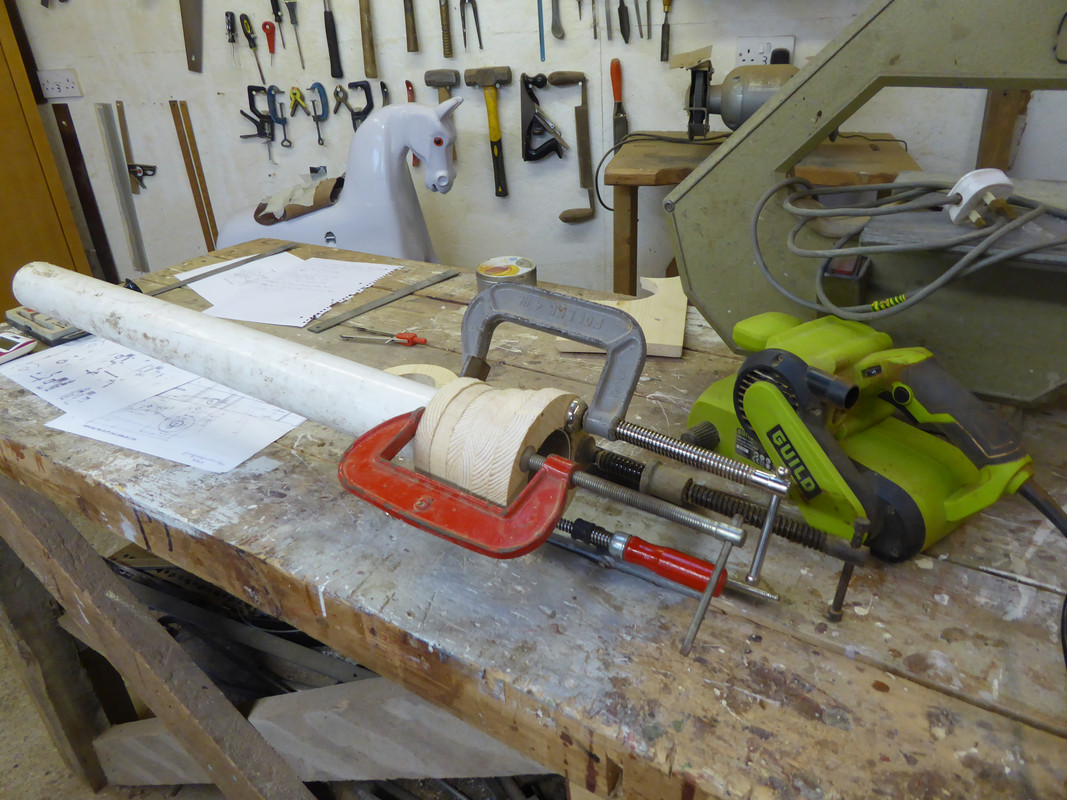
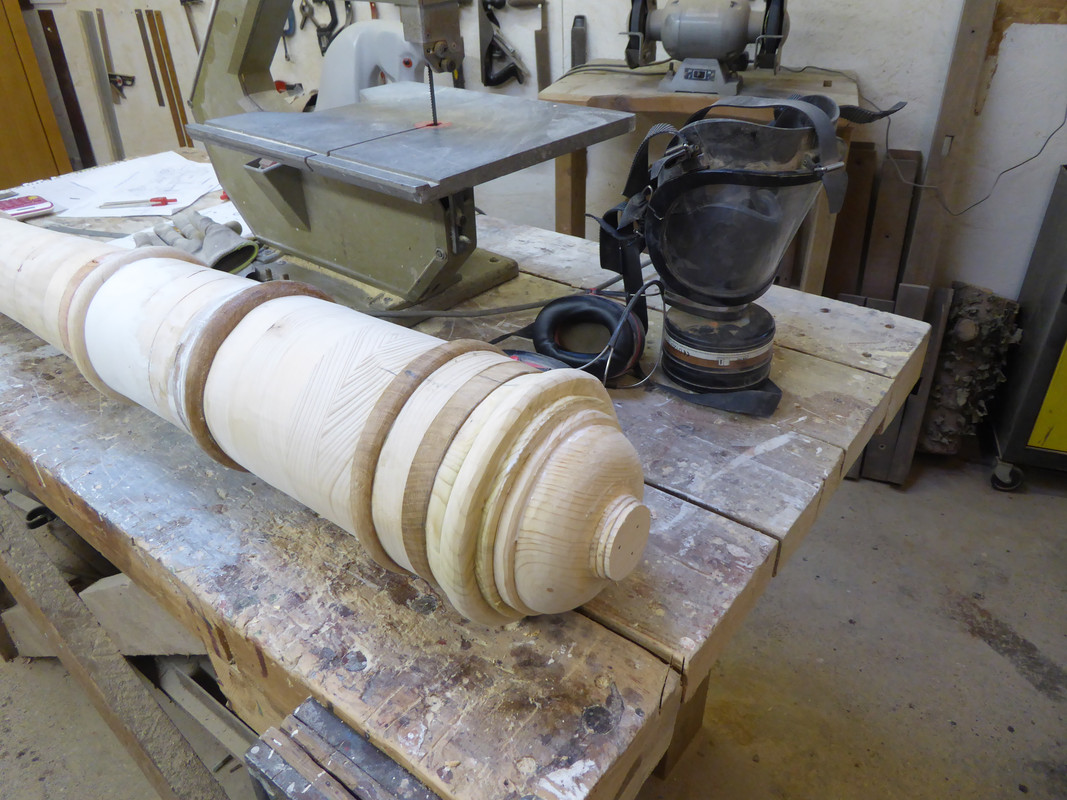
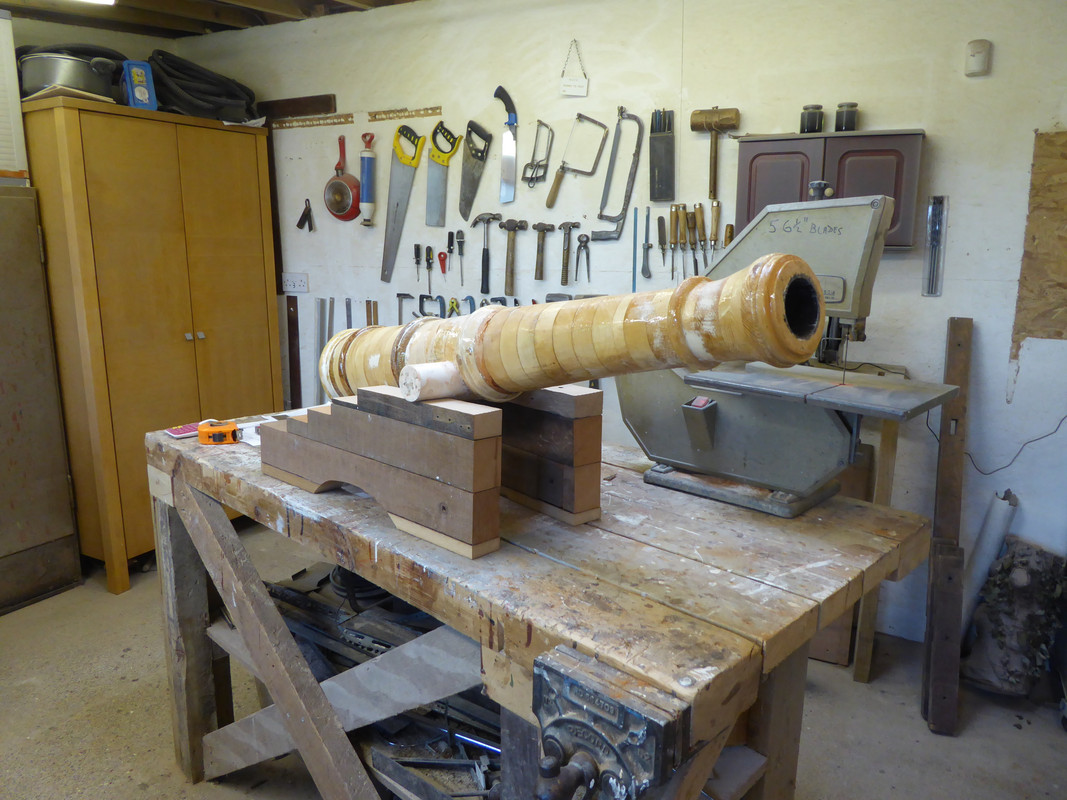
I used a plastic drainpipe to make a smooth bore, then cut discs, each with a hole just fitting the pipe, of differing sizes from some old scaffold planks and other pieces of wood to gradually build up the barrel.

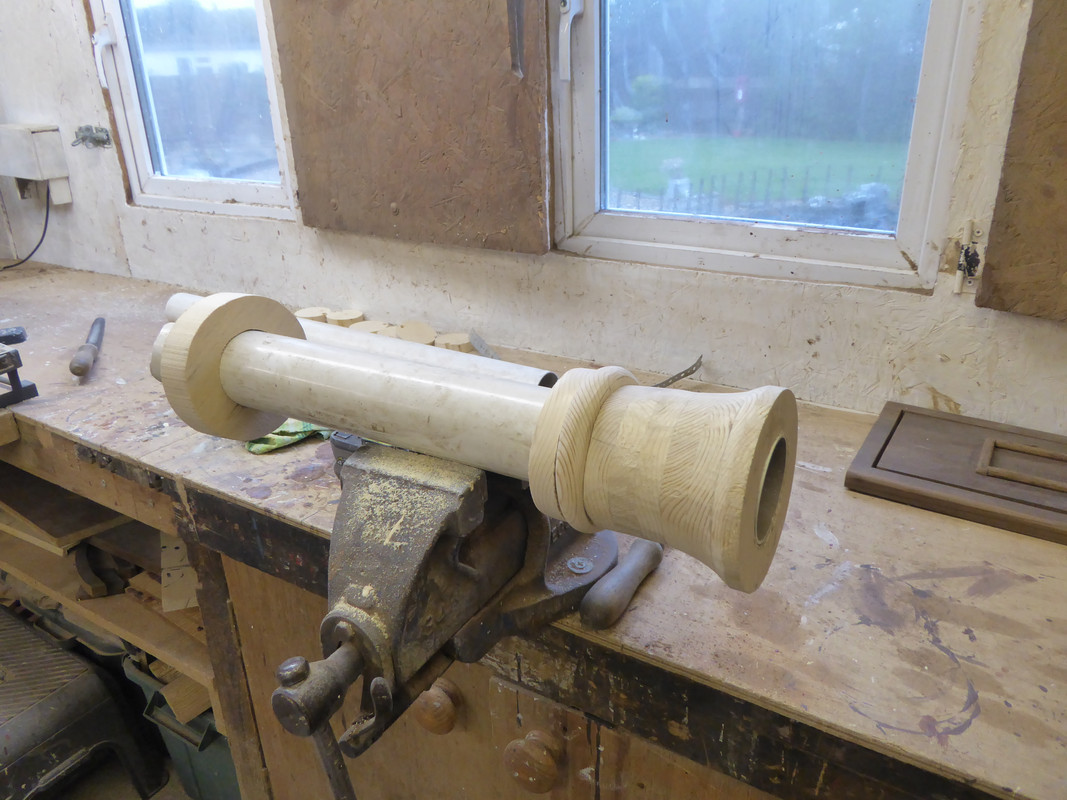
Creating the muzzel. (Spelling as per the plans)

Shaping and smoothing the muzzel.

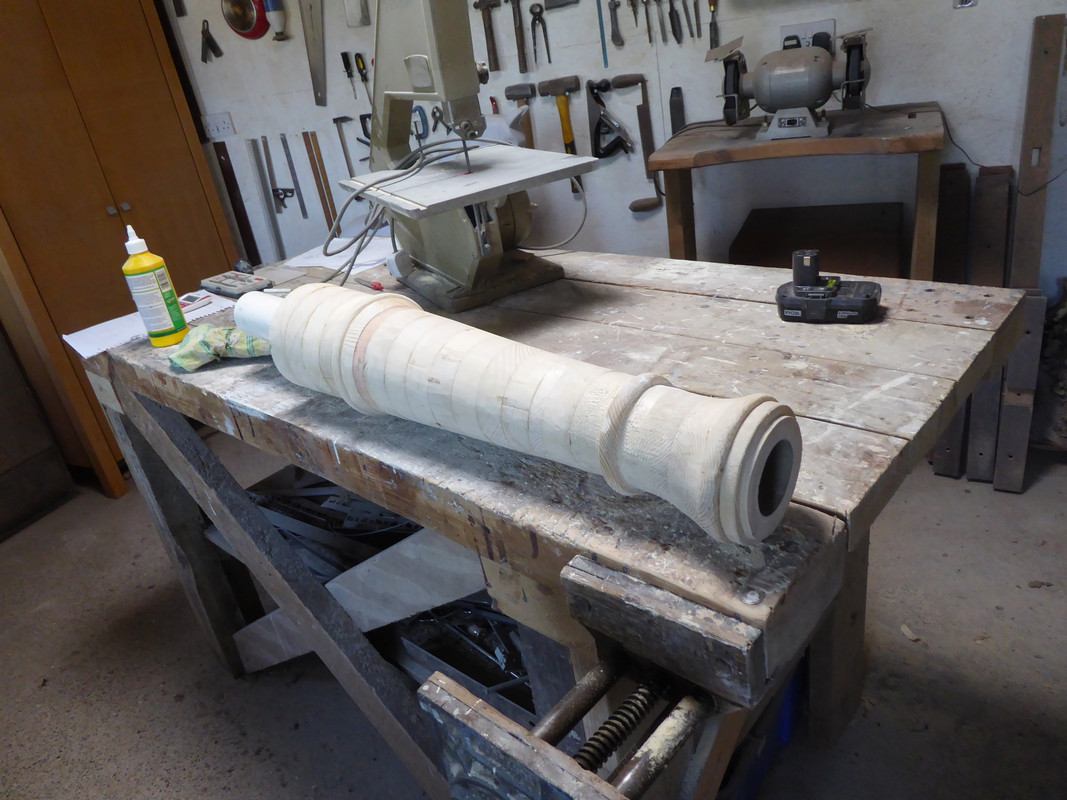
Building up the Chase along with reinforcing rings.

Shaping the Chase and reinforcing rings.

Making the Breech with First, Second, and Trunnion Reinforce.

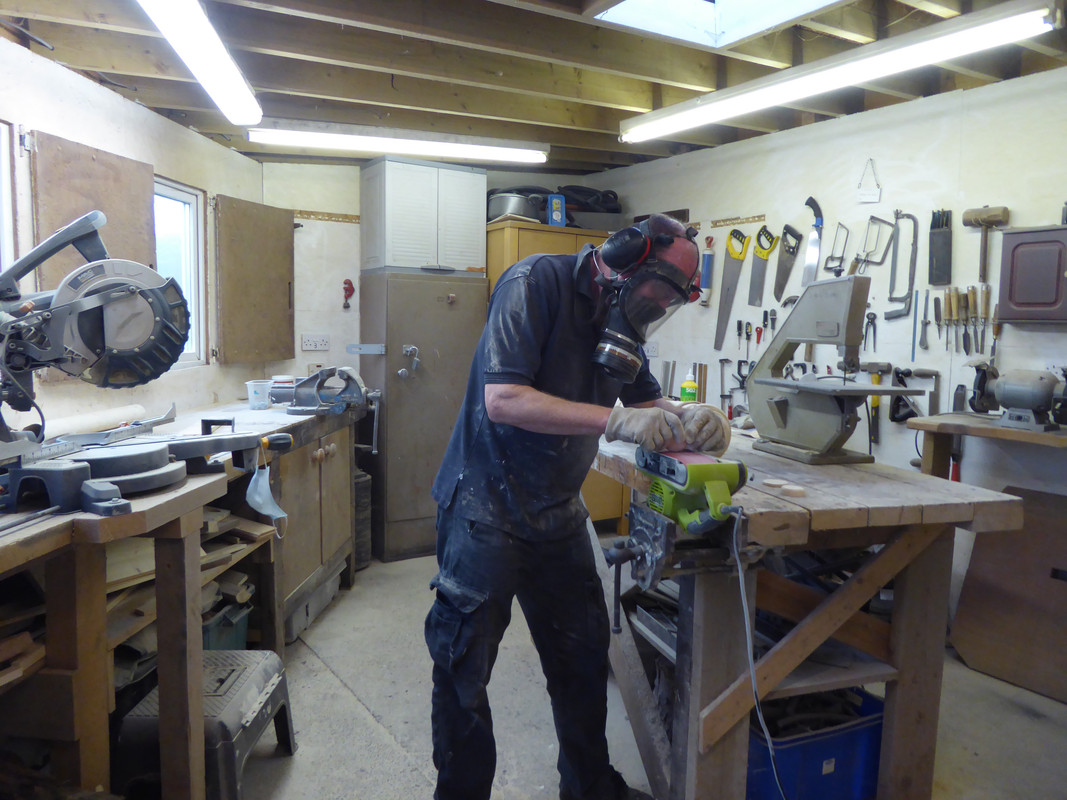
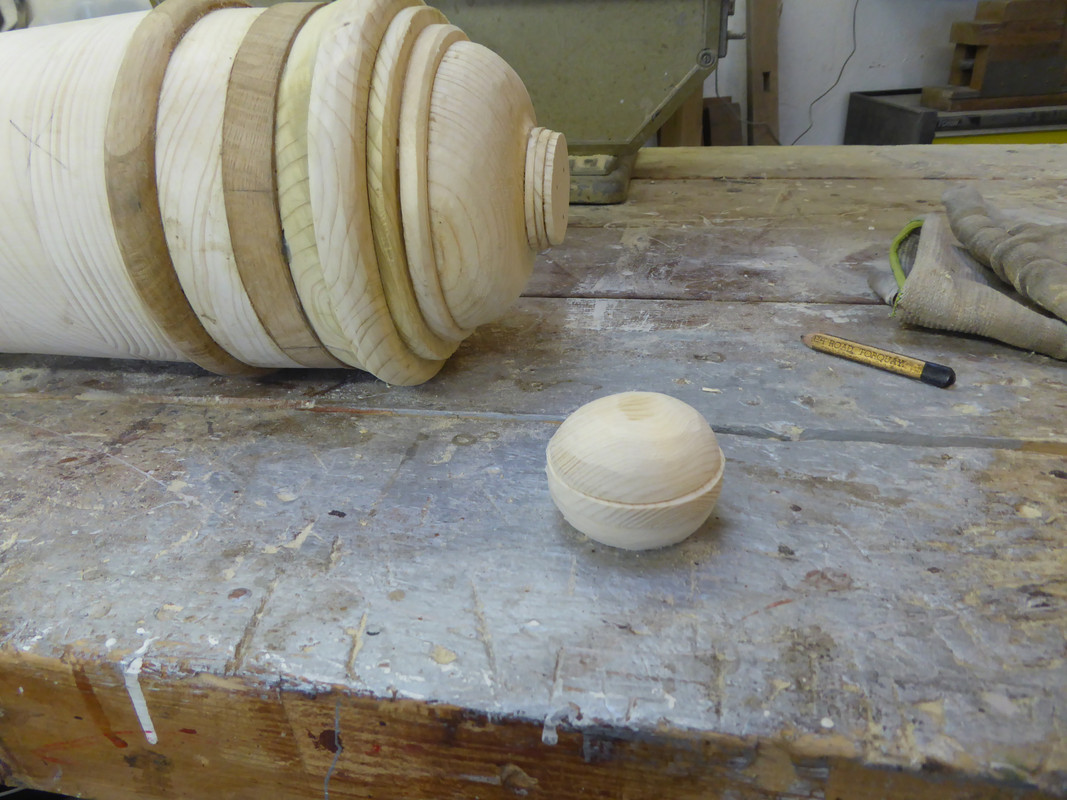
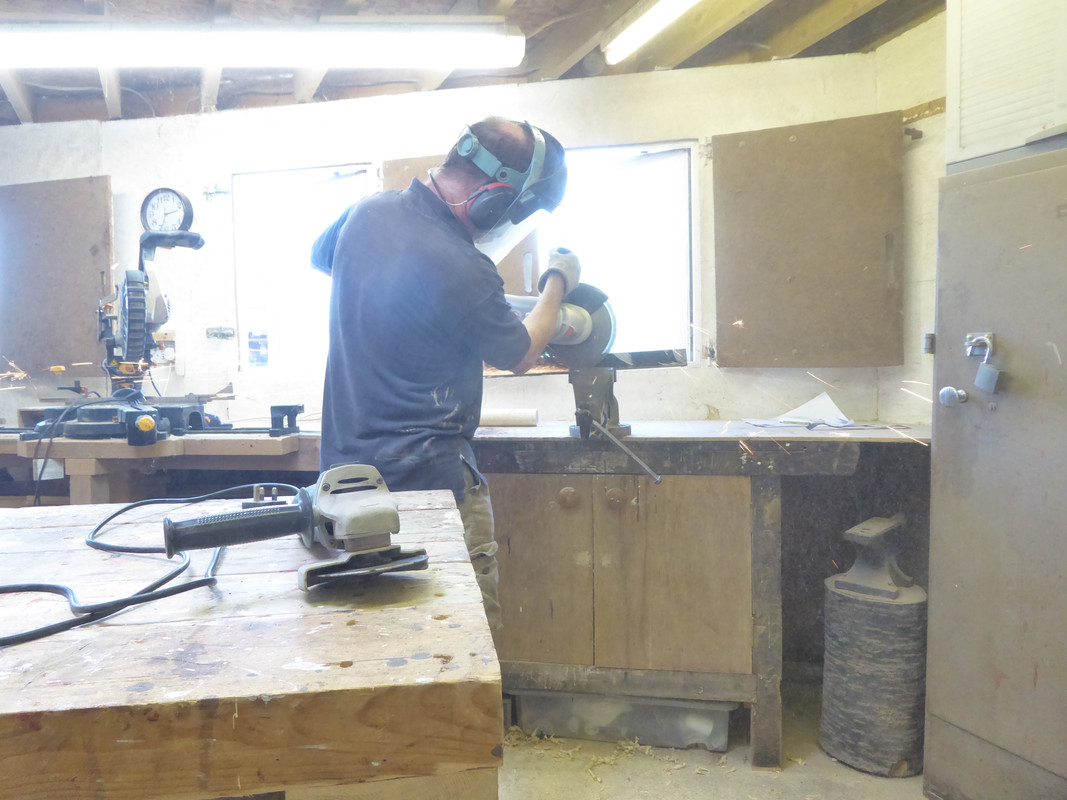
Using a belt sander as a linisher to shape the Cascabel.

Cascabel ready for fitting to the R Send.

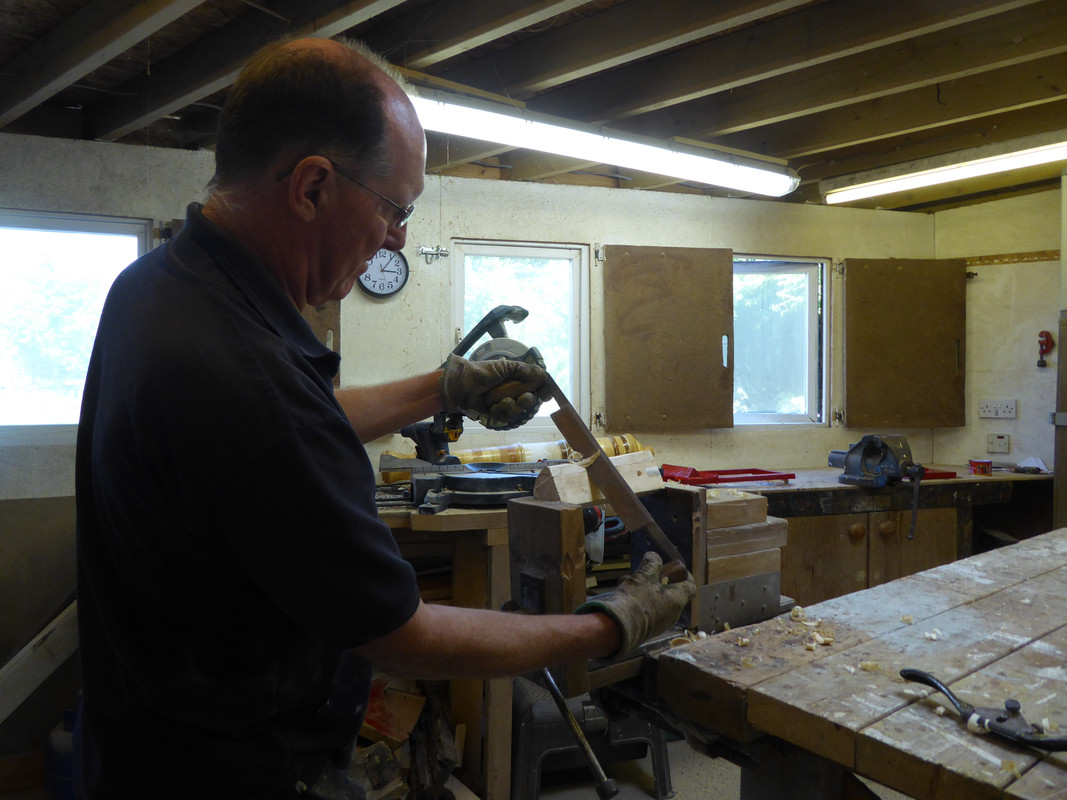
Making the Trunnions. I had to laminate three pieces of wood to get the overall thickness before making the rectangular section into round as I had nothing the right size. My Lovely Cousin does like a man who knows his trunnions.

Trunnions attached and Gun Carriage side pieces made out of some nice pieces of hardwood, salvaged from my Uncle/FiL’s old workbench.

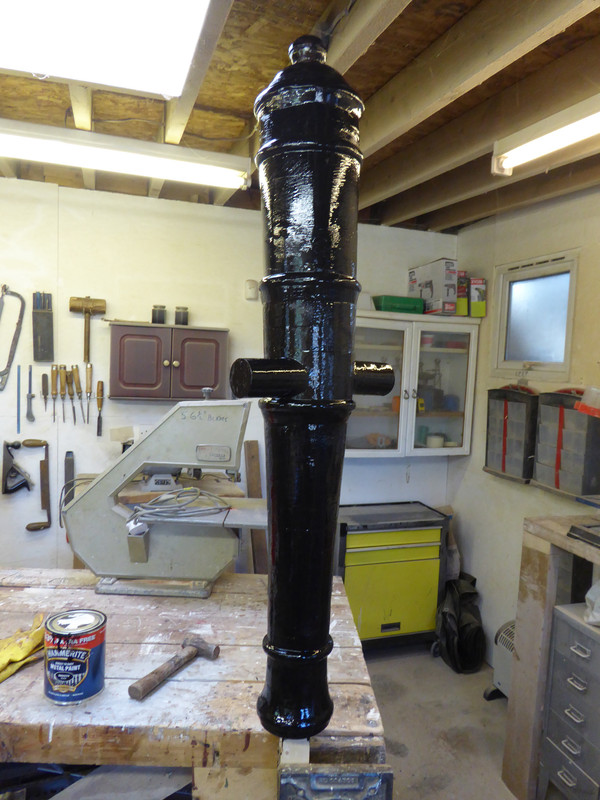
The Barrel painted with fibreglass resin as a waterproof coat, then several coats of Hammerite black.

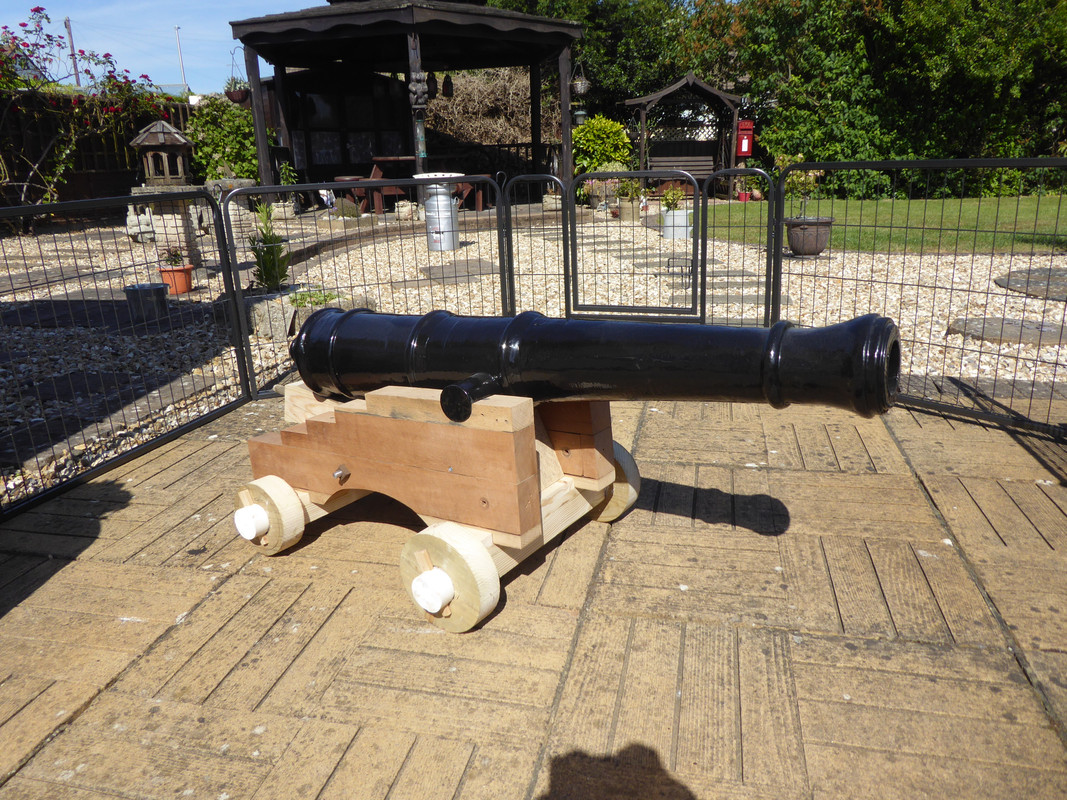
Trial assembly of Barrel onto the Gun Carriage. The wheels were made from a piece of treated roof timber and the fore and hind Axtrees (axles) were made using the same technique as that for making the Trunnions.

Making the brackets to secure the Trunnions from the side piece of an old metal bedstead frame.

The finished project showing the Breech, Trunnion Mounts, Stool Bed, and Wedge for setting the elevation of shot.

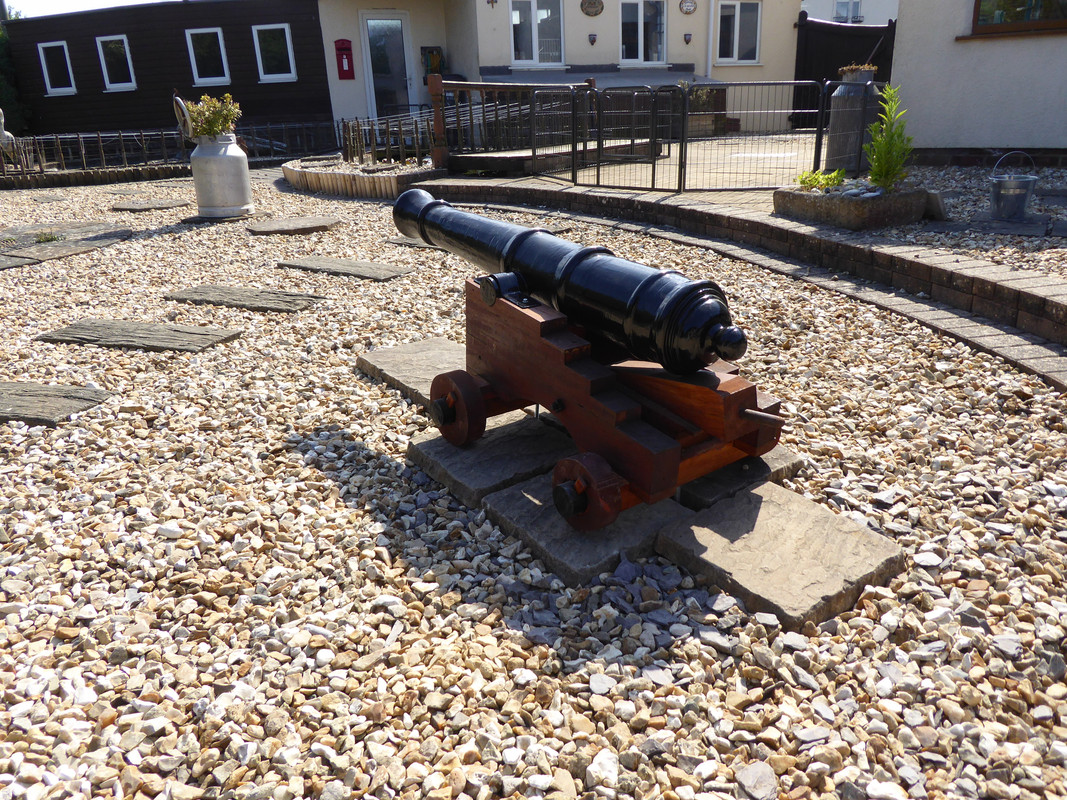
Down the throat, showing the Transom under the Barrel.

The tractor seat behind the cannon is something I made from the top of an old fish tank last year, mounted on top of a re-purposed water feature.
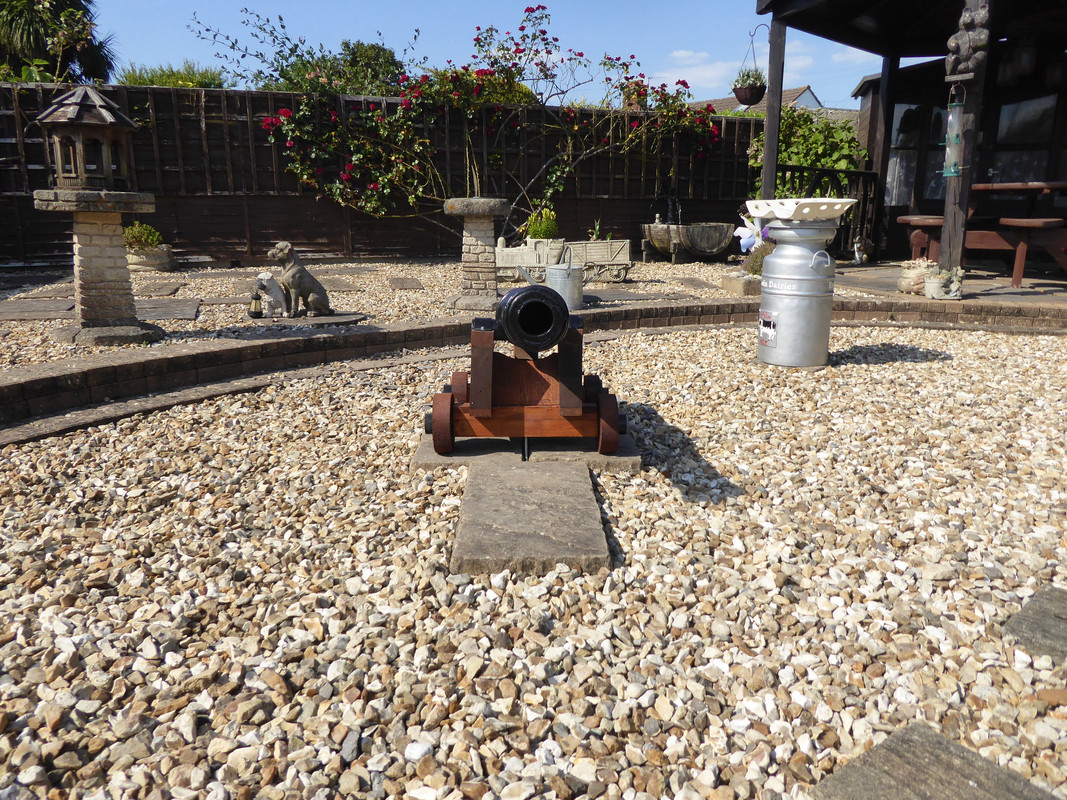
Ready for Action!

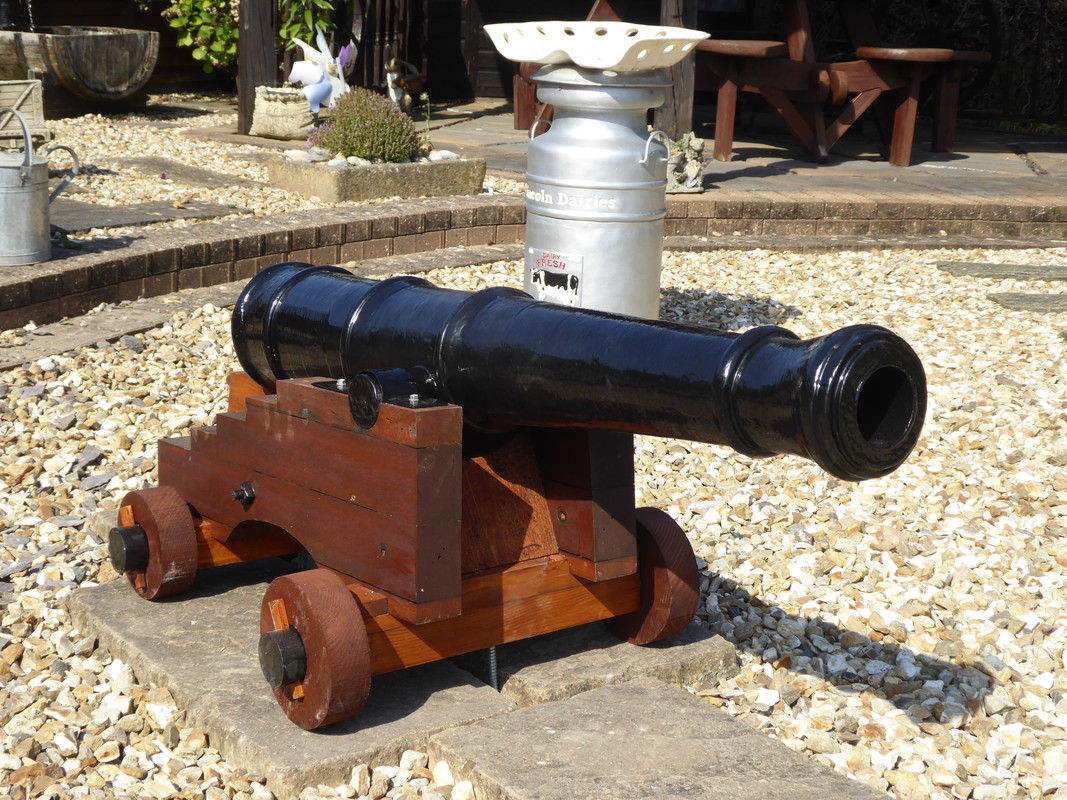
Sadly I had to add anti theft devices bolted from underneath and set in concrete, hence the shiny galvanised bolt showing in the last two piccies.

10 Likes

Your work it truely amazing Fruitey…so pleased to see the step by steps…

That’s so beautiful Fruitcake ! May I ask how long it took you to make this masterpiece?
Epic woodturning skills!

One rather odd question, why is it called Metalwork if you work with wood as well?

1 Like

thats superb very impressed Im a joiner to trade so understand all the work involved shame nowadays you have to worry if it will get stolen

1 Like

Excellent work Fruitcake… :grinning:

1 Like

That is absolutely brilliant Fruitcake you are so skilled .
-could you make me one that works I need it to deal with my neighbour.

1 Like

I have a liking for all things “nautical” and I really like that “24-pounder” … :astonished:

1 Like

That was on the old site.

That’s brilliant but how do you have all that stone with no weeds? What is your secret?

wow, brilliant

1 Like

Terrific work Fruity, absolutely wonderful, I’m in awe of your skills :clap: :clap: :clap:

1 Like

It was indeed, and I did say so in my opening post.
Having posted about a new project (In a spin), a couple of people asked me to post my other projects on this site because they hadn’t seen them before, so I obliged.

1 Like

Dig deep.

The slightly raised level has a concrete bed that is weed resistant to start with.
I went down a spade depth on the lower level, put in a heavy duty porous membrane, then poured in five tonnes of gravel.

Any weeds that do have the temerity to appear are quickly despatched with vinegar, or pulled out.

1 Like

I did ask you to post your other projects! I’m so glad I did! Please continue to post your past projects! You’re really talented Fruitcake :slightly_smiling_face:

1 Like

Ahhhh. A concrete bed. That’s a good start.
We don’t have that. I do however use vinegar and water with a few drip dishwashing liquid.
Do you use straight vinegar?

Also, how did you turn to make that project so round? I didn’t see a lathe. I bought my own lathe 6 years ago and do enjoy turning. The only thing I disliked about turning was sharpening my chisels and you really need to enjoy both to stay at it.

1 Like

I echo what others have said , a great piece for the garden, It was also interesting how you built it up .

1 Like

I hope this makes sense.

No I don’t have a lathe. I had the idea to make a cannon sometime ago and thought of all sorts of different methods. In the end I decided to make a series of circular blanks of differing sizes.
I cut them out with a bandsaw, then drilled a hole in the middle to cut the bore with a jigsaw, then used a circular surform to get the size just right to make a tight fit on the drainpipe.

I found some drawings online, one of which had a scale in feet and inches. I used dividers to determine the actual size of the real thing, then divided by three and converted to millimetres to make measuring easier.

I measured between the reinforcing rings to determine the length of each section and again divided by three. I could then work out how many discs I would need using a British Standard fireproof scaffold plank as my datum thickness.

By dividing the length of the section by the number of discs, I could work out the mean diameter of each disc at varying points along the barrel section. You can see the increasing sizes in the photos.
Plane and belt sander were then used to create the tapers.
If you were to take callipers to the barrel you would find it is not true round. If you look at the vertical shot, you can actually see that the barrel isn’t quite straight either.
Fully assembled though, the overall effect is good enough to trick the eye into believing it is round and true.

I used thinner boards for the reinforcing rings.

I also made a barley twist leg out of oak for our breakfast bar, but I can’t find the photos I took at the time. Again, I made it without a lathe.

1 Like

I make picked eggs and pickled onions using jars of pickling vinegar. Once used twice, I then save it for the garden weeds and use it neat.

2 Likes

Yes actually it does. I saw the bandsaw in the photos and now looking at the photos more clearly by blowing them up some I see that they are actually sections cut which definitely can be done with the bandsaw. Drilling holes for the drainpipe to fit into and then sanding it all down with a belt sander is brilliant.

Also brilliant. Use it neat. :joy: That’s cute. What a clever idea. You’re probably one of these DIY’ers who makes as many things as possible for mere enjoyment.

Very impressive. :+1:
Thank you :grin:

1 Like

I tried reusing the pickling vinegar three times. The first two times work perfectly, but the third time it turns a sort of milky/opaque colour and the finished product doesn’t taste as good, so now I save it after the send use to pour onto weeds. Because of the volumes used, about two litres, I can afford to use it on the garden straight without the need to dilute it.

I bought a fixer-upper and had to learn all sorts of techniques to carry out repairs or make things from scratch. I do like to make things just for the fun of it, and being retired I now have the time to do it.