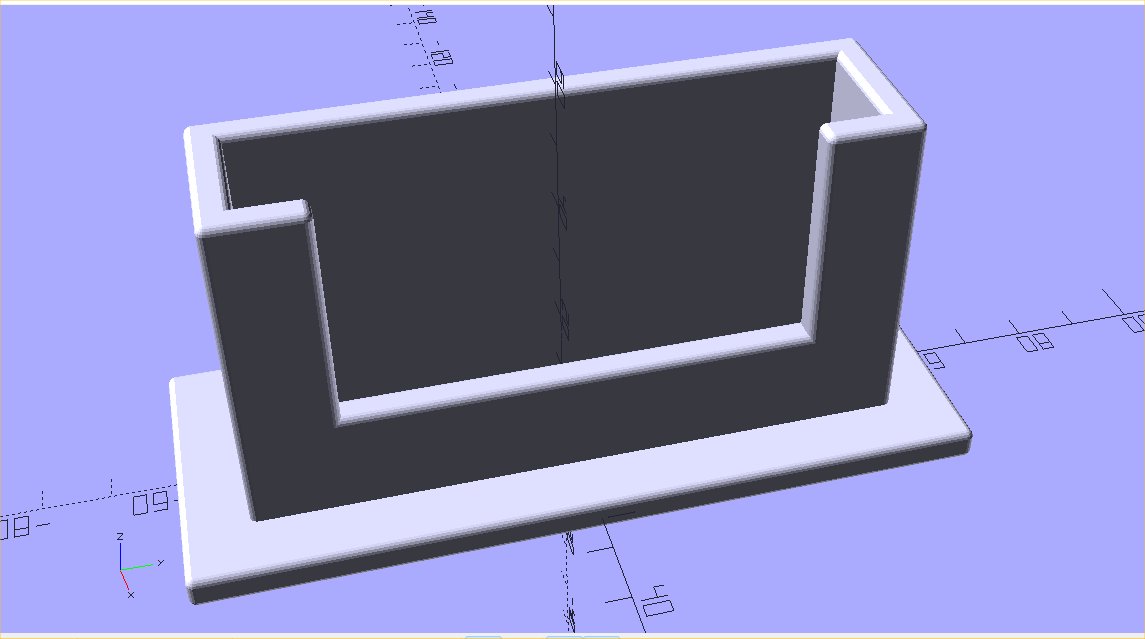
I was asked to make a business card holder for a club I belong to so I had a go. It actually didn’t take that long and I am quite pleased with the result. It allowed me to try out a new command “minkowski” which combines two objects in a shape that encompasses them both - in this case it makes the nice rounded corners and edges.
It was designed in OpenScad and wasn’t too difficult. I am not using modules yet but am using a lot of variables so it is very easy to change the size of the object and the container.
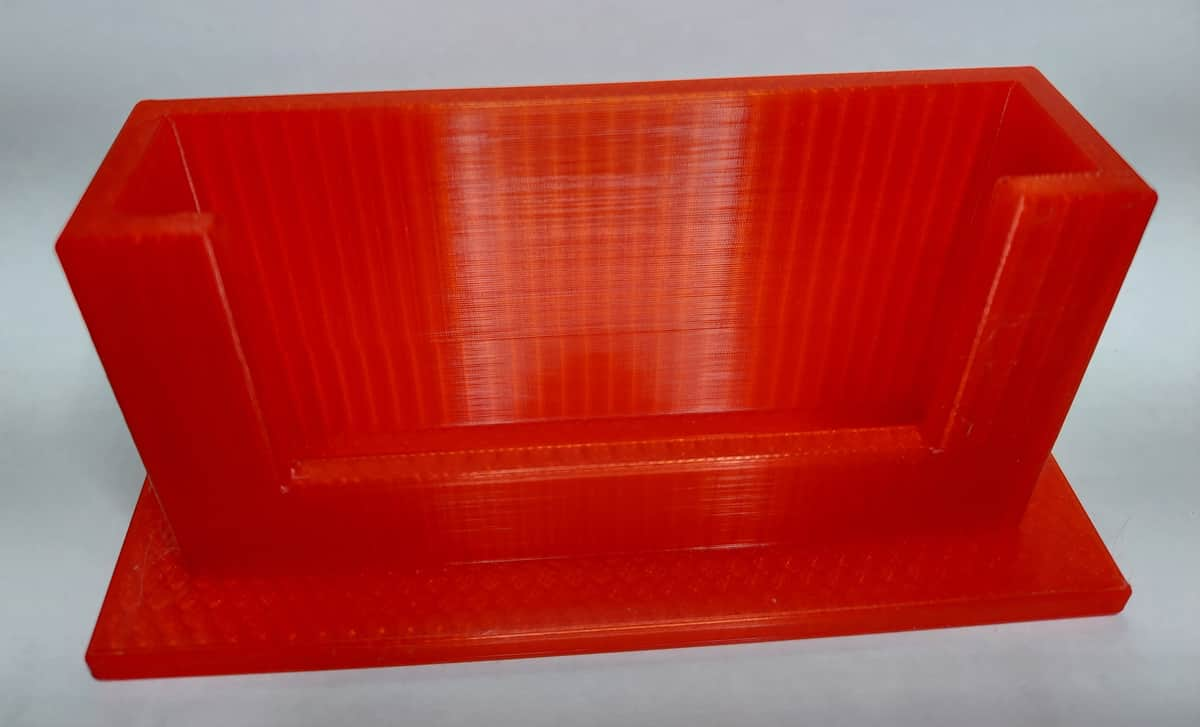
I had intended to wait until tomorrow to print out this card holder but got impatient and decided to use the red transparent filament and risk it running out.
The result is quite pleasing but I think I could remove a portion from the height however this will do as a first attempt.
I am not keen on the translucent filament for this job because you can see the honeycomb infill but it does hold the cards nicely (I turned them round for privacy reasons obviously). This is still the 250gms that was supplied with the machine so it goes a long way. It seems quite sturdy too.
As you can see the cards only stick a bit above to top of the holder but the window allows the printing on them to be read however I think I would knock a centimetre off the height to make them easier to take out of the holder and save a bit of plastic.
To do that merely requires the value of “Conht” in the code (see the first post) to be changed from 50 to 40.
This print took about 6 hours so would have used a maximum of 900Wh or slightly less than 20cents worth of electricity.
@Bruce , l suspect you are only doing this out of boredom Brucy ??
Six hours to make one of those ?? And it’s plastic too !!
You could make one of them out of a nice peice of grainy wood quicker !
All you are doing is creating more plastic waste ??
Still, of you are happy ?
Donkeyman!
Assman, it is computerised, I don’t have to watch it for any of those six hours. My computer sent the information to the printer which then goes about making it. Whether it takes 1 minute or one day it doesn’t need my attention until it is finished.
As for the use of plastic it used 60gms of plastic by comparison your car contains an average of 200kg of plastic many times more than my printer would use in its lifetime. It can be recycled - Plastic is essential to our lifestyle to say otherwise is ridiculous.
However thank you and @Omah for your interest in the project, good to see that you are following this.
Thanks for your comment @Maree, as you can see I printed out a copy of it. I am pleased with the result but it will look better when made out of a solid colour plastic and with the height slightly reduced.
The program I use to design these things is absolutely brilliant, so flexible yet with an easy to use interface. The code is relatively easy to learn too though I still get the syntax wrong
Hopefully the club will be pleased with the final version too.
That how it comes out. I have a process called “ironing” turned on which gives a better finish but takes longer. I turned the Infill up to 30% instead of the usual 15%, which also takes longer - that probably wasn’t needed.
Whether it always comes out so shiny I don’t know because that is the only filament I have tried., there are many different types including “silk” which I presume gives a finer finish. I have also ordered a “clear” finish which might be interesting.
The filament rolls are less than $30 (£15) for 1kg so a roll could make at least 16 of those card holders (not that I will make 16) as designed but I used a 2.5mm wall thickness whereas they only need a 1mm wall thickness so in fact you would get many dozens from a roll.
New filament was supposed to arrive today but it was mis-sorted to Melbourne according to Australia Post (came from WA) so even though they still say it is due today I suspect it won’t arrive until tomorrow.
I am still very much a beginner with the programming but am enjoying learning and my creations are probably less practical than they need be, it is just hobby.
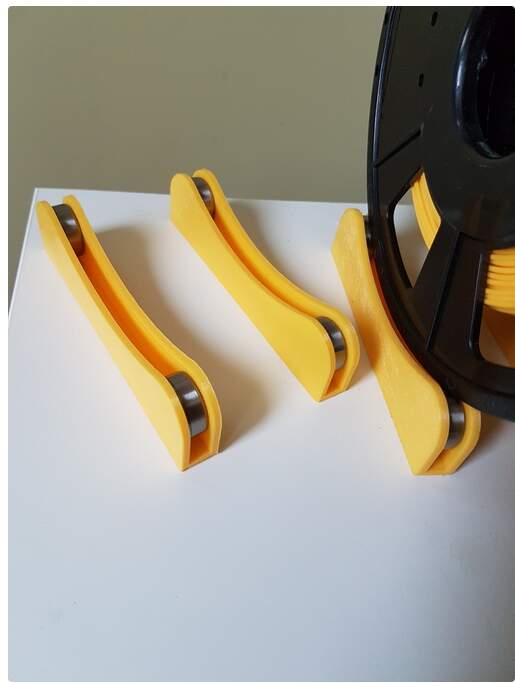
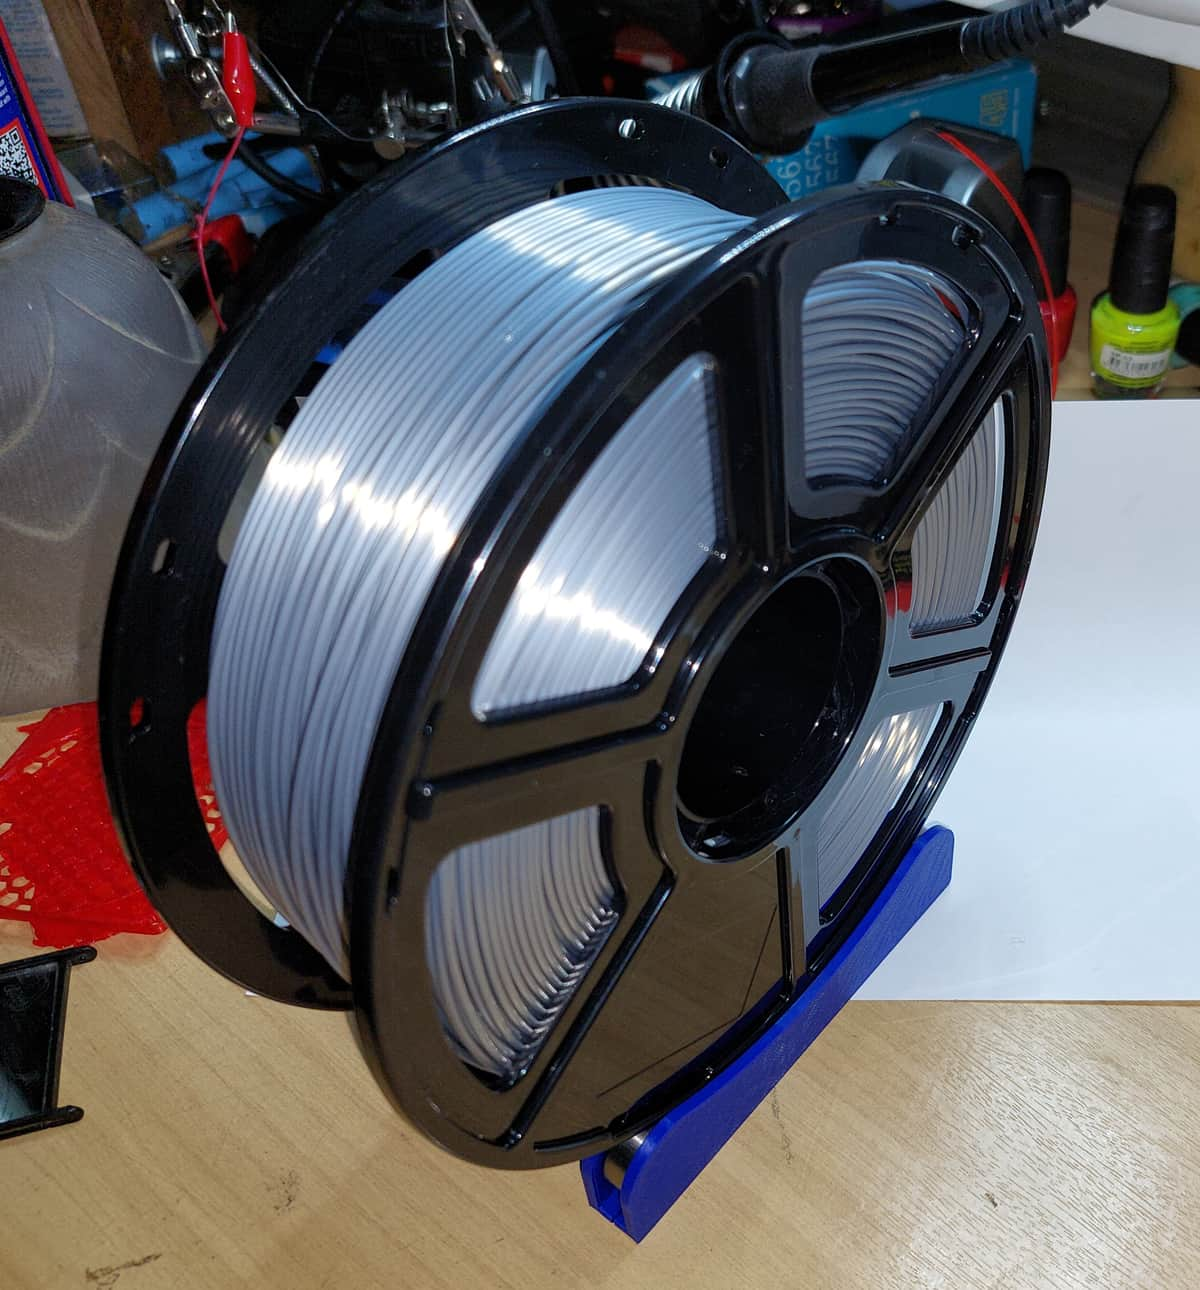
I have another project that basically involves no work on my part. My printer can only hold 500gm reels of filament but the cheapest way to buy it is in 1kg rolls. However there is nothing stopping the filament from being fed from outside the compartment for the reel.
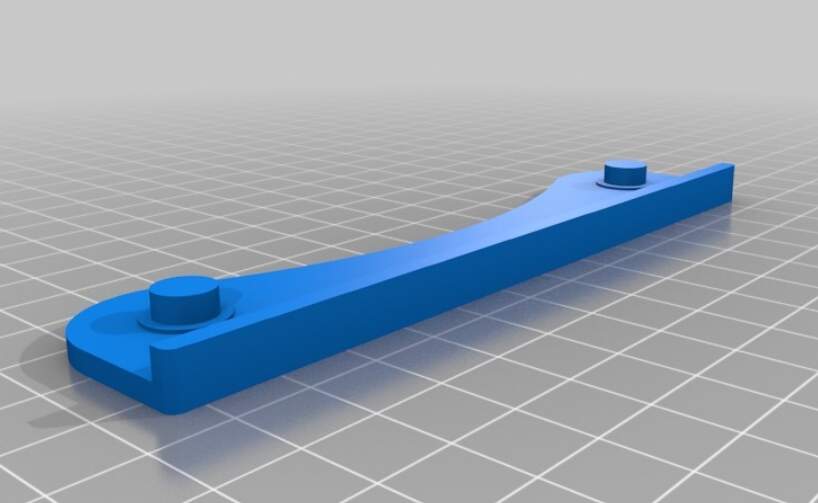
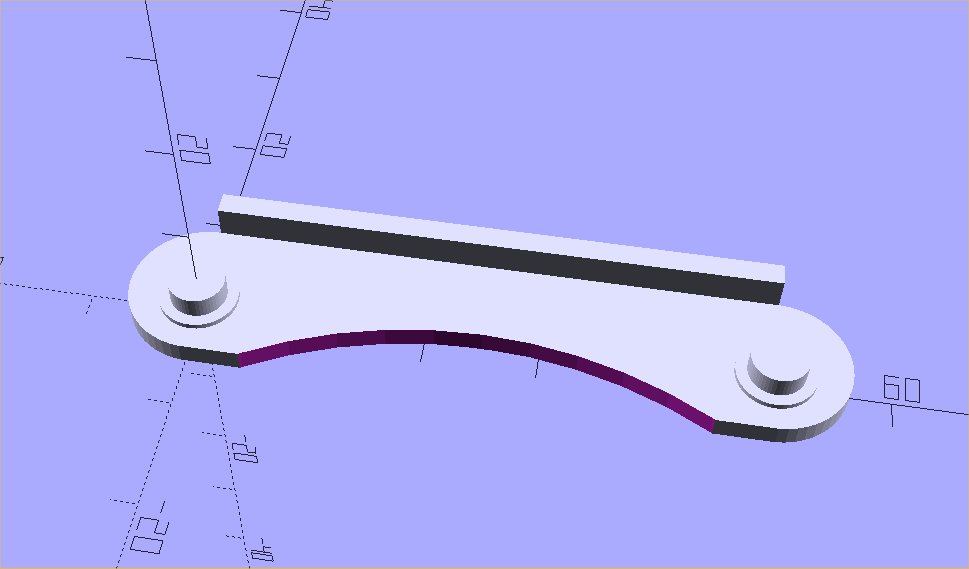
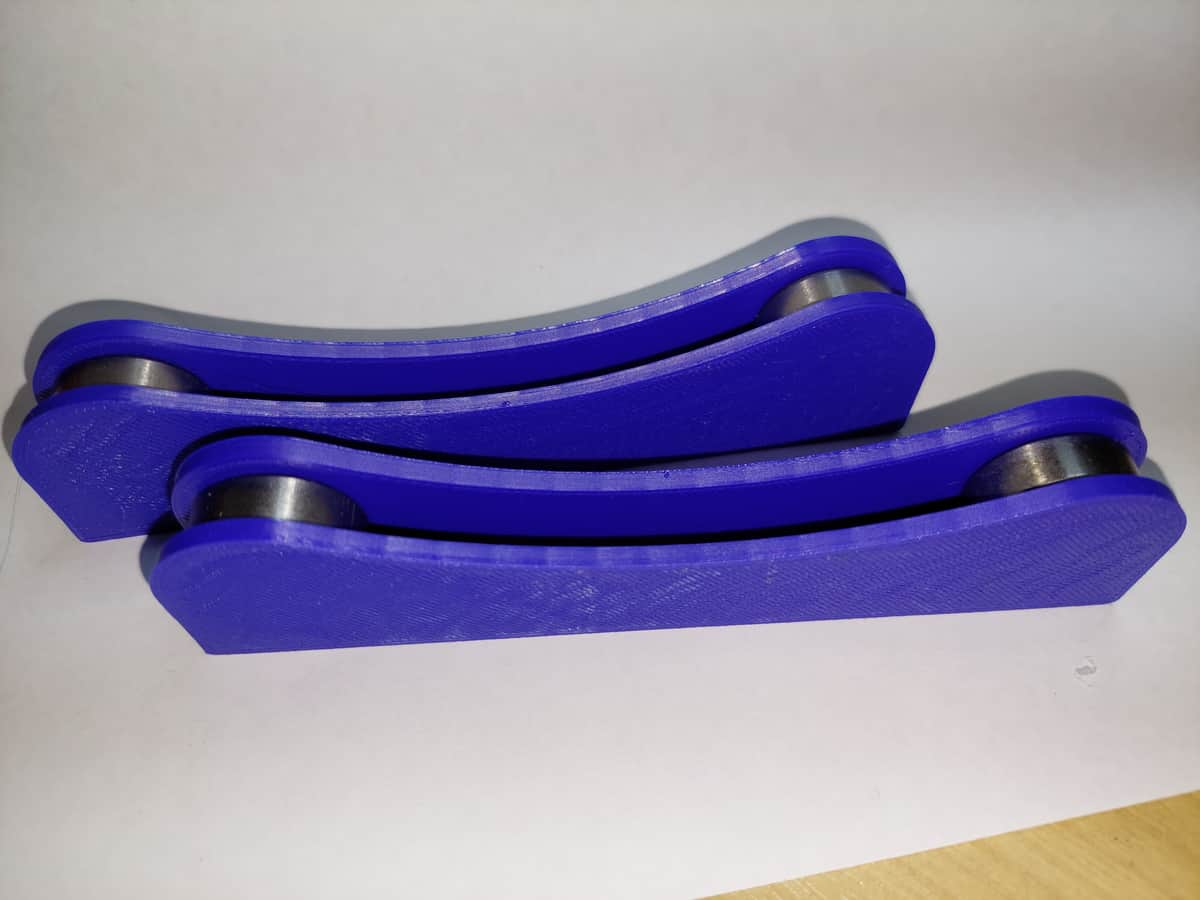
My next job will be to print out four of these parts to make a stand for the larger reel of filament.
As you can see from this illustration they are used to hold ball bearings so the reel can rotate freely. I have already ordered 20 of the bearings from eBay for a few dollars. Obviously I only need four but they are a size that can be used in other projects too.
I didn’t have to design this I downloaded the design from Thingiverse there are several similar sites offering free downloads of designs made by their subscribers.
I don’t think it is quite as elegant as the original and the numbers I used were made up as I don’t have the bearings to measure. I will never print this version as I will undoubtedly use their design rather than this but it was a useful practical exercise.
Here is the code used to create it: (any line starting with // is a comment and takes no part in the design)
//Spool Holder

//Bearing Details
//608 skate bearings

Inbrdia = 5;    //Inner Bearing Diameter

Inrcdia =7;     //Inner Bearing Race Diameter

Outbrdia = 10;  //Bearing Outer Diameter

Brwdth = 5;     //Bearing width

//Other dimensions

Spdist = 50;    //Distance between Centres

Wallthk = 2;    //Wall Thickness

Spcwdth=0.5;     //Spacer Width

//Object*******************

difference()
{
translate([0,1,0])

//Keep sides and base locked together
union()
{
//Create base
translate([0,(Outbrdia+3)/2,0])
cube([Spdist,Wallthk,Wallthk+Brwdth/2+Spcwdth]);


 //Create side panel
 hull()
 {
   cylinder(h=Wallthk , d=Outbrdia+3, center=false,$fn=50);

   translate([Spdist,0,0])
   cylinder(h=Wallthk , d=Outbrdia+3, center=false,$fn=50);
 }
 }
 //Create circular cut out in side panel
 translate([Spdist/2,-40,-0.5])
 cylinder(h=Wallthk+1,r=40,center=false,$fn=60);

}

//Create Two Spindles and spacer for Bearings using BearingMount module

BearingMount();

translate([Spdist,0,0])
    BearingMount();

//Module to create bearing mounts

module BearingMount()
{
    //Bearing mount
    cylinder( h=Wallthk+(Brwdth/2) , d=Inbrdia,center=false,$fn=50);
    //Spacer
    cylinder(h=Wallthk+Spcwdth , d=Inrcdia, center=false,$fn=50);

}
PLA filament is a thermoplastic polymer made strictly from renewable resources. Poly Lactic Acid (PLA), is generated from biodegradable material like cornstarch, potato starch, sugarcane and tapioca roots, and has a smooth, shiny appearance. PLA filament is popular for its ease of use, natural ability to break down and superior print detail capabilities.
Advantages of PLA filament
PLA filament is the most common type of 3D printer filament used.
PLA 3D printer filament is the most environment-friendly 3D filament solution.
Because of its low toxicity, PLA filament is a very popular choice in the 3D printing community.
My printer will also use ABS and PETG I have no idea what they are. Our resident plastiphobes will be having apoplexy by now.
I have to say that I am quite enamoured by 3D Printing as a hobby. I only bought one of the smallest cheapest printers but I am really enjoying it. It’s a Flashforge Adventurer 3 if you want to look it up.
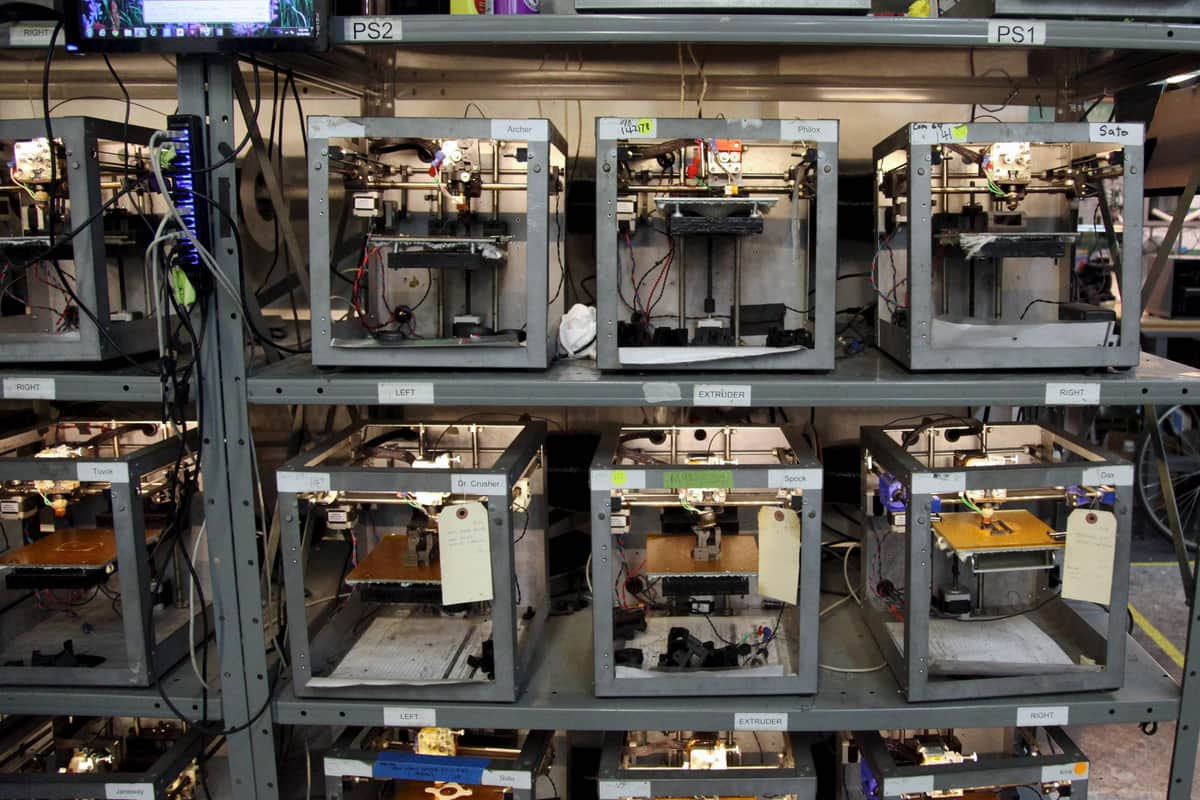
It amazes me the number of hobbyists that seem to have many machines to print out parts on a full time basis either as a part time business or for their club - seems to be a lot of model railway enthusiasts or game players - using much bigger and faster machines than mine.
Personally I think my machine is more than adequate for me, very happy with it. It requires no attention once set running, In future for longer prints I will start it when I go to bed so the print is ready in the morning.
It is completely self contained. Once the object has been transferred to the printer (via my LAN) the computer can be turned off, it is rated at 150watts so it doesn’t use a lot of power either.
Am also enjoying learning the scripting language used in OpenScad (pronounced: Open Ess Cad apparently), that is very much a work in progress.
Finally the card holder. I reduced the thickness of the walls, the height and the size of the base. This reduced the material used by about half from the prototype (35gms instead of 60gms) and the time it took to print. I will pass it on to the organiser on Monday and see if they want another.