
`There are a few web sites where objects for 3D printing are available to download. One is called called Thingiverse.
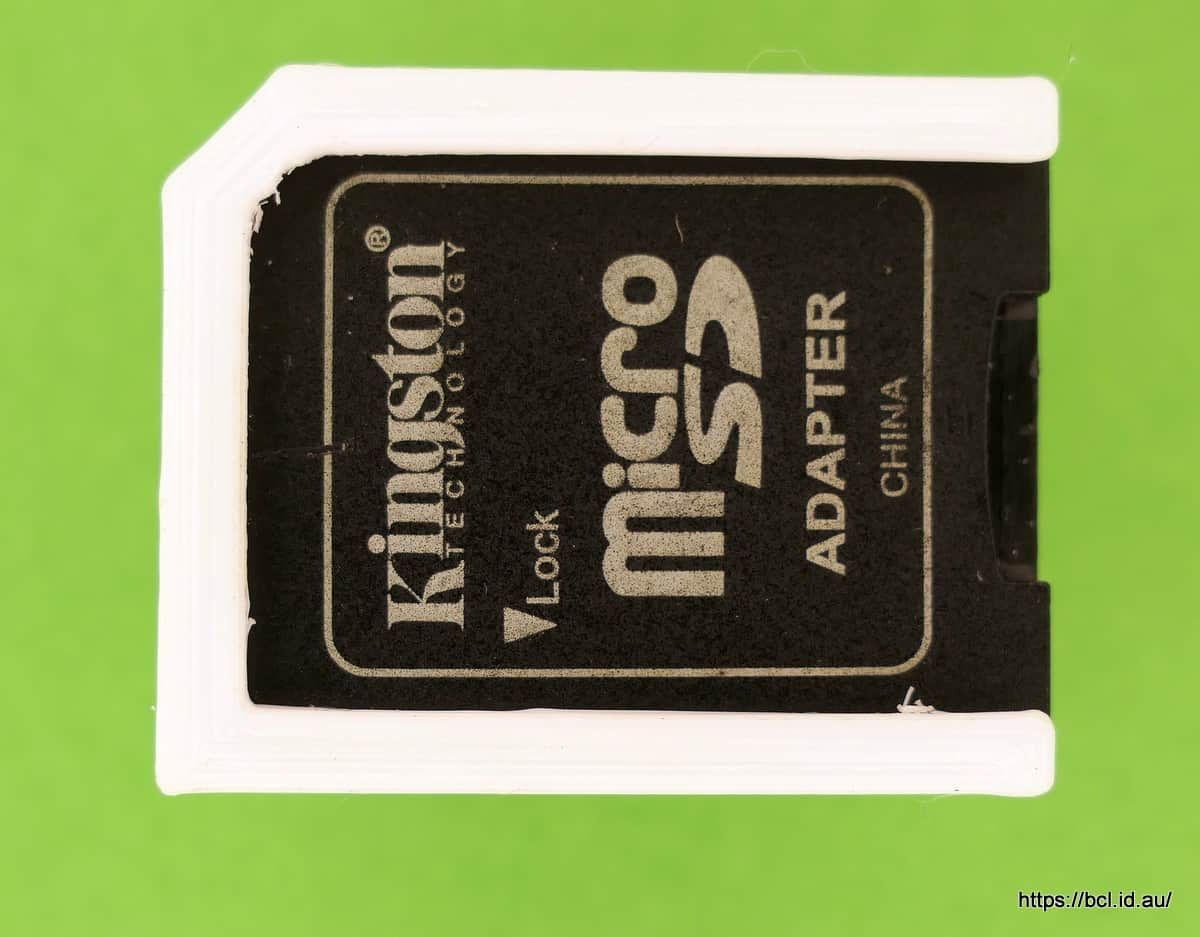
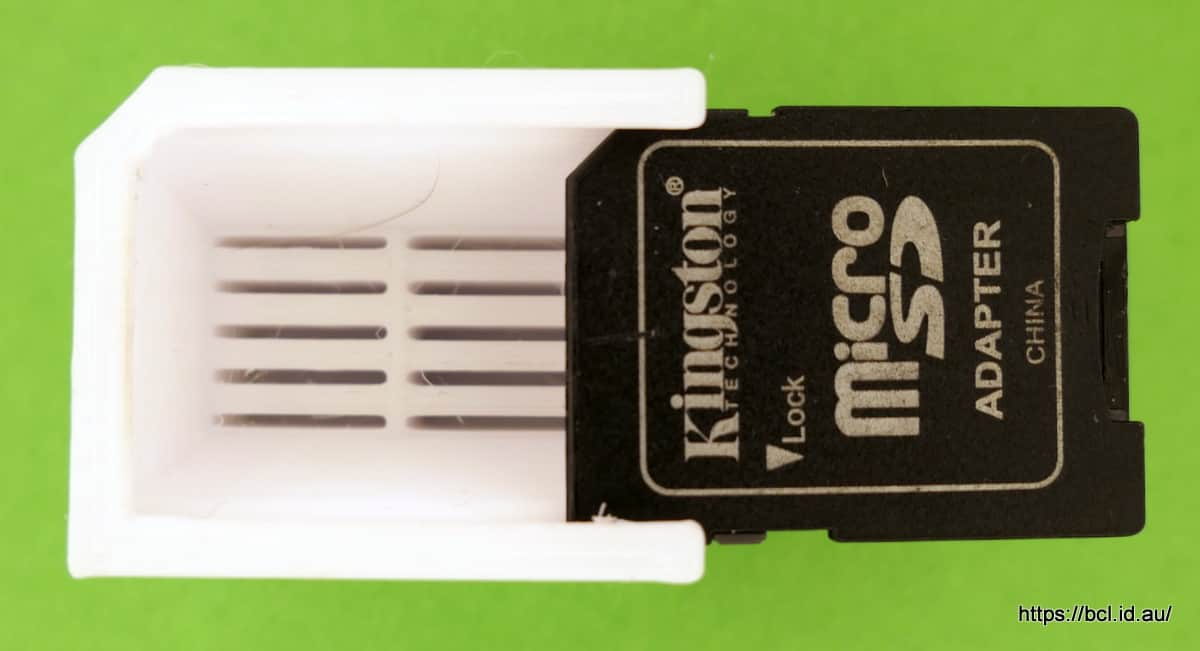
Recently I was browsing and I came across this rather clever box to hold Micro SD Cards but what I thought was particularly clever was that it used a SD Card Adaptor as a lid. I downloaded the file and printed one for my Micro SD cards.
This got me thinking about making one for my SD cards, perhaps using a box making module I had worked on earlier. Googled the exact measurements for an SD card - they are 32mm by 24mm by 2.1mm if you are interested. I am still learning OpenScad so I can’t make anything quite so sophisticated as that box.
After a couple of hours work in OpenScad I came up with this:
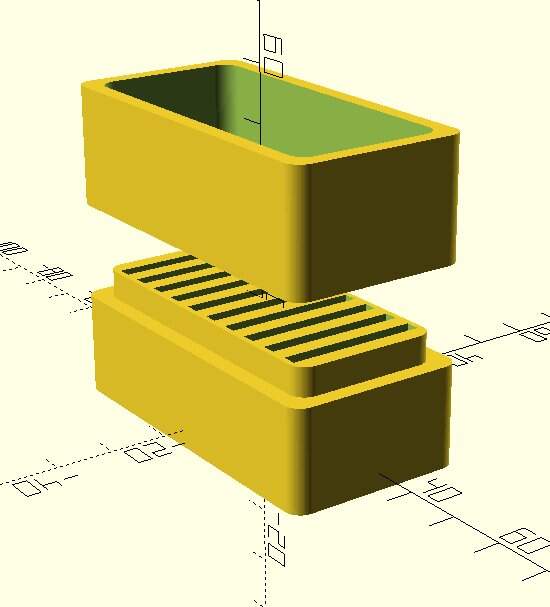
The lid is moved to the bed of the printer in the slicer, obviously you couldn’t print it in mid air.
This is the code:
//SD Memory Card Holder Box


//Variables

sltw=24.5; //Width of SD card +.5
sltl= 2.5; //thickness of SD slot
thk=3;     //Box wall thickness
gap=3;     //gap between slots
sdh=20;    //inner holder height
crnr=3;    //corner radius


sltno=10;   //Number of slots
inw=sltw+thk; //Inner holder width <<<???
cseh=sdh-thk; //outer case height

bsew=sltw+2  ; //width of slot module
bsel=(sltno*(sltl+gap))+gap  ; //length of slot module

//End variables

$fn=100;

//Outer case

union(){
    difference(){

         hull(){
                boxshape(
                    l=(bsel/2)-crnr +thk,
                    w=(bsew/2)-crnr +thk,
                    ht=-thk,
                    h=sdh-2,
                    r=crnr);
        }

        //Inner cut away
        hull(){
                boxshape(
                    l=(bsel/2)-crnr -.2,
                    w=(bsew/2)-crnr -.2,
                    ht=0,
                    h=sdh,
                    r=crnr);
        }
    }
}


//Inner holder
difference(){
     hull(){
            boxshape(
                l=(bsel/2)-crnr,
                w=(bsew/2)-crnr,
                ht=0,
                h=sdh,
                r=crnr);
        }
//slots

    for(t=[0:gap+(sltl):(gap+sltl)*(sltno-1)]){
        translate([t-bsel/2+gap,-bsew/2+1,0]){

        cube([sltl,sltw,sdh+1]);
    }
    }
}


//Lid


union(){
    difference(){

         hull(){
                boxshape(
                    l=(bsel/2)-crnr +thk,
                    w=(bsew/2)-crnr +thk,
                    ht=35-thk,
                    h=33-sdh+2+(thk*2),
                    r=crnr);
        }

        //Inner cut away
        hull(){
                boxshape(
                    l=(bsel/2)-crnr +.1,
                    w=(bsew/2)-crnr +.1,
                    ht=35,
                    h=sdh,
                    r=crnr);
        }
    }
}

//ht moves whole object up or down
//h is the height of the object

module boxshape(l,w,ht,h,r){
	translate([l,w,ht]) {
	cylinder(r=r,h=h);
	}
	translate([-l,w,ht]) {
	cylinder(r=r,h=h);
	}
	translate([-l,-w,ht]) {
	cylinder(r=r,h=h);
	}
	translate([l,-w,ht]) {
	cylinder(r=r,h=h);
	}
}
The maths was the hard part, just getting all the bits in the right place. In fact I didn’t allow enough to make the lid fit easily, it is a bit tight, if I make another I can correct that.
I like using variables because just my changing one it will create a box for 20 cards or just 5 cards, anyway this is the finished product hot off the press
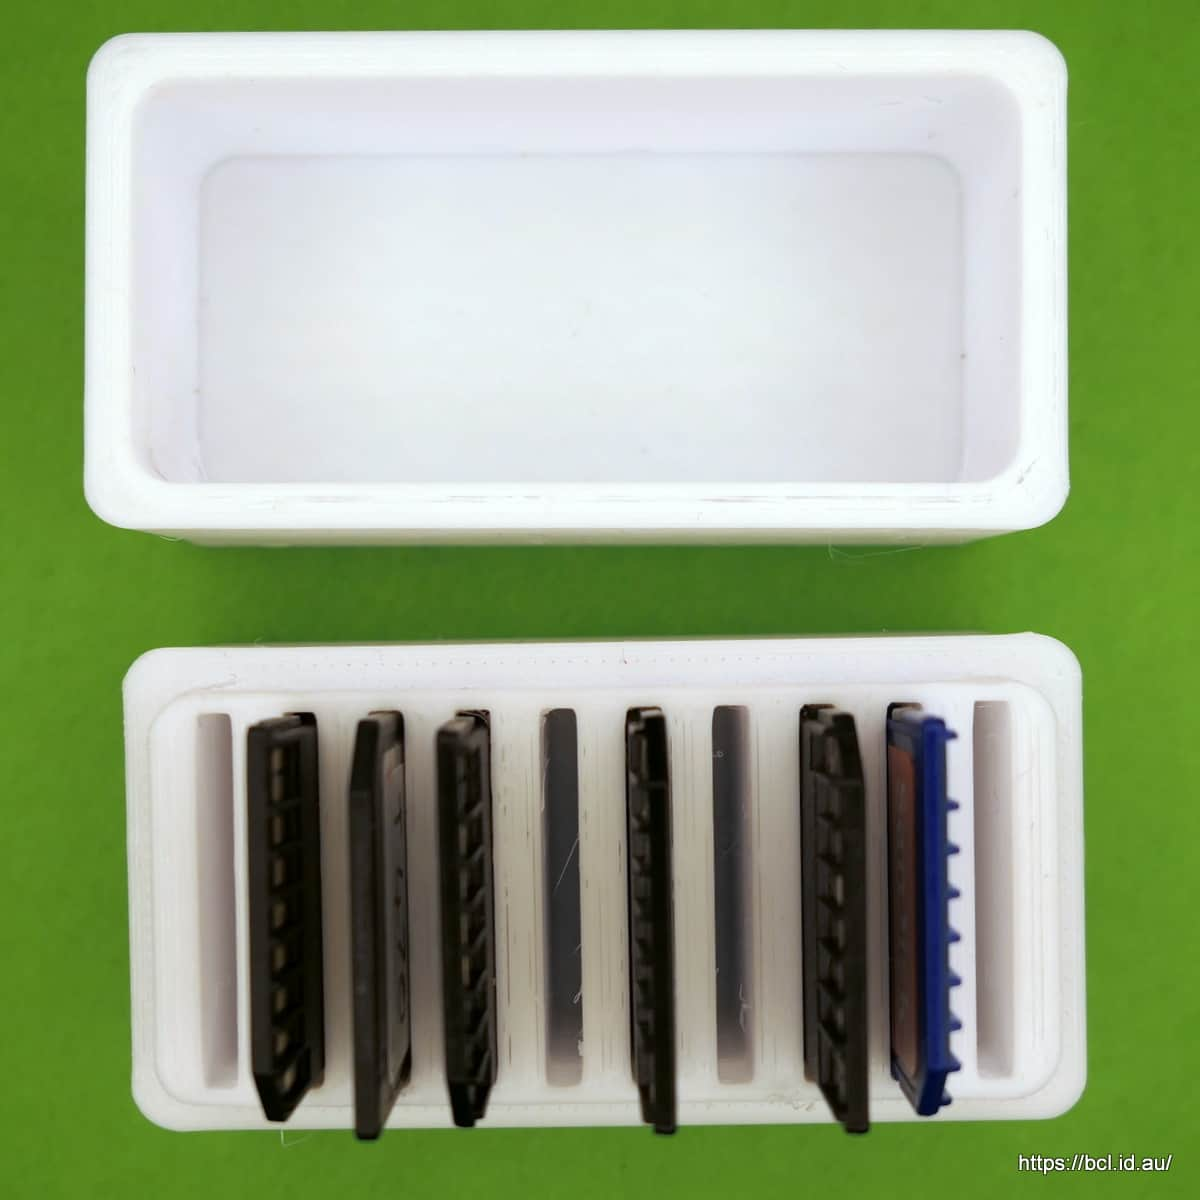
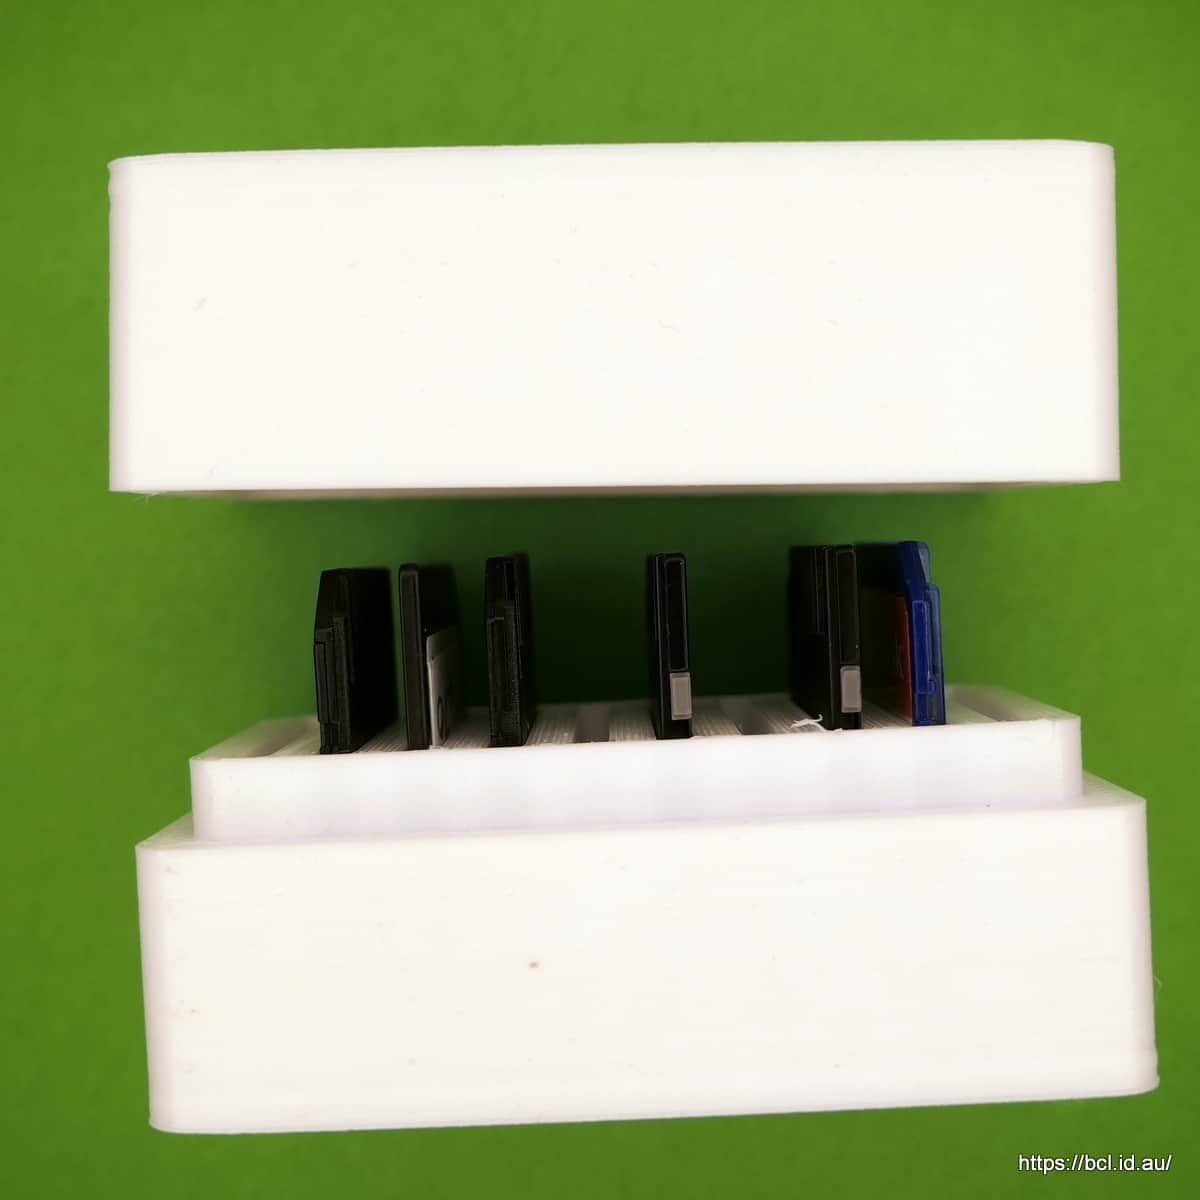
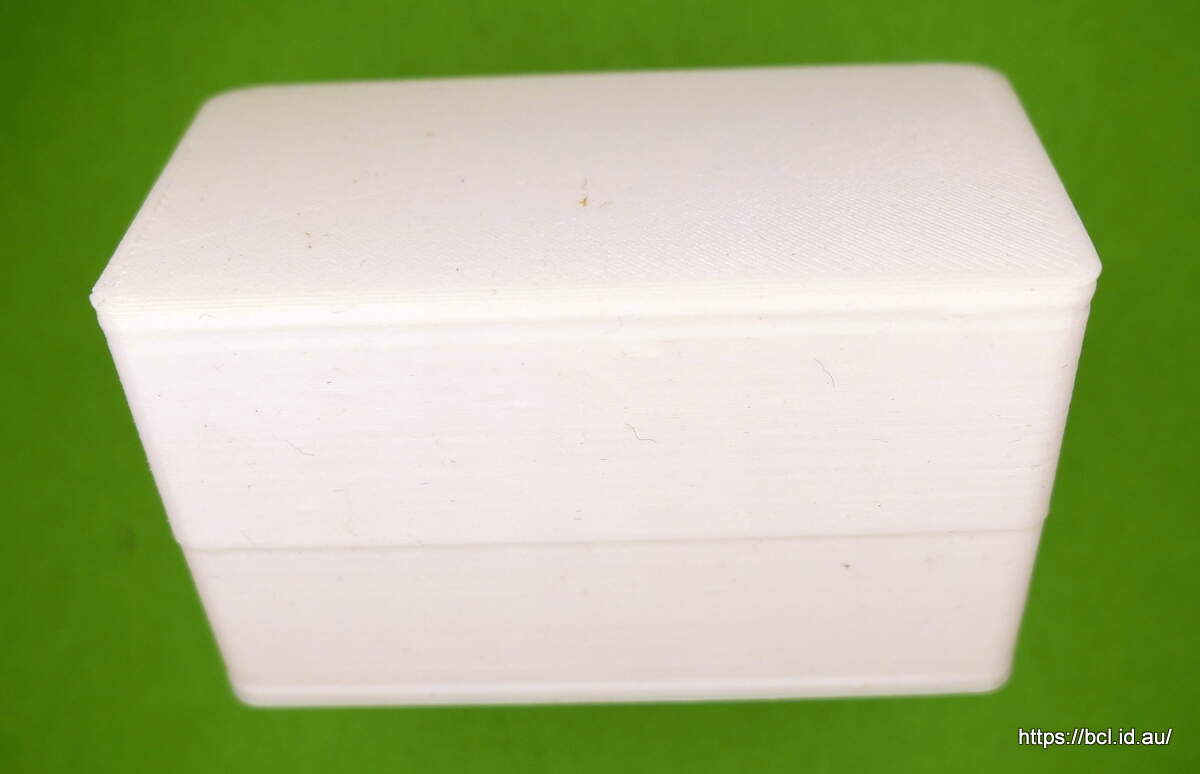
BTW that was printed in PETG and I haven’t quite got the settings right but that was what was in the printer, it would look better in PLA