Wood Turning Lathe repair

My son-in law has mental health issues, but he found that wood turning helped calm his mind. It also turns out (pun intended) that he is very good at it.
Unfortunately, part of his lathe suffered damage and was put out of action as a result.

Yesterday my son brought me the damaged part to see if it could be repaired. More importantly, my son-in law came as well. This was a breakthrough as it was the first time he has been outside his home in two years. Because of this, it was immediately apparent how important it was to get his lathe working again.

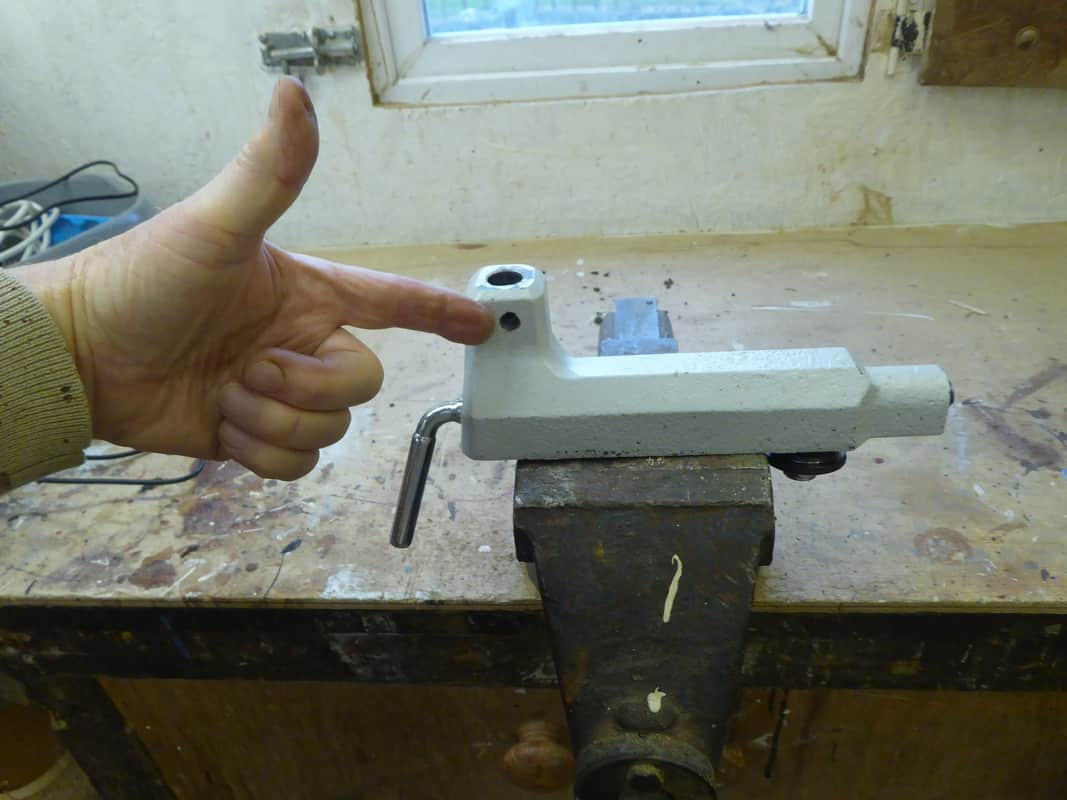
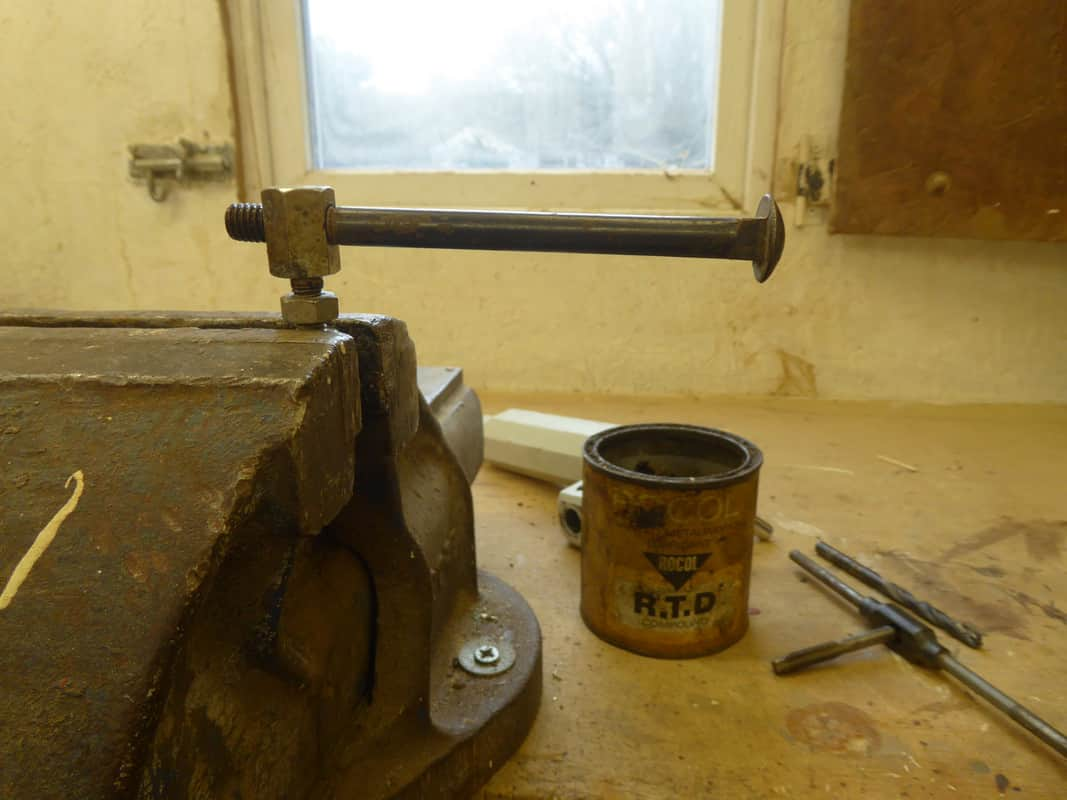
This is the damaged part. The tool rest is T-shaped and looks a bit like a car windscreen scraper. It has a spigot that fits in this hole.

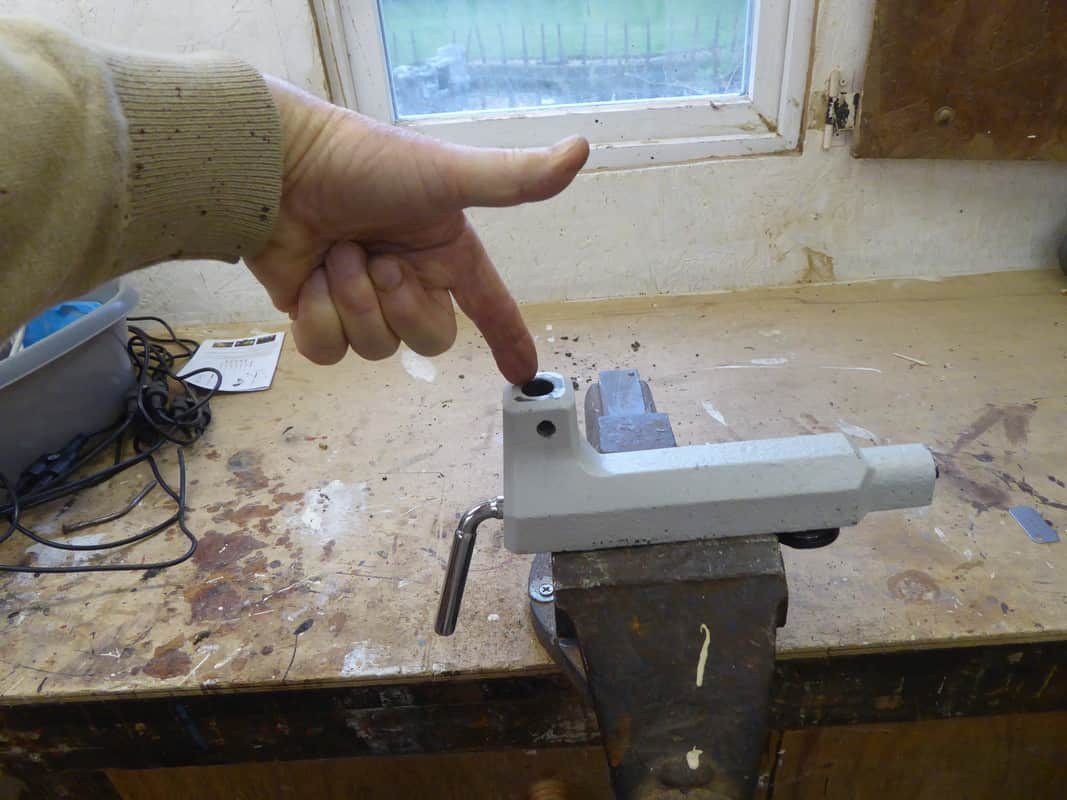
It’s locked in place by a handle that screws into this threaded hole, but unfortunately the thread had stripped. It was a cheap lathe, and the metal quality is not very good. This damage means that the tool rest could move causing the tool/chisel to grab or be thrown out which could cause serious injury.

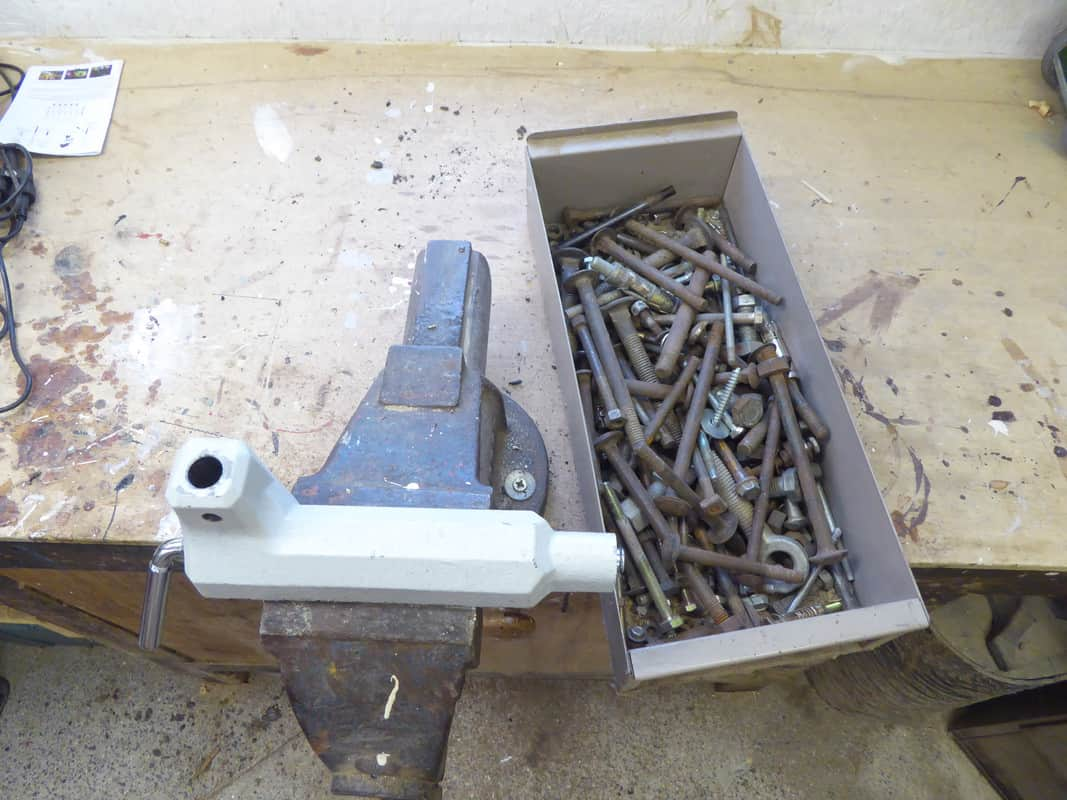
It needs a new locking handle, and to do this it needs a bigger hole with a new thread cut in the body of the tool rest holder. I wonder if there is something in my junk-box that will do.

My “O” Level in Metalwork taught me that the softer the material, the coarser the thread should be. This old coach bolt and nut affair with a 3/8ths Whitworth thread (16 Threads Per Inch) should do nicely.

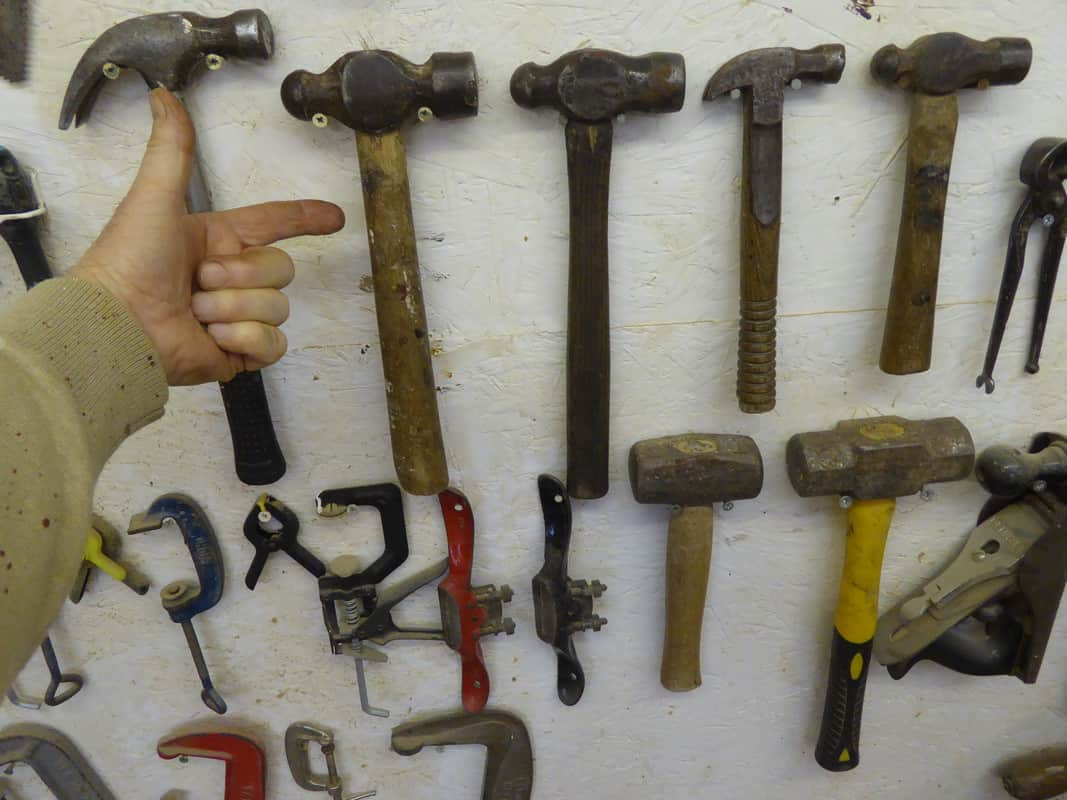
I broke out my trusty thread cutting kit, bought nearly fifty years ago for ÂŁ3.25. I know, they saw me coming.

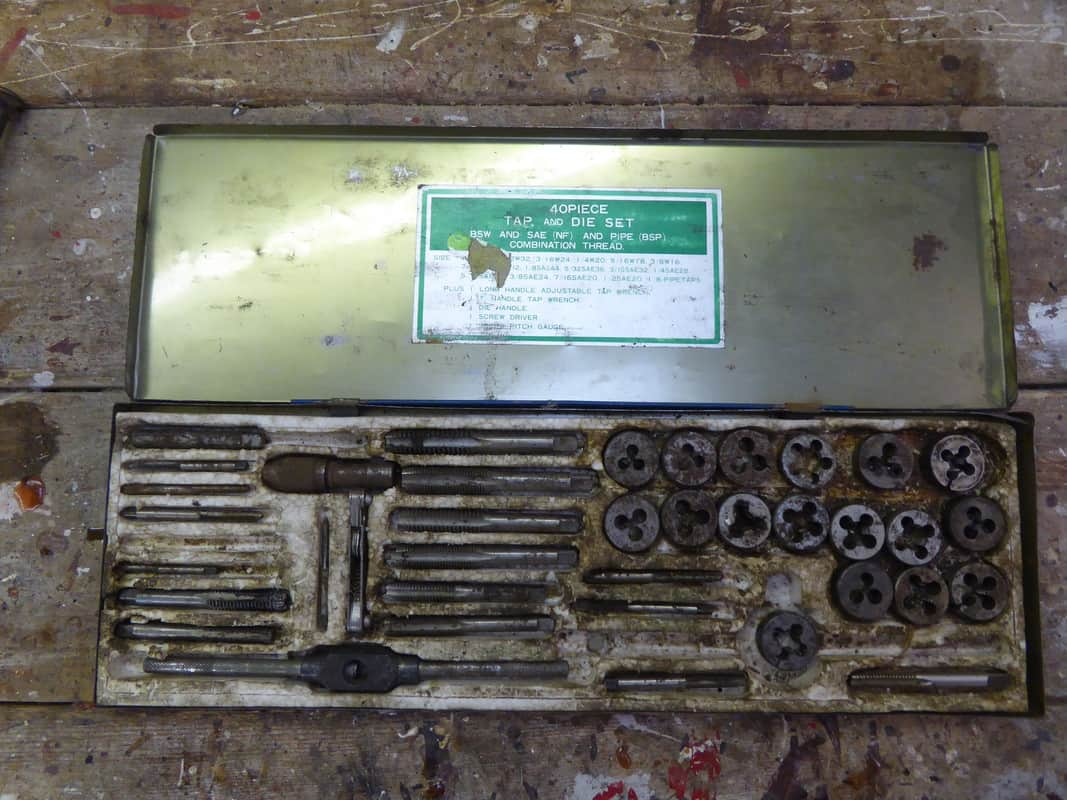
Next I drilled the old hole out to the new tapping size, liberally applied cutting compound, then tapped a 3/8ths Whitworth thread into the workpiece.

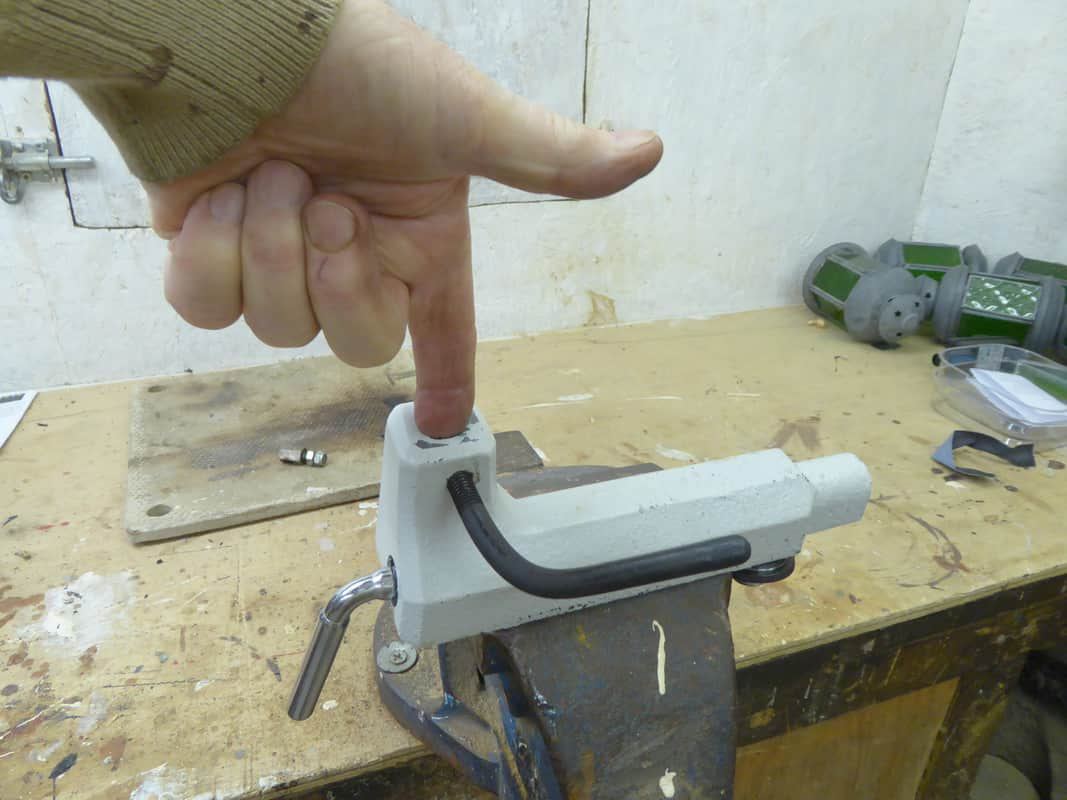
A perfect fit. Note that the bolt is not square to the job because the original hole was not drilled square. I told you it was a cheap lathe.

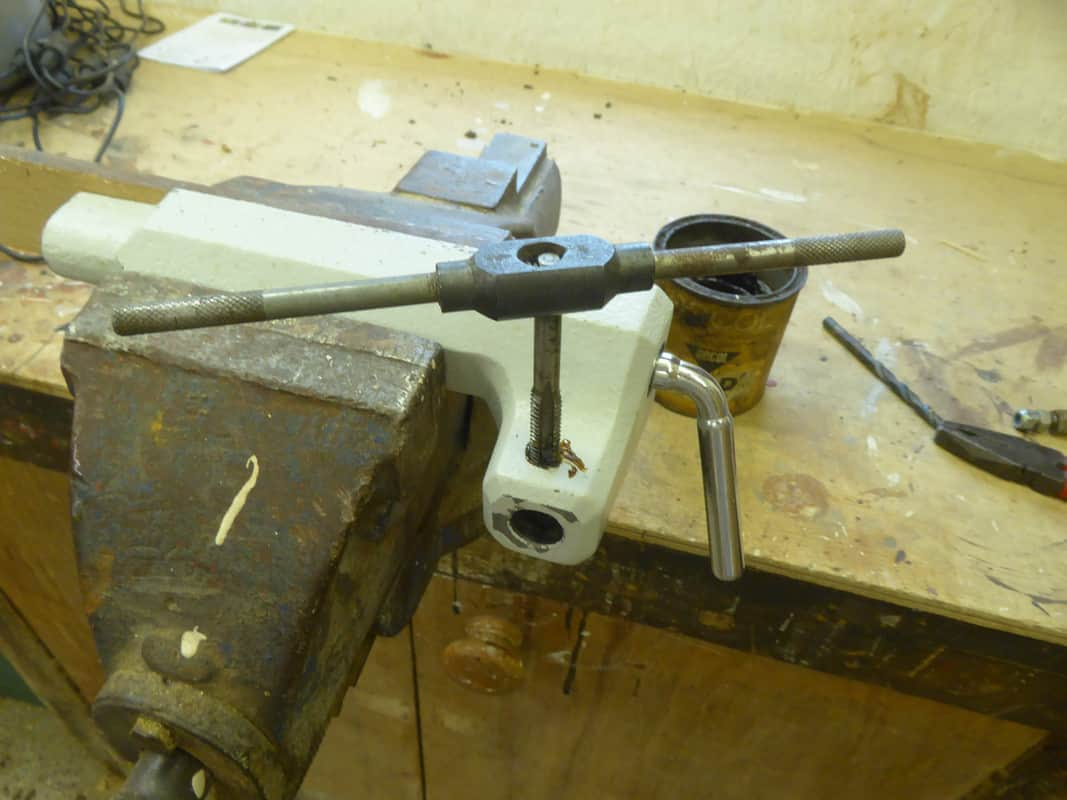
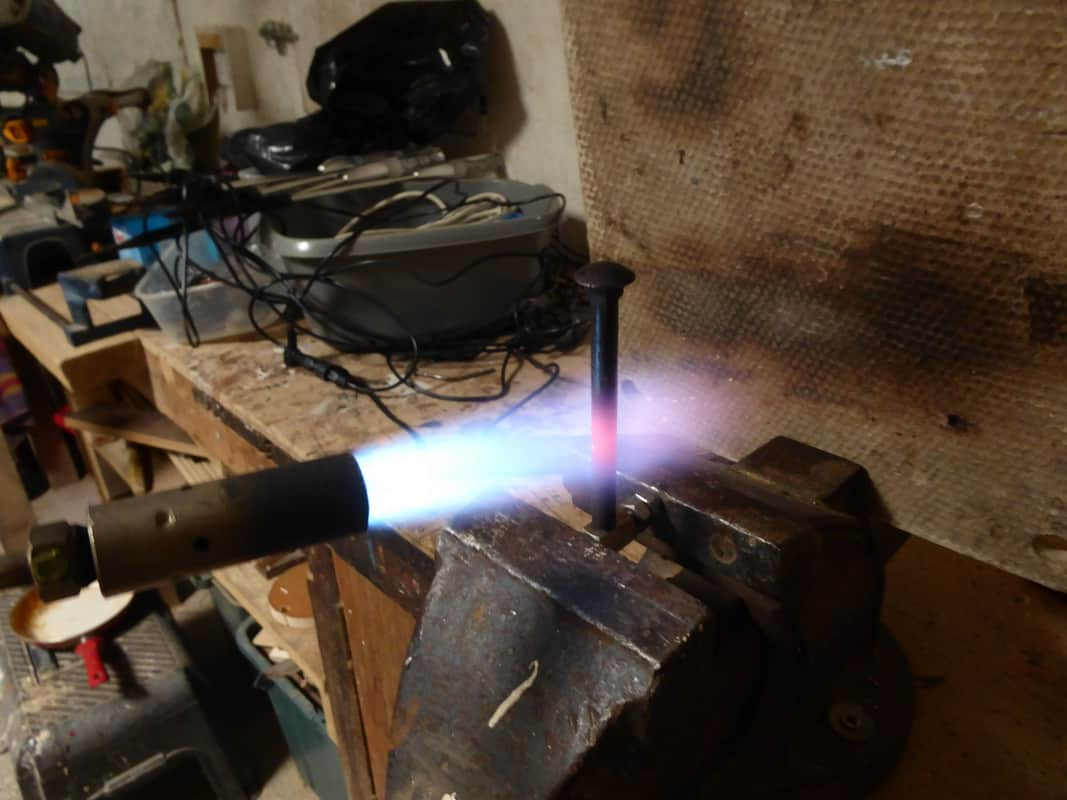
Now I needed to bend the bolt to make a handle. This one I think, belonging originally to my Uncle/FiL.

Using the nut assembly to protect the thread, I heated the bolt to soften it,

… then, still using the nut to protect the thread, I gave it a good (calibrated) whacking.

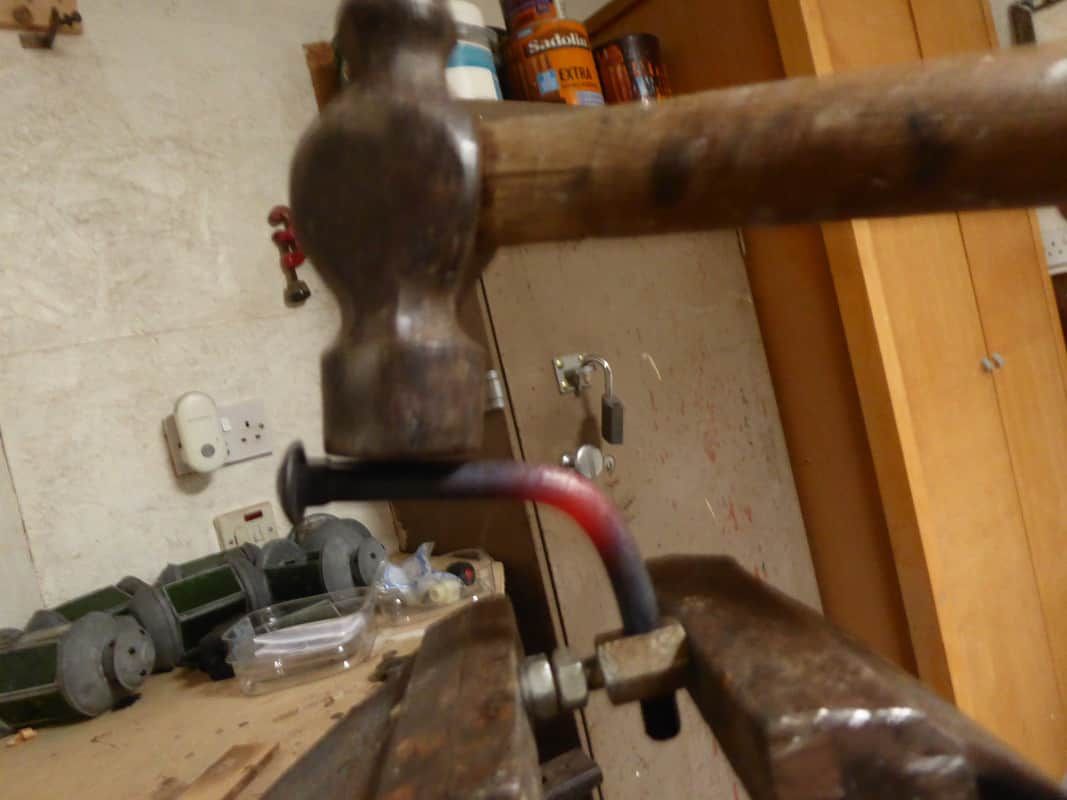
More important than having the correct tools for the job is having the correct PPE.

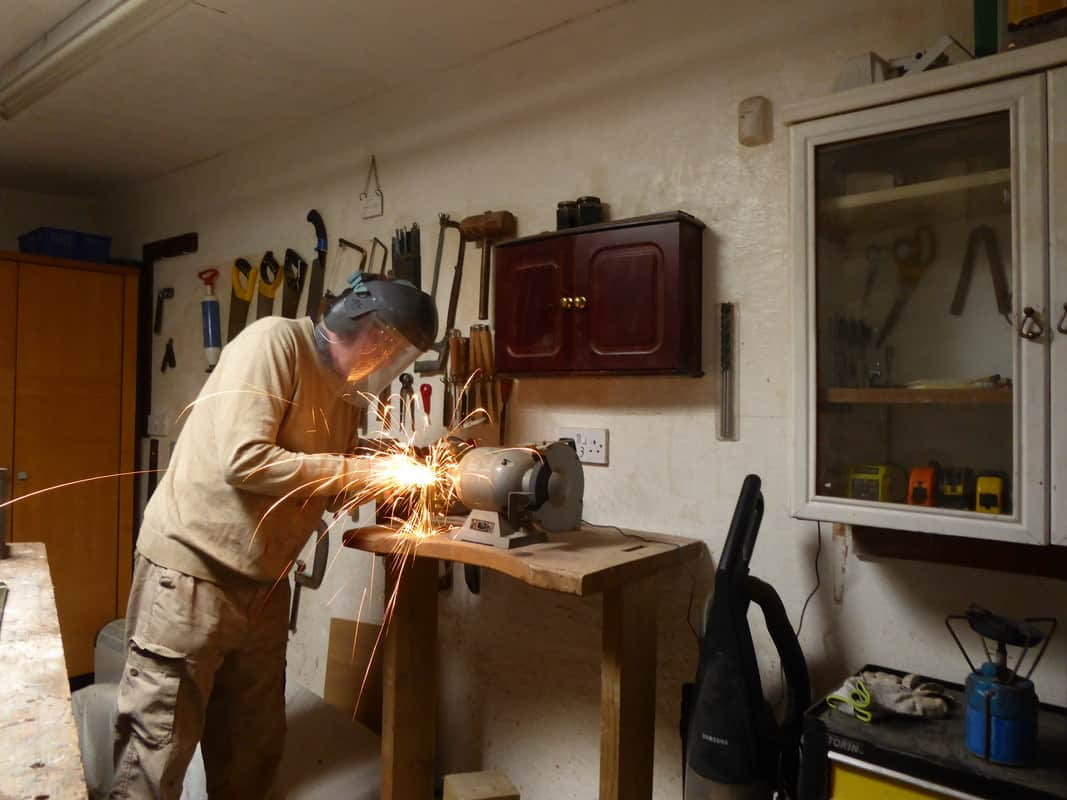
The mushroom head on the bolt would be uncomfortable, so I did a bit of cosmetic surgery upon it to give it a more ergonomic feel.

Another thing I learned in the forge at school was something called oil-bluing, to give a degree of corrosion protection.
First, heat the workpiece up until it is cherry red,

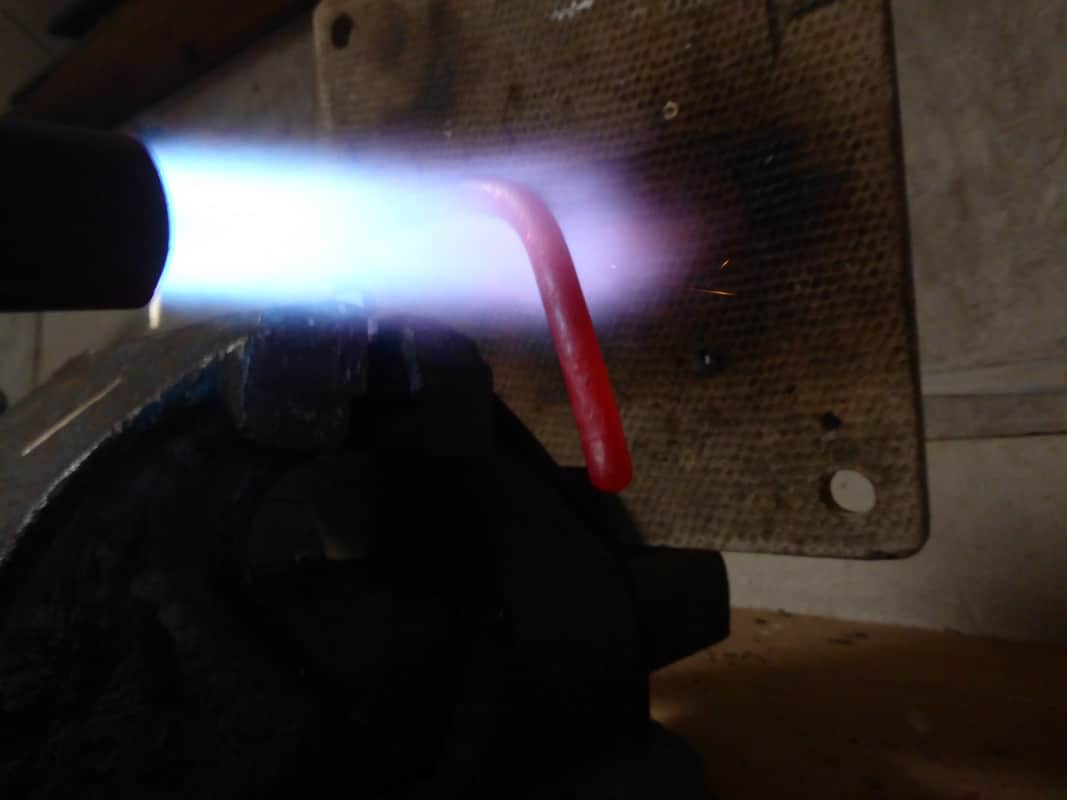
… then quench it in oil. (Sorry about the shaky camera shot, but you try shifting a piece of red hot iron one handed and operating a camera at the same time with the other hand!)

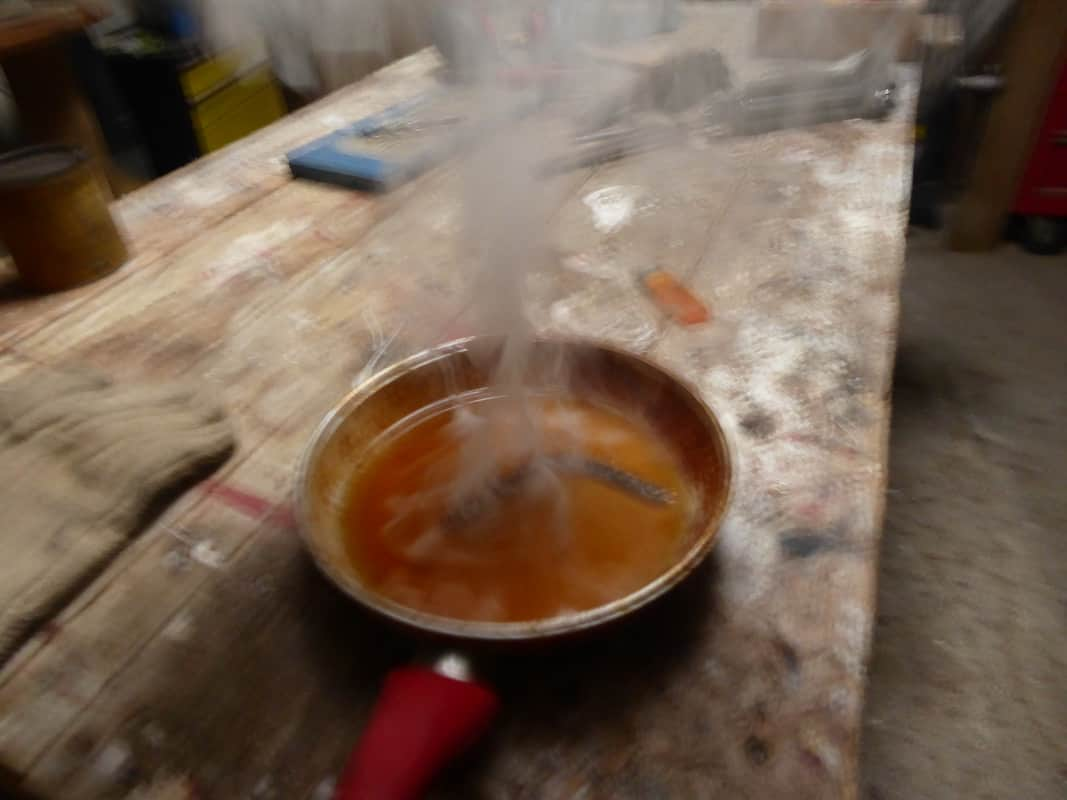
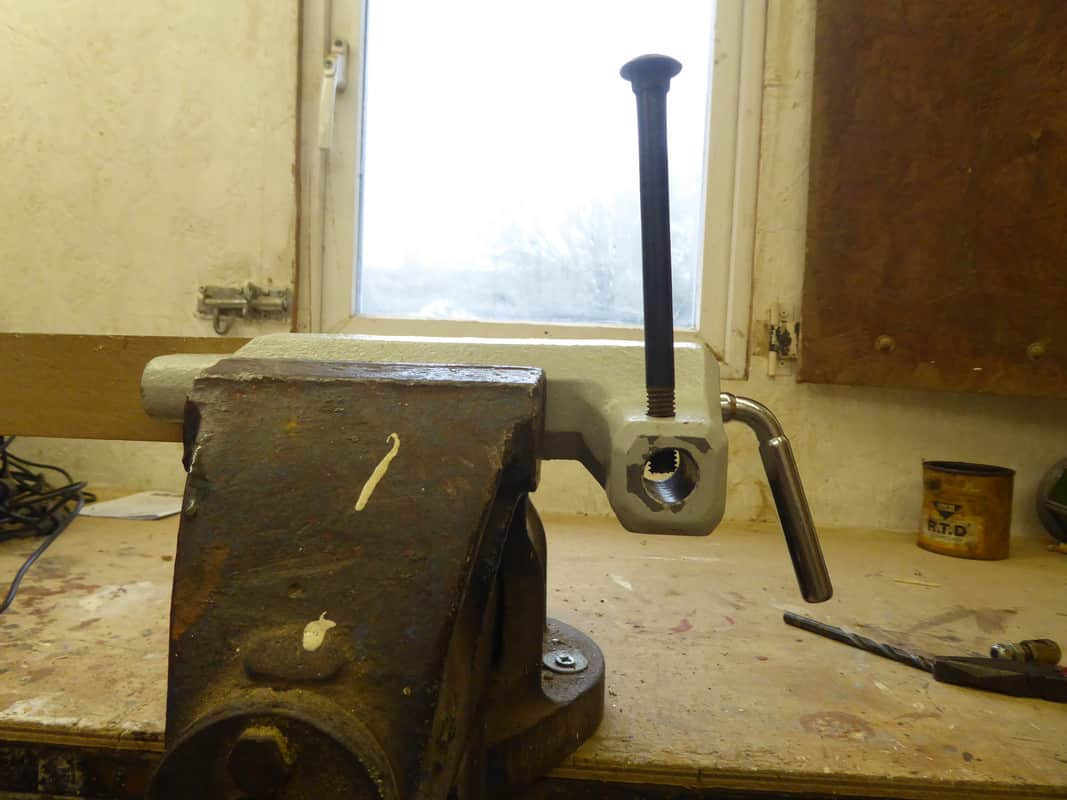
All done, with a nicely rounded end.

I’ll take it back to my son-in-law at the weekend.

As an aside, does anyone recognise what my temporary heatshield is made from? Millions of these were made and fitted to millions of homes. My house was built in 1960, and still has one in place.

1 Like

No idea but how skilled you are FC :slight_smile:

1 Like

This is brilliant work, and most especially meaningful too. I am sure your SIL was thrilled that you were able to get the lathe up and running again.

I was particularly interested in the threading kit. My dad, gone two years now, has a virtually new one exactly like the one you showed, and I never really knew what it was for, so now you have me inspired to figure it out. I remember admiring it when I was younger.

That one part required learning a lot of skills over the years. Bravo! :038:

1 Like

I’m sure you can find some “How to” videos on the internet to help you. Household oil or nearly any type of grease will work as a cutting lubricant for general DIY use.

1 Like

This is such a heartwarming story :smiling_face_with_three_hearts: And no, I don’t know what your heat shield was made with…?

1 Like

It looks like sheet asbestos cement FC and could be from an old cabinet rest for a flat iron or even an old ironing board. . that slightly mottled look reminded me of one.

1 Like

You are correct about it being made of asbestos cement. They were/are bolted/screwed to a wall for mounting a domestic 230V AC mains fuse and meter.
My dad used to pick up all sorts of things when he worked for a building society, and had to clear a house for repair and resale. This is one of the many things he brought home with him.
It’s perfect as a heat resistant table for soldering or as I have used it here as a heat shield.

This one in my house is brown.

1 Like

Another great job there you’ve done there Fruitcake. :+1:

My maternal grandfather was a toolmaker by trade and he had the most marvellous set of dies and taps anyone could wish for. Unfortunately, when he died, my uncle (his SiL) beat my father (his other SiL) and me to them.

1 Like

Yes, my first thoughts was for a meter board, but I was under the impression an order was put out for all to be replaced early on during the 70’s due to the possible health hazard. I can remember mine in Teddington being replaced and the bother due to a 3-phase incomer and the new board not quite large enough. In the end the head was changed and a single phase rig/cutout fitted as a replacement. The rambling old house was at one time four flats so I expect the 3-phase was to accommodate all the electric cookers. Iph was all I needed and wanted, so I was happy to see the conversion and neatening up :+1:

1 Like

Now there’s a nice tidy display of cable terminations. I’d have to get those tails sorted out together with the twisted earth bonding. That photo should be used at college as how not to connect up :wink:

1 Like

I couldn’t agree more. I was shocked, pardon the pun. I told my energy supplier when we had solar panels installed, so they said I would have to pay to have the tails from the terminal blocks extended because a different meter would have to be located under the consumer unit, off to the right of that piccy. The BG Alec(trician) who did the original survey organised another Alec to fit the longer tails who charged me £70 for the privilege. I contacted BG afterwards to tell them it was done, and booked an appointment for the new meter to be installed, and all cabling re-routed.
Three years on I am still waiting for them to turn up!

The whole lot downstream of the Western Power Distribution main fuse needs ripping out and replacing. I know how to do it, but I’m not licenced, so bargepole, 3,2m long, touching it, not going to.

1 Like