Light Box project

Somebody gave us this tin last chrymble. I think it originally contained tasty yet nutritious festive bisquits.

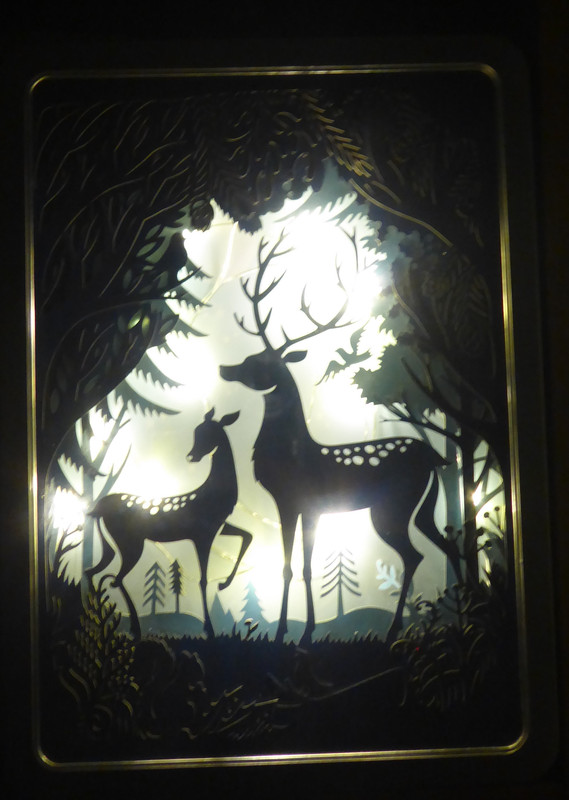
The lid is actually a thin hollow tin with three layers of thin card stamped with a woodland scene, and separators between each layer to make a sort of three dimensional effect.

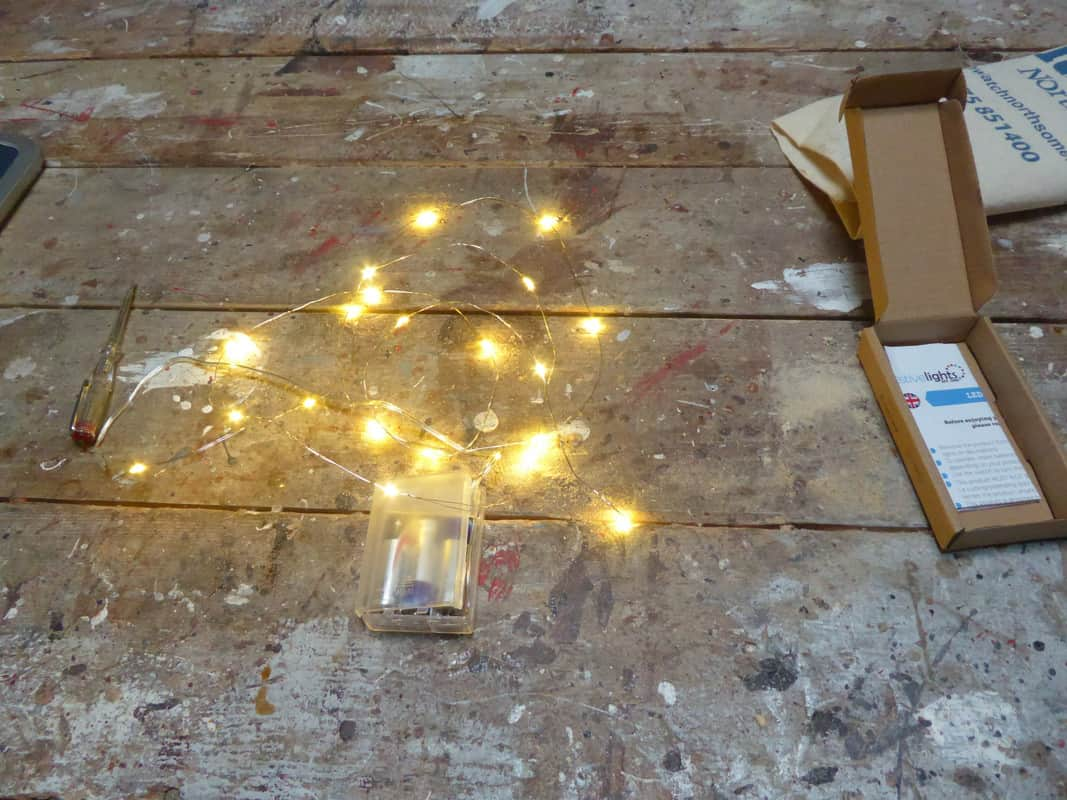
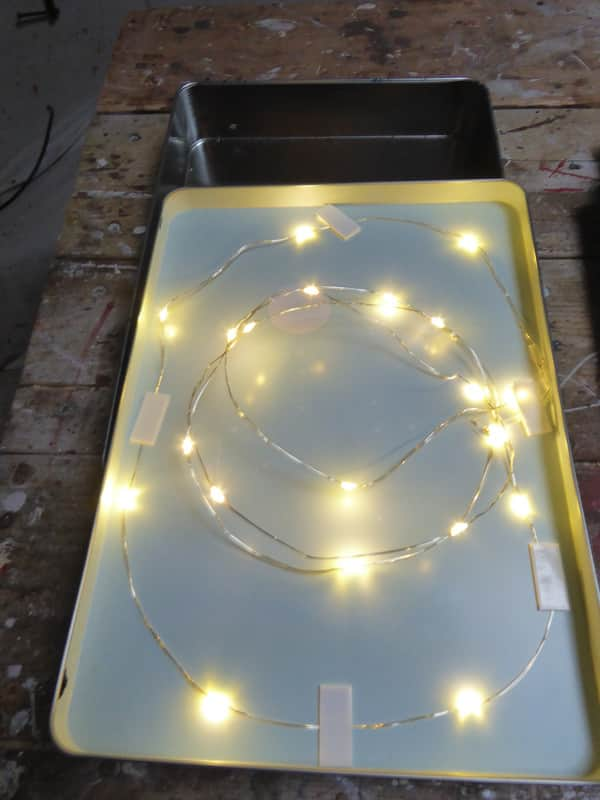
I thought it would look nice if somehow it could be backlit, so I bought this.

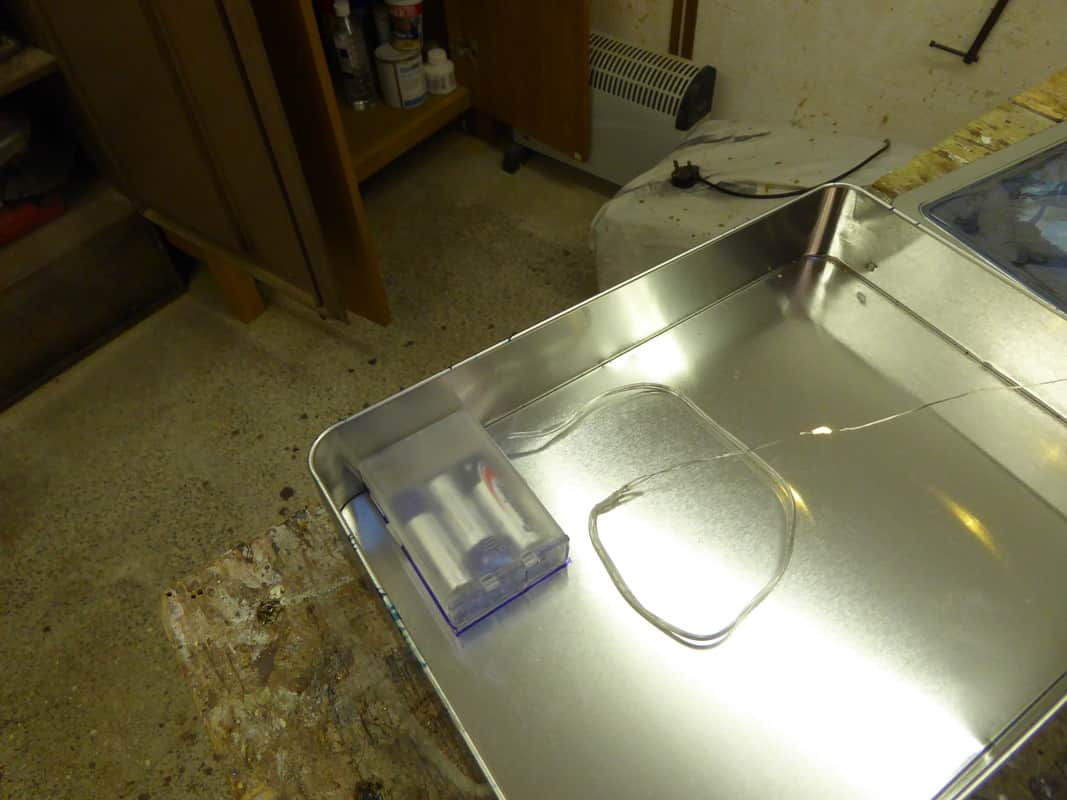
It has a switch on one end and the plan was to have this poking out through a hole in the side of the main tin so it could be turned on from the outside. The wire/light string came out a hole at the same end as the switch, so the first job was to relocate the outlet to the side. Lucky I have a box of assorted holes, so it was just a case of selecting the correct size and sticking it in place.

Just a quick blob of hot glue to hold the wire in its new position.

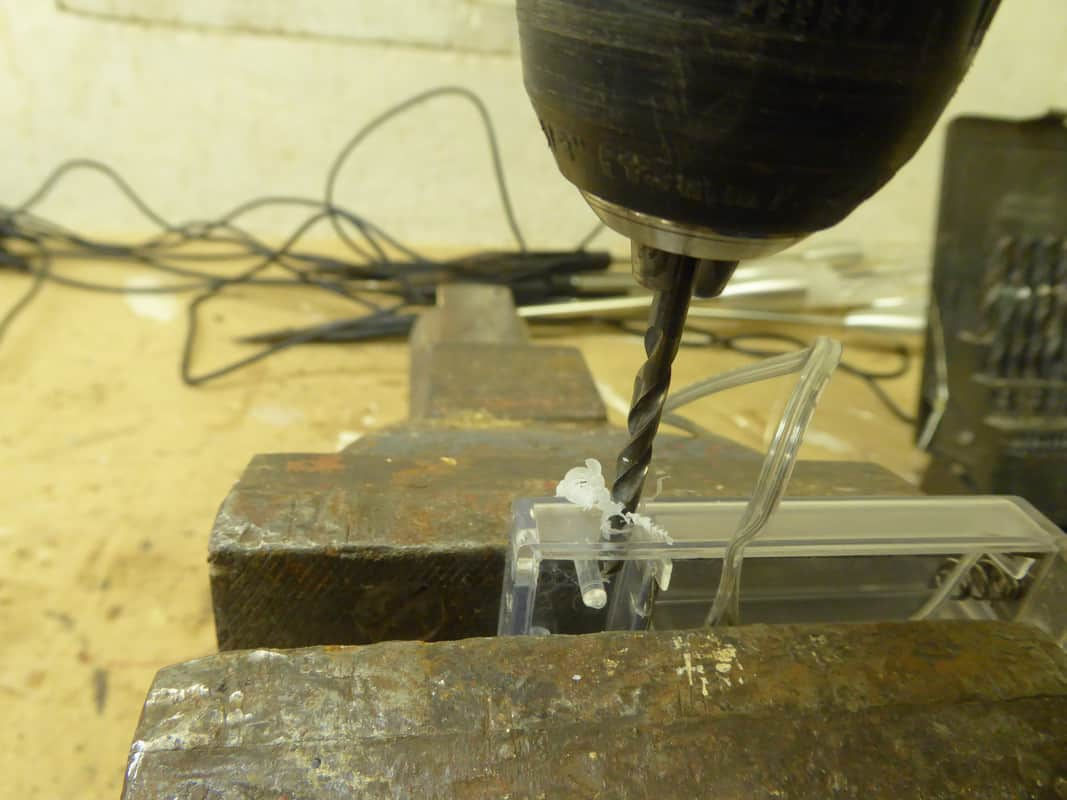
Now with the wire out of the way I could mark the switch position on the side wall of the main tin so I could install another hole there.

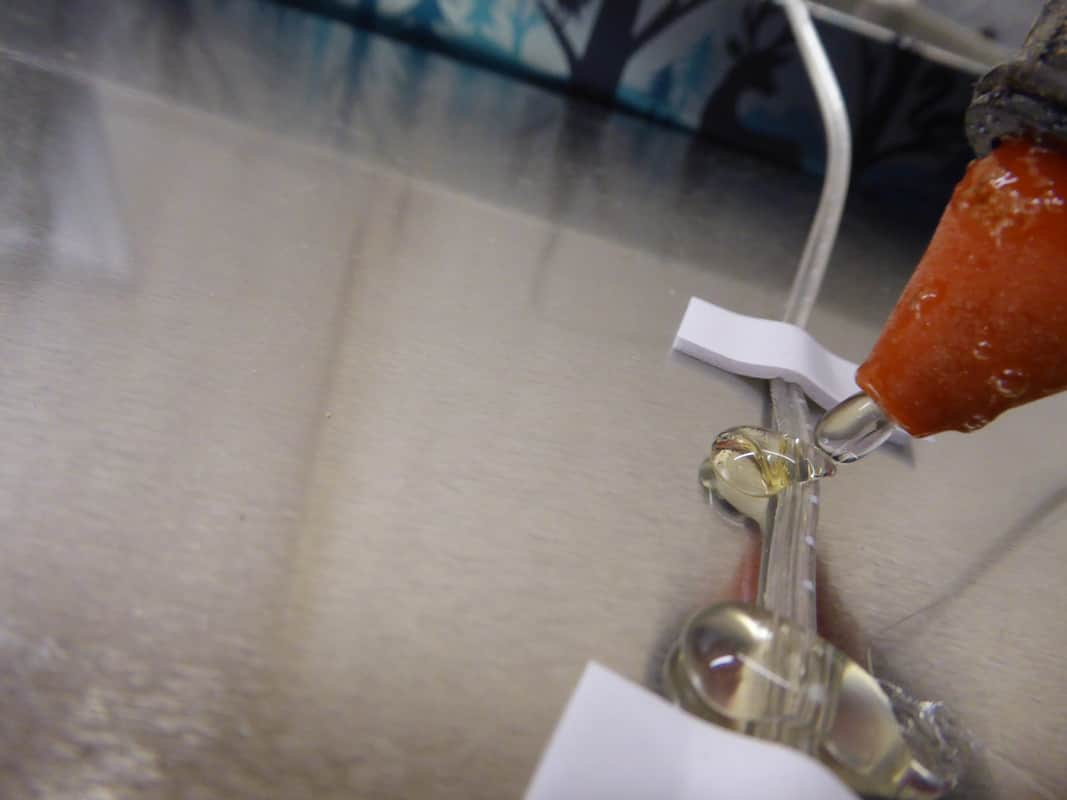
I don’t know if there is a name for it, but the trianguloid shape is a result of drilling through very thin metal that flexes and causes the drill-bit to move.

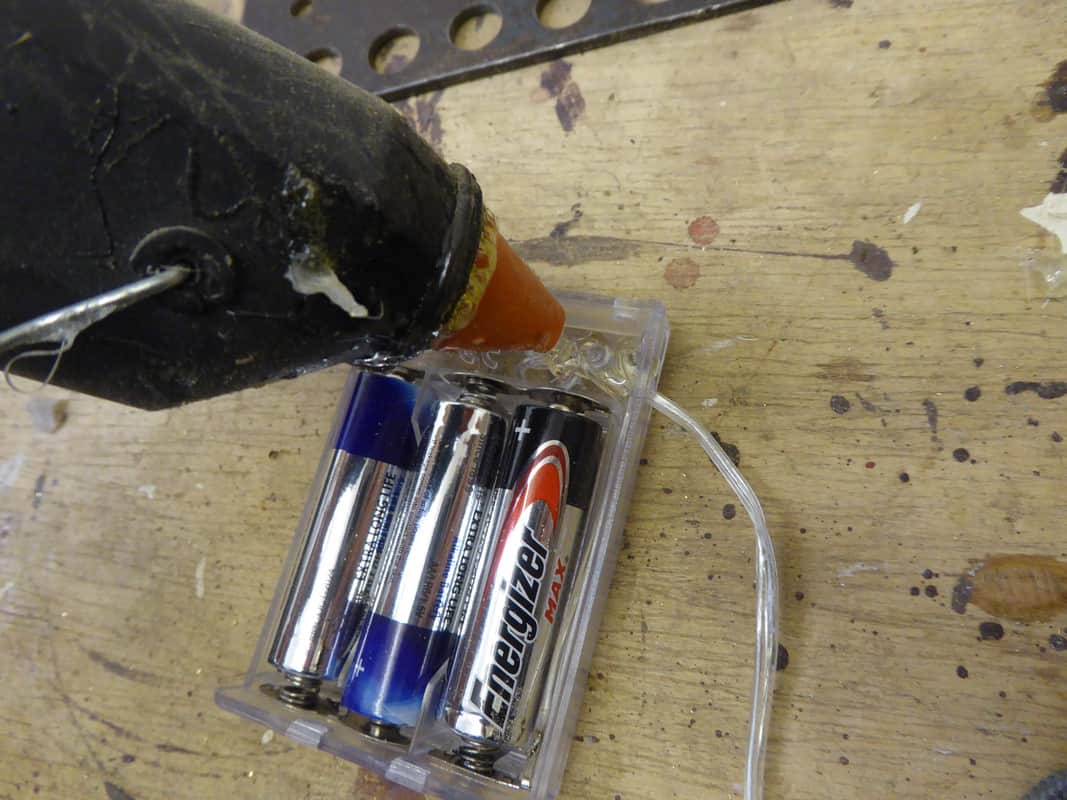
It’s very light weight so double sided sticky pads should hold the battery box in place without any problem.

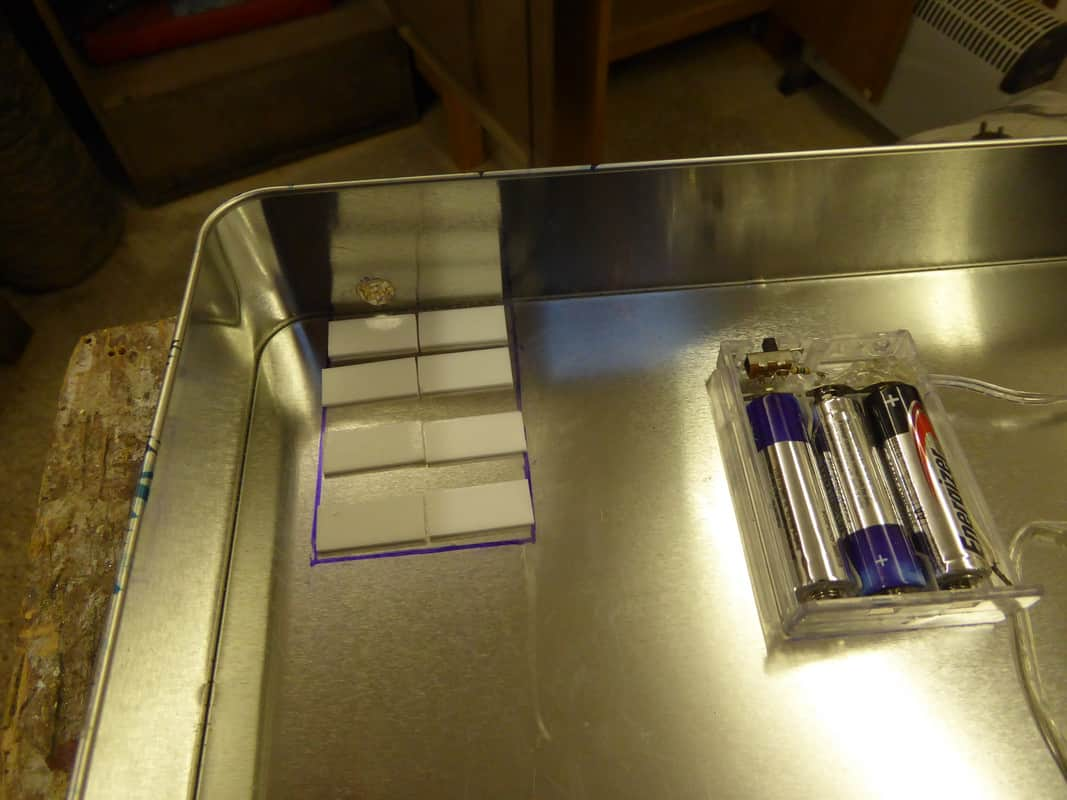
All nice and secure.

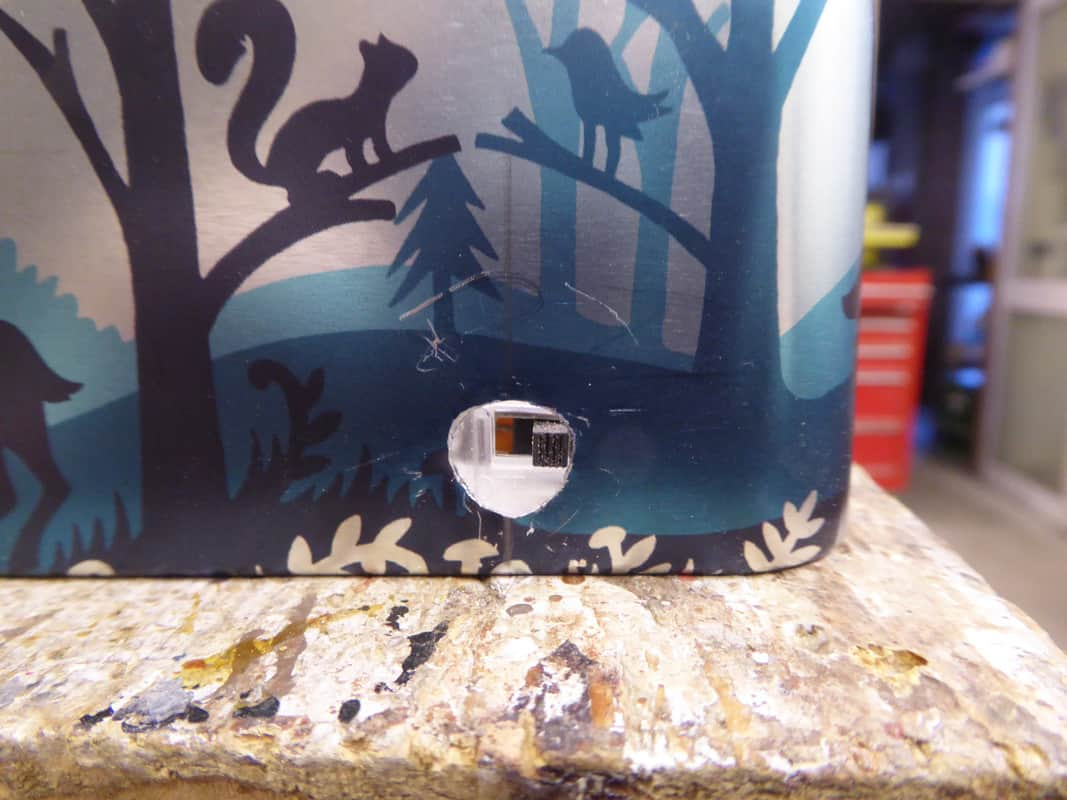
I needed another hole fitted into the back of the lid assembly to feed the wire/light string through. I then needed to secure it all in place so it wouldn’t move, but with enough slack that the lid assembly could be removed when the batteries need changing. The white disc is the moon that forms the background to the woodland scene.

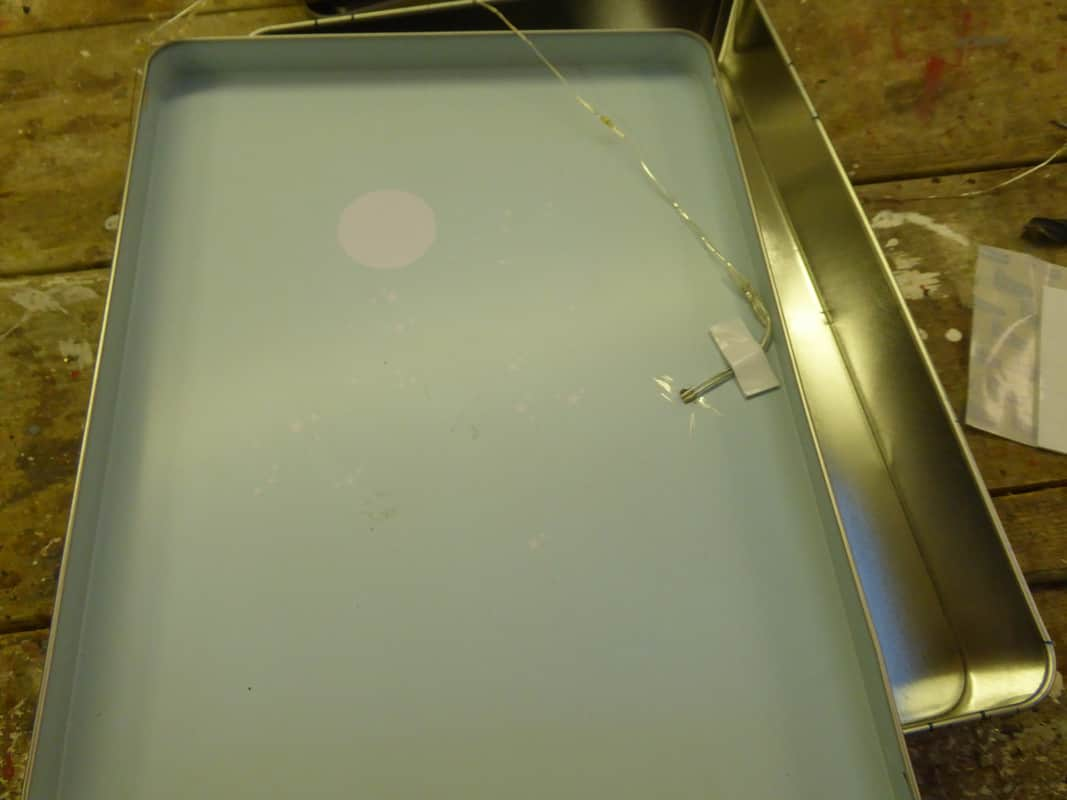
Belt and braces. I put a blob of glue where the wire comes through the tinware to stop it chafing, then more glue to hold the wire in place so it couldn’t accidently get pulled out when the lid assembly is removed.

Test firing successful.

Inserting the first layer of card.

Second layer and separator.

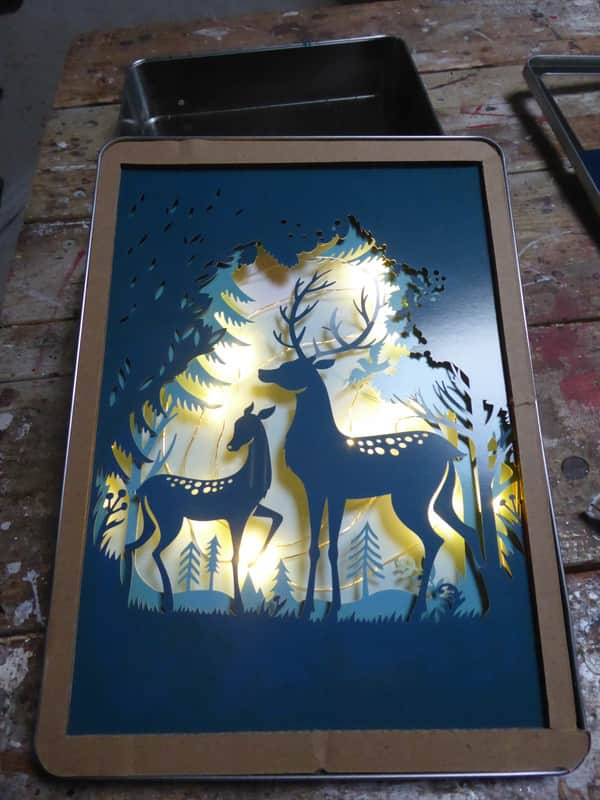
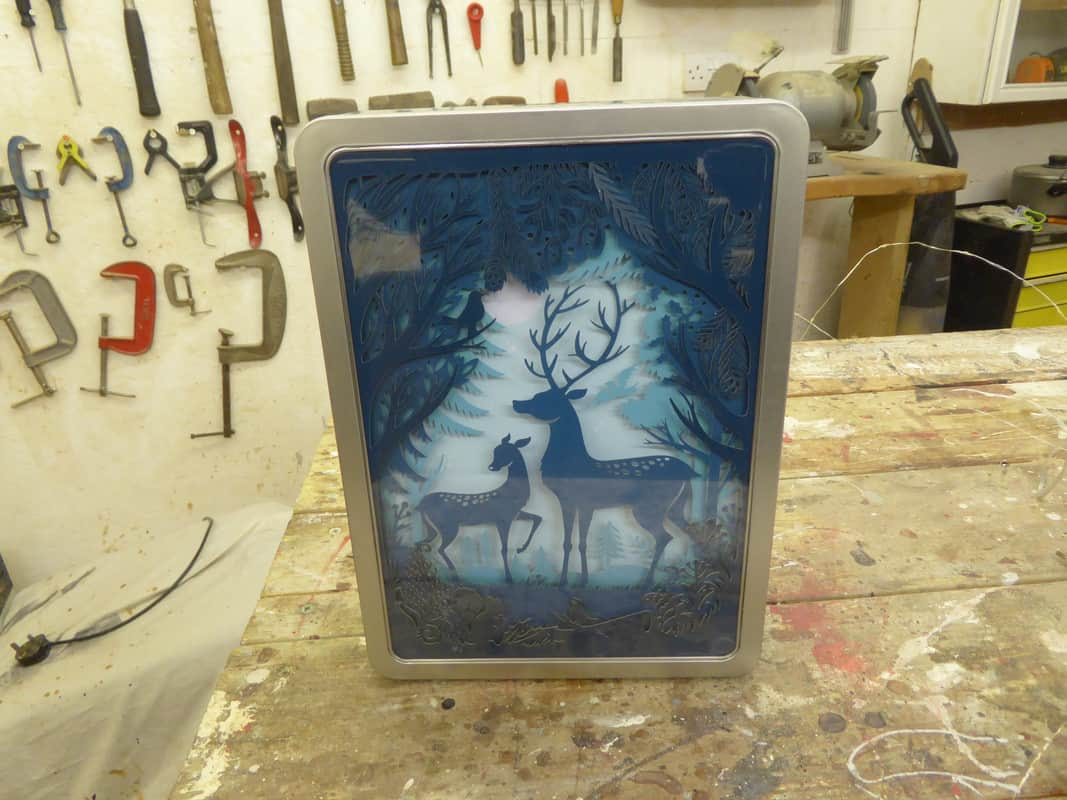
Third layer and tin-lid, then back on the shelf where it normally lives.

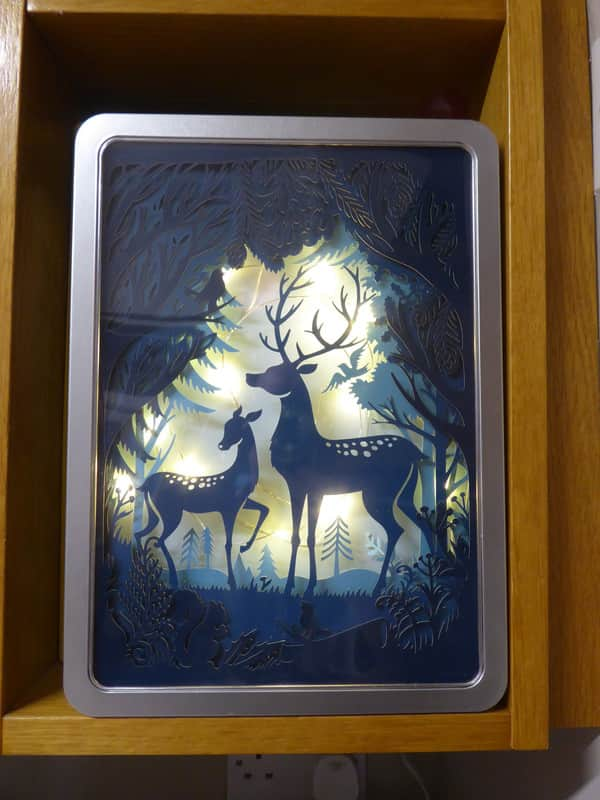
The whole thing only took me a few hours, and it cost under a fiver. My Lovely Cousin didn’t even notice it was missing, and now it’s back you can’t see the switch, so it will be a surprise when she comes down on chrymble day to find it lit up in the kitchen.

The photo doesn’t actually do it justice due to reflections, but you can still see the moon. I’ll sneak a piccy laterer when darkness descends.

9 Likes

I love the way you show what you actually do in the various stages.
I have a crafty gene I do believe but it’s been neglected of late.
Shall look out for the night photo. Wonder what we shall see from you next Fruitcake. Well done as well…

1 Like

Thanks. I now wish I had taken more photos of my past projects during the making of stage, and sadly I’ve lost some pics as well. I also lost a load of images on photobucket when it changed to a paid for service, and now I have no way of recovering them.

1 Like

I have to echo what Dianne said, and say I love the process photos! The end result is so pretty, well done!

I agree with you about photobucket…their policy’s disgust me and I too have lost photographs, due to their large adverts obscuring the screen & photo’s. :frowning:

1 Like

I think it’s great that you took us through the stages of how you achieved the end result, well done, it looks lovely.:grinning:

2 Likes

Brilliant !

1 Like

Well done Fruitcake. I wish I had your abilities.

1 Like

Fruity, you have a real flair for this! The beauty AND the practical side. And the impressive with the tool collection.

2 Likes

Brilliant Fruitcake! :clap:

Am I the only one seeing two pictures there? I see the beautiful deer in the centre but I also see two white cats, one on the left being a tabby, snuggling up together behind the deer. :grinning:

2 Likes

I had that issue once, but went in and logged in the other day and could access my old photos again…Have a try you might get in as well…
Just on there now.
It has a big sign about Hosting is not allowed but look for the manage my account, the small size letters…
It took me to the next page, where it offered me a monthly payment deal…ignore that and click where it says your photos…mine must opened up alright…
just uploaded and saved it to PB …no way though am I going back to it…the stamping alone is annoying… :flushed:

image

now that is a full on project…the end barn and makeshift ladder upwards to another world… :crazy_face:

4 Likes

Don’t know about cats, but there is a squirrel and a bird in the foreground :grinning:

2 Likes

Fruitcake! That’s so creative! Superb workmanship and I echo Di’s sentiments! It’s great to see the step-by-step process!

The end result is absolutely gorgeous! I look forward to seeing it illuminate the darkness :slightly_smiling_face:

2 Likes

Oh yes! I would never have spotted that if you hadn’t mentioned it, but now I can’t unsee them :relaxed:

@Fruitcake this is such a wonderful project, I am in awe of your skills! And like others, I love that you explain the whole process. I bet your lovely cousin was thrilled with the result :clap: :clap: :clap:

2 Likes

It’s really lovely @Fruitcake, you are so creative.

1 Like

Very good you BH must have been delighted.
I’ve never seen such an attractive biscuit tin

1 Like

Thanks for your help. It worked, but unfortunately the photos I am looking for aren’t there.

1 Like

Lovely job.

One thing you might be interested in is picking up a junked LED TV from the kerb and removing the Frensle/difuser screen.

It is specifically designed to spread light evenly over an area… You could use it together with LED tape on this or another project to add a very even backlight. The screen is rigid plastic so it can be cut (or melted). I think it would be far more effective and efficient than your card. (and cost nothing)

1 Like

Thanks everyone for your comments and suggestions.

Here is the tin with the dark turned on. It’s actually better seen in daylight because you can pick out the details better.

None of the pictures do it justice.
There are no cats.

There are three layers of card, each with a separator between them.
The first layer is made up of trees and a bird in flight just to the right of the stag’s ear.

The middle layer has the two deer and grass at the bottom.

The top layer has a bird in a tree to the left of the stag’s antlers, a squirrel rampant, underneath the young deer, and a bird singing under the stag’s forelegs.

I must stress that I only installed the lights. Someone else had already done all the hard work of making the cards and the tin.

I thought about trying to put lights between the layers of card, but the edges are so fine and delicate I was a-feared I would break them.

Sadly my Lovely Cousin spotted the lights in the tin yesterday, so it is no longer a secret, but she hasn’t seen them switched on yet.

4 Likes

I think this project is Brilliant. I accept you didn’t do the original artwork, but you have taken it another step forward and made something that was pleasant into a thing that is worth displaying on the wall.

See now I have seen that picture I just want to get in there and clean it up. My OCD is offended! :smiley: :smiley:

2 Likes