Another Project - a Project Box

I often make small electrical projects and one of the silly costs is the small project boxes that house these projects, they are not cheap so I decided to write a small Openscad program to create one of any size that was necessary and that still worked no matter the dimensions.

As it happened I came across such a design that was easy to modify to suit myself.

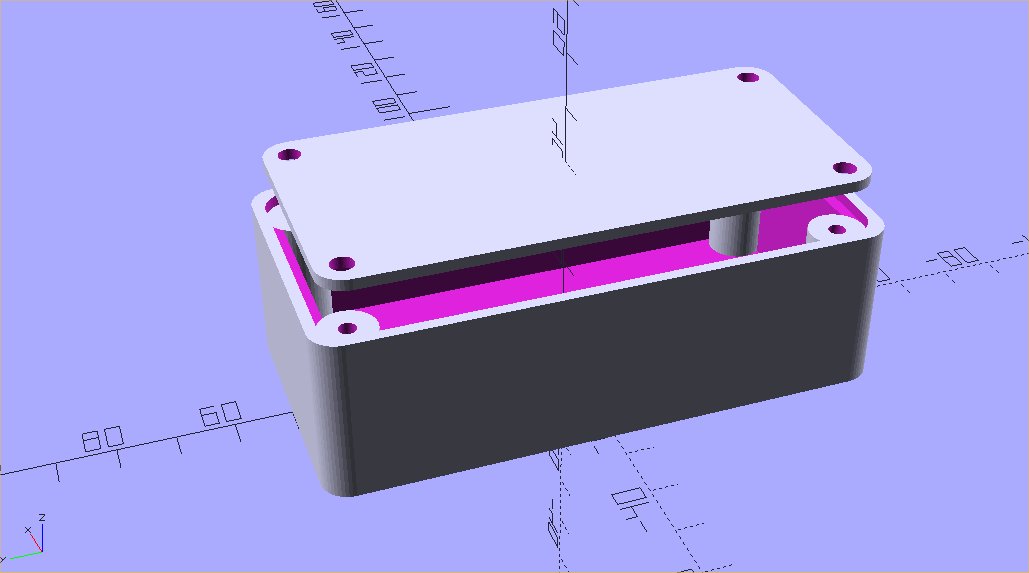
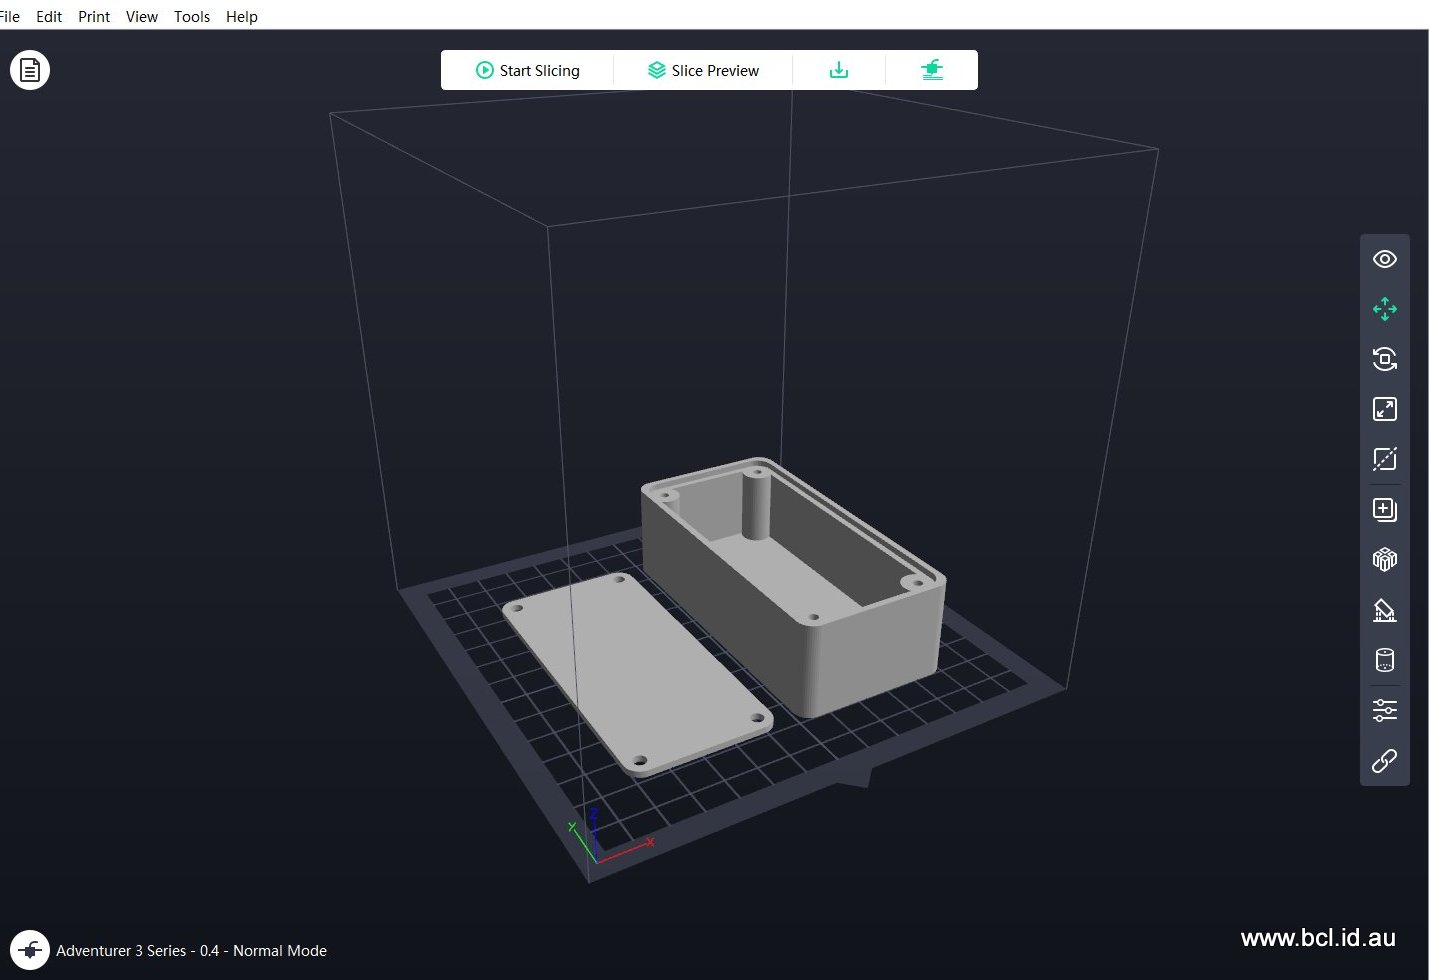
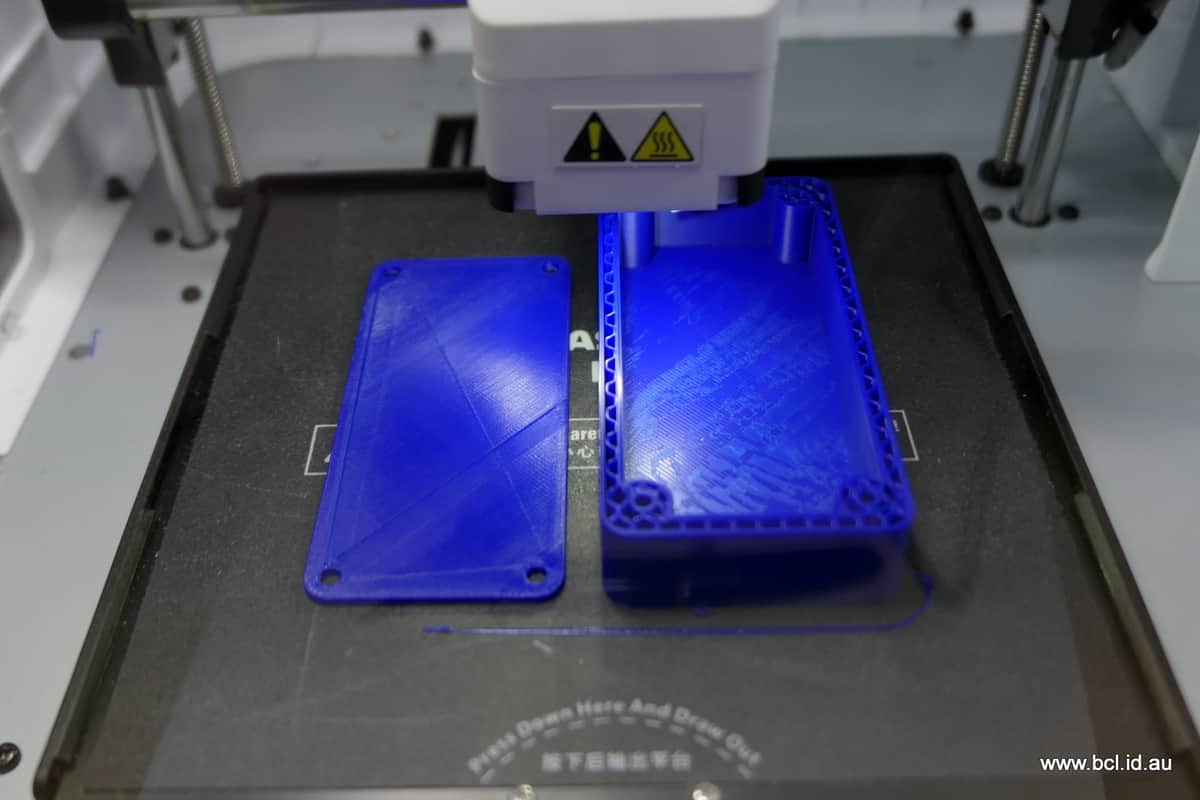
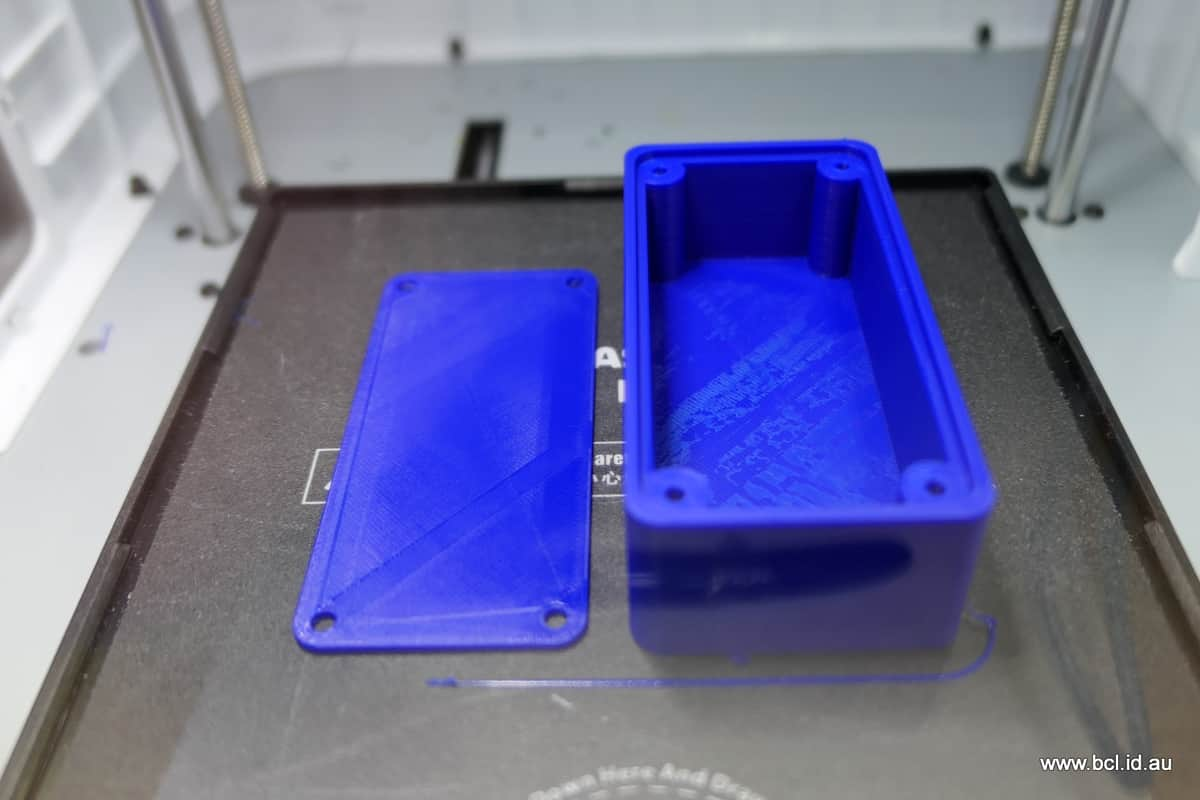
Obviously you can’t print the lid as it appears in the picture but the “slicing” software allows you to separate it and print it beside the box at the same time.

This is the code:

//Customisable box with lid

//Variables****************
//outside dimensions

width=50;
length=100;
height=30;

//Other variables (in mm)

corner_r=5;     //Radius of corners
wall_thick=4;   //Box wall thickness
post_d=10;      //Mounting post diameter
hole_d=3;       //Screw size diameter
lid_thick=2;    //Lid thickness
lid_lip=2;      //Supporting lip for lid
lid_tol=.4;     //Fit tolerance - so lid is not tight fit

//End Variables************

$fn=50;

//Basic Box
difference(){
  
    hull(){
        posts(
            x=(width/2-corner_r),
            y=(length/2-corner_r),
            z=0,
            h=height,
            r=corner_r);
    }	
    
//Contents
    hull(){
        posts(
            x=(width/2-corner_r-wall_thick),
            y=(length/2-corner_r-wall_thick),
            z=wall_thick,
            h=height,
            r=corner_r);
    }	
    
//Lip inside Box
    hull(){
        posts(
            x=(width/2-corner_r-lid_lip),
            y=(length/2-corner_r-lid_lip),
            z=(height-lid_thick),
            h=lid_thick+1,
            r=corner_r);
    }	
}

//Support Posts
difference(){
    posts(
        x=(width/2-wall_thick/2-post_d/2),
        y=(length/2-wall_thick/2-post_d/2),
        z=wall_thick-.5,
        h=height-wall_thick-lid_thick+.5,
        r=post_d/2);
    
    //Holes in posts
    posts(
        x=(width/2-wall_thick/2-post_d/2),
        y=(length/2-wall_thick/2-post_d/2),
        z=wall_thick,
        h=height-wall_thick-lid_thick+.5,
        r=hole_d/2);
}	


//Lid
difference(){
    hull(){
        posts(
            x=(width/2-corner_r-wall_thick/2-lid_tol),
            y=(length/2-corner_r-wall_thick/2-lid_tol),
            z=height-lid_thick+10,
            h=lid_thick,
            r=corner_r);
    }		
    
//holes in lid
    
    posts(
        x=(width/2-wall_thick/2-post_d/2),
        y=(length/2-wall_thick/2-post_d/2),
        z=height-lid_thick+10,
        h=height-wall_thick-lid_thick+.5,
        r=hole_d/2+.5);
		

}   
    
//Main Construction Module
module posts(x,y,z,h,r)
{
	translate([x,y,z]) {
	cylinder(r=r,h=h);
	}

	translate([-x,y,z]) {
	cylinder(r=r,h=h);
	}
	translate([-x,-y,z]) {
	cylinder(r=r,h=h);
	}
	translate([x,-y,z]) {
	cylinder(r=r,h=h);
	}
}

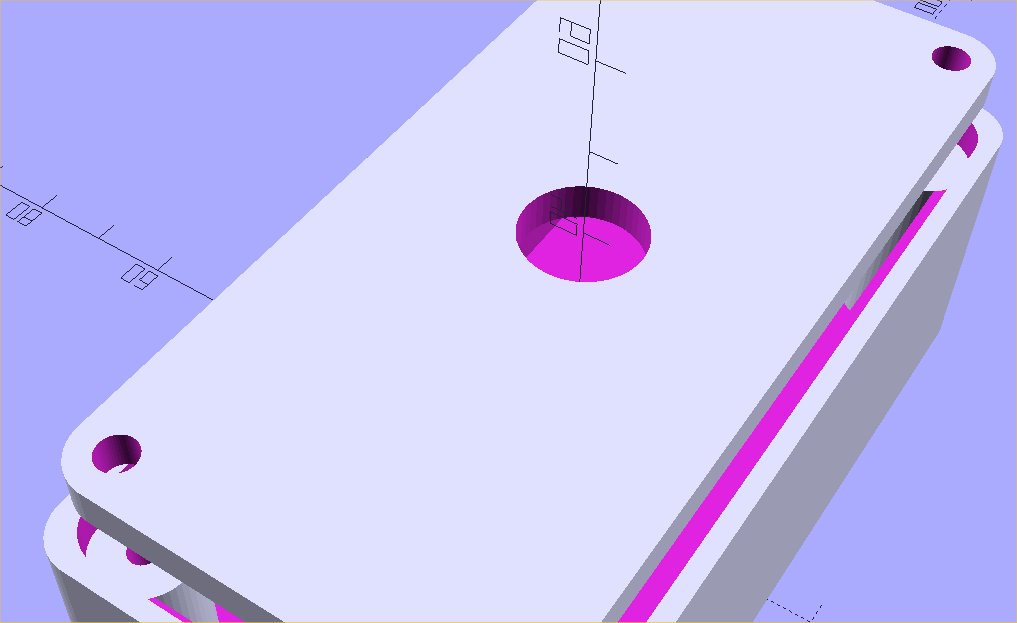
For example if I wanted to add a hole for a switch it was a simple matter of adding this bit of code in the right place.

//Hole in lid for a 0.5 inch switch

	translate([0,0,height+9.5,])
	cylinder(h=lid_thick+1,d=12.5); 

to give you this

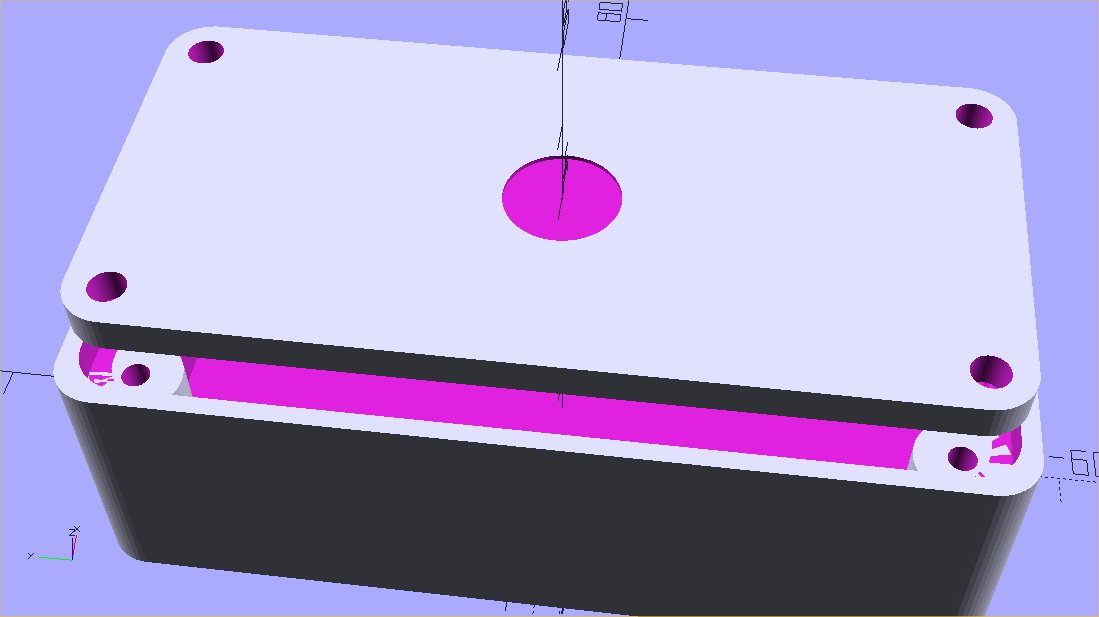
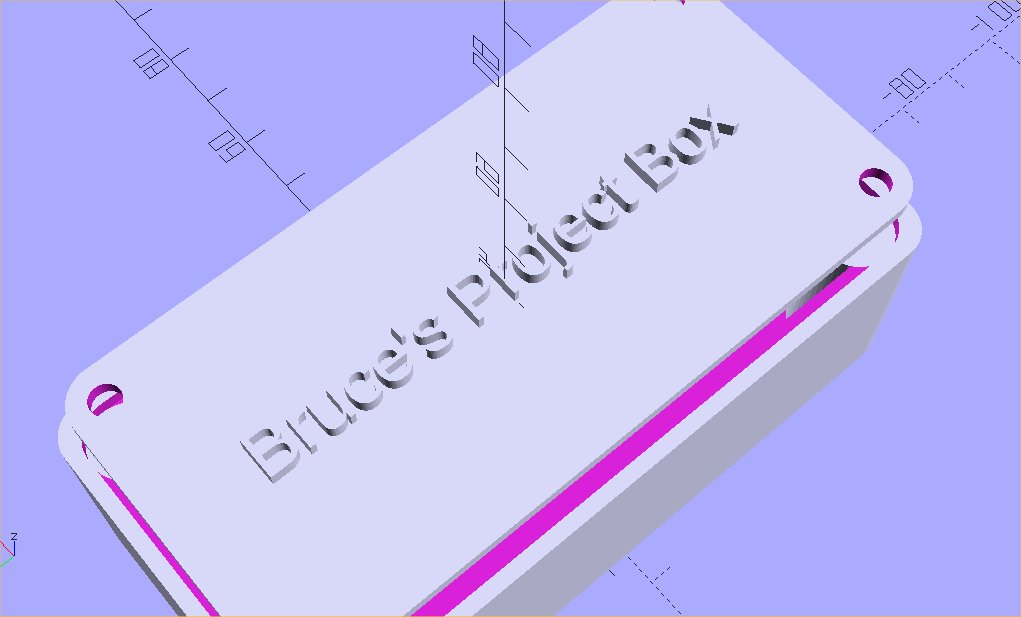
Also if I was making a hole in the lid I would want the lid to be thicker for extra strength and that would just be a matter of increasing the variable “lid_thick” from, say 2 to 4, the change would automatically be catered for in the rest of the code as can be seen on the picture.

I have got to say how much I am enjoying using the printer and also the Openscad software, the lattr is brilliant (and free). I still forget the occasional semi colon (very important) and the “rotate” command drives me up the wall but it is a lot of fun especially on wet miserable days like today.

I made a blue!

Looking at the second picture I realised that the hole doesn’t go all the way through. I forgot to deduct the thickness of the lid.

This is correct

//Hole in lid for a 0.5 inch switch

	translate([0,0,height-lid_thick+10,])
	cylinder(h=lid_thick+2,d=12.5);

Phew, that’s better.

1 Like

Bloody hell Bruce, you’ll be printing your own Casket next!!!

I would have to shrink to 150mm to fit in

Ooh, I like those, very useful. When we are in the midst of a DIY project we always have a “ things we mustn’t lose” box for things like screws and handles etc we’ve taken off and will need when we start re assembling things

You are getting very good at printing yourself useful things you need :+1:

…or, to add to the excitement, I could write on it

rotate([0,0,-90]){  
translate([0,0,height-lid_thick+10]){
linear_extrude(4){

#text("Bruce's Project Box",halign="center",valign="center", size=6);
}}}

Using the same code and the “difference” command I could engrave it.

Thanks @Maree it is actually a lot of fun. I am enjoying learning to use Openscad which was a bit daunting at first but once you get the hang of the basics is actually quite simple and flexible. I learn a lot from analysing how other people have done things because like most programming type of languages there is more than one way to skin a cat.

In actual fact you probably don’t need to design anything yourself as there are so many designs already out there but I did buy my printer to make things that I needed so I am generally sticking to that principle. However I did print out a little Buddha for a friend of mine from a design I downloaded.

As for the printer it is really simple to use and all the hard work is taken care of by its software - once the design is loaded it just gets on with printing it. I usually set it off over night so what ever I am printing is ready for the morning. There are things that can go wrong but none have happened to me yet and I belong to a FB group which seems very good at suggesting remedies for every little issue.

1 Like

I think I might get one when I retire and try it out

I’m more into the arty/ crafty side but it’s very handy to be able to make practical bits and bobs as well

My friend was able to make me a new knob for my cooker which worked really well

1 Like

I think you would find it a lot of fun. Judging by the FB group I think a majority of people use the printers for the art and crafts side of thing (or even Cosplay) rather than more practical things which interests me slightly more.

Have a browse through this site:

https://www.printables.com/

I am thinking that today I might do a test print of this box project - once I have searched the garage for a suitable self taping screw :wink:

1 Like

Thank you, I’ll have a look :+1:

1 Like

Certainly looks like you’re getting the hang of it @Bruce , all credit to you, looks like being a very satisfying hobby…

I printed out a small test box today. 50mm by 100mm by 30mm

First I “sliced” it in the appropriate software which works out each layer of the print and passes it to the printer. There are other settings I could change to make it smoother etc but frankly as I am not a model maker I haven’t bothered. The current settings are good enough for my purpose.

As you can see I used this software to move the lid from being suspended above the box down to the base of the printer.

Then I transferred it to the printer via my LAN

It took over 6 hours to print. Forgot to show how much filament was used, that information is in the slicer but it estimated 17m or 51gms

This is a while into the print the cover has been finished and you can see the honeycombed pattern of the infill. That is 20% infill, if I wanted it to be solid I would change it to 100% infill, this is set in the slicer.

The finished item in the printer (the last two pics taken through the glass hence the reflections.

Finally a couple of the finished item.

The lid fits loosely but not too loose and the holes line up perfectly. The lid is perfectly flush with the top of the box. Quite pleased.

BTW I couldn’t find some suitable self tapping screws I only had some that were much too large so I set the hole size to 3mm

Thanks for the idea @spitfire

It was a wet, miserable day so I designed a coffin just for the practice :slight_smile:

I won’t print it out :skull_and_crossbones:

//coffin


//Variables

length=140;


//Other variables
width=length*0.3;
topw=length*0.225;
footw=length*0.15;
height=length*0.225;
shoulder=length*.3;
wall=4;
lid=2;
dia=5;

//echo (footw);

difference(){
//Basic Shape
    corners (
        tw=(topw/2-dia),
        l=(length/2-dia),
        z=0,
        sw=(width/2-dia),
        sl=(shoulder/2),
        fw=(footw/2-dia),
        h=height,
        r=dia);
        
     corners (
        tw=(topw/2-dia-wall/2),
        l=(length/2-dia-wall/2),
        z=wall,
        sw=(width/2-dia-wall/2),
        sl=(shoulder/2),
        fw=(footw/2-dia-wall/2),
        h=height,
        r=dia);
//cut out for lid

 corners (
        tw=(topw/2-dia-wall/4),
        l=(length/2-dia-wall/4),
        z=(height-lid),
        sw=(width/2-dia-wall/4),
        sl=(shoulder/2),
        fw=(footw/2-dia-wall/4),
        h=height,
        r=dia);

}  

//Lid

corners (
        tw=(topw/2-dia-wall/4-.5),
        l=(length/2-dia-wall/4-.5),
        z=(height+10),
        sw=(width/2-dia-wall/4-.5),
        sl=(shoulder/2),
        fw=(footw/2-dia-wall/4-.5),
        h=lid,
        r=dia);


module corners (tw,l,z,sw,sl,fw,h,r){
        hull(){
            translate([tw,l,z]){     //top 1
            cylinder(h=h,d=dia);
            }
            translate([-tw,l,z]){     //top 2
            cylinder(h=h,d=dia);
            }
            translate([-fw,-l,z]){     //foot 1
            cylinder(h=h,d=dia);
            }
            translate([fw,-l,z]){     //foot 2
            cylinder(h=h,d=dia);
            }
            translate([sw,sl,z]){     //width 1
            cylinder(h=h,d=dia);
            }
            translate([-sw,sl,z]){     //width 2
            cylinder(h=h,d=dia);
            }
        }
}    

To be honest it wasn’t that difficult I just took the Project Box design added a few more parameters and there it is. It is designed to be scaled up, it works entirely off one parameter - the length - so whether it is 100mm long or 2 metres it still works (I got the proportions from a US DIY woodworking web site.) The problem is that my printer only prints objects up to 150mm.

Will it produce noxious gases when burnt?

I have no idea but the plastic filament seems to be entirely made of vegetable matter so no worse than when I am cooking I wouldn’t have thought.